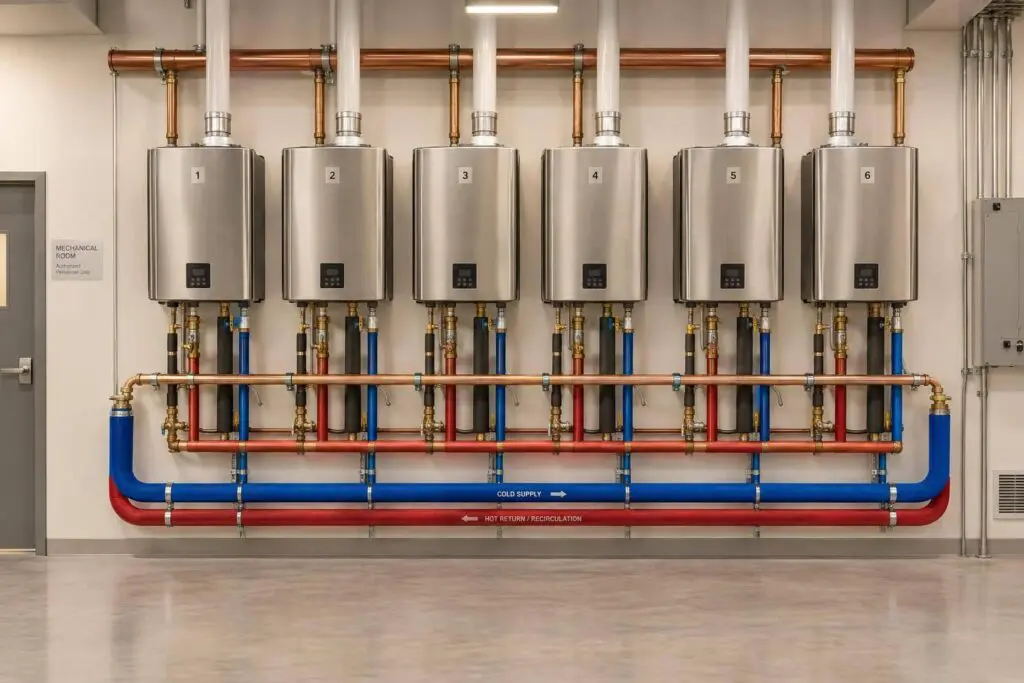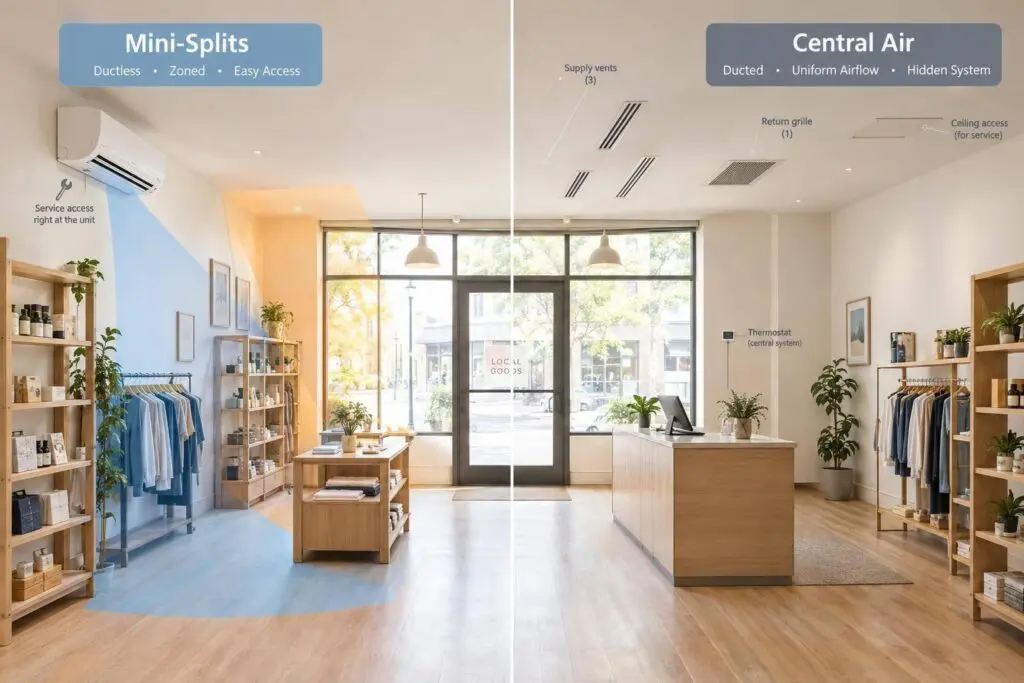

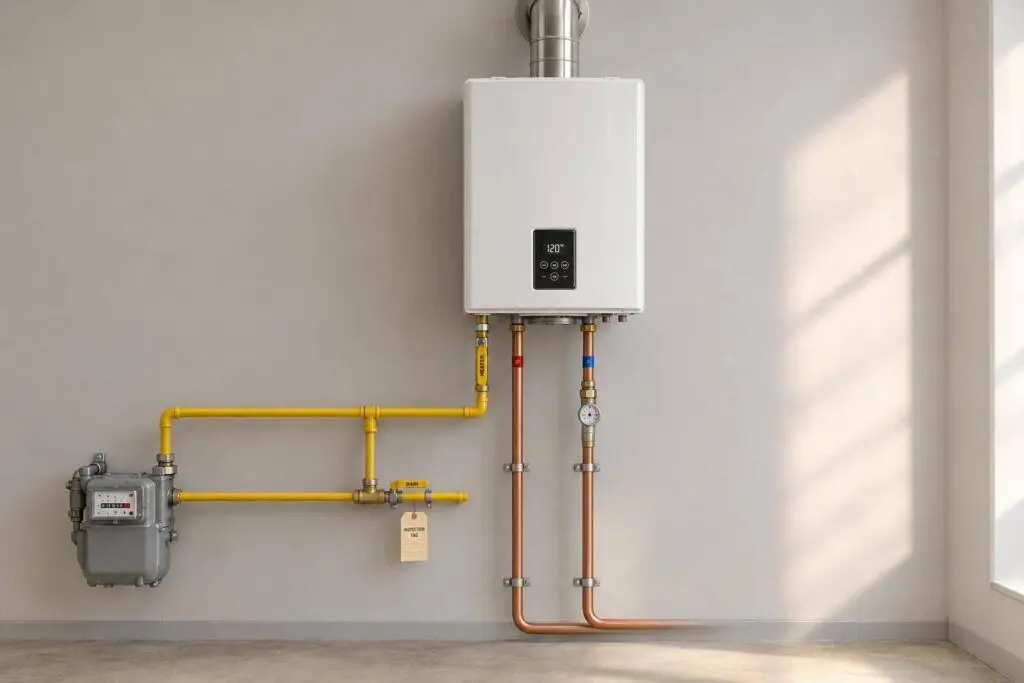
Before choosing a tankless heater, I’d check hot-water demand and benefits, shared gas capacity, and the installation space. A unit drawing 120,000–200,000 BTU/h may need more gas than your old water heater’s piping can supply.
Here’s what I’d verify with a licensed contractor:
- Hot-water capacity: Size for overlapping uses and Chicagoland’s cold winter inlet water – not advertised maximum GPM.
- Gas supply: Total the connected appliance inputs, check the meter, regulator, and piping, and measure heater inlet pressure under shared load.
- Installation fit: Confirm approved venting, combustion air, clearances, electrical supply, drainage, freeze protection, and maintenance access.
- Upgrade options: Compare a lower-input heater, larger gas piping, multiple units, or a storage-based or electric system against the same demand.
- Final checks: Plan permits, utility coordination, testing, and commissioning before ordering.
My rule: <u>Choose a heater your home can support – not just one that meets your hot-water demand on paper.</u>
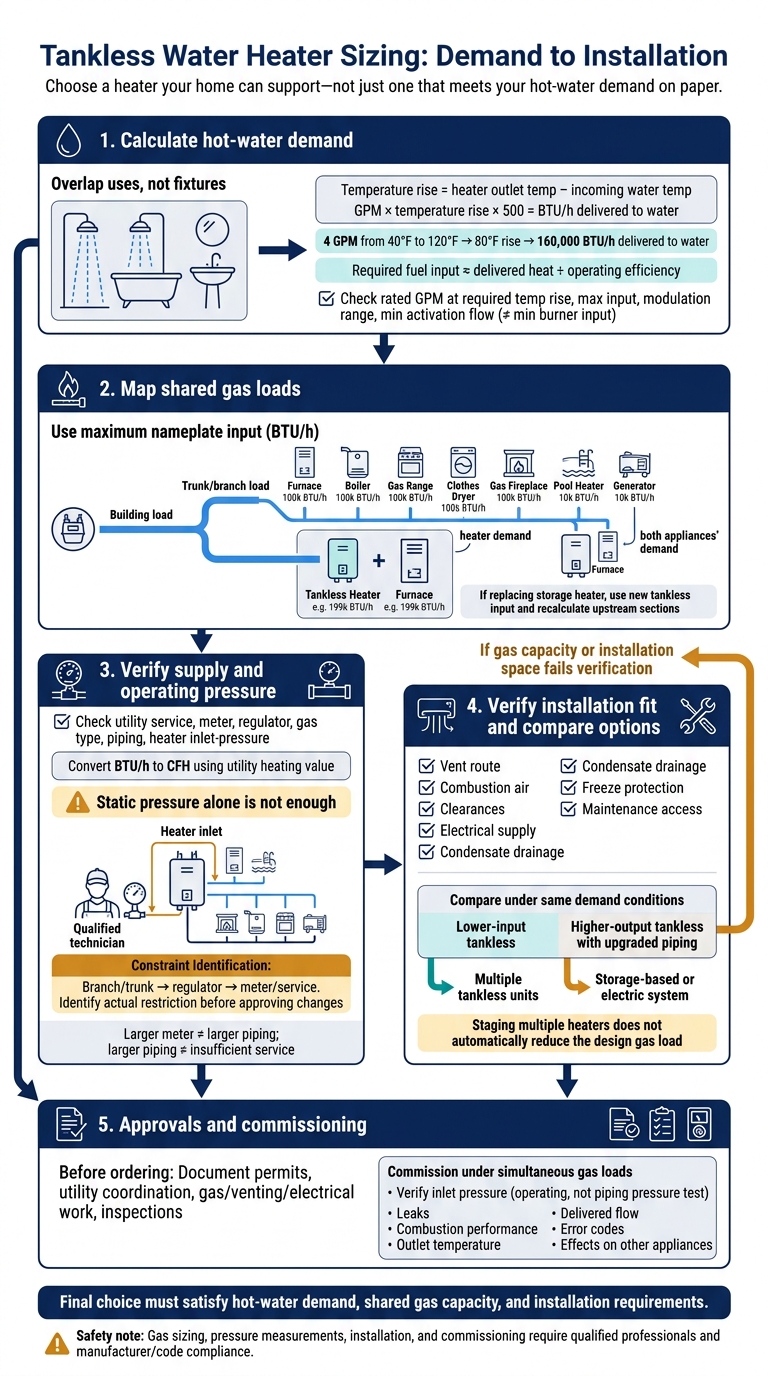
Tankless Water Heater Sizing: Demand to Installation
Calculate Hot-Water Demand and Heater Input
Measure Peak Flow and Temperature Rise
Count hot-water uses that overlap, not just fixtures. Get actual flow rates from showerheads, faucets, appliance manuals, or field measurements. Then add only the hot-water loads likely to run together, based on documented occupancy and usage patterns. Fixture count alone won’t tell you peak demand. Commercial sites may need a fixture-unit or diversity analysis rather than a simple residential estimate.
Calculate temperature rise = heater outlet temperature − incoming water temperature. For a Chicagoland site, use the coldest expected inlet temperature – not a mild-weather reading. Mixing at the fixture changes how much of its total flow comes from the heater, but this calculation still uses the heater’s outlet temperature. Residential delivery is often 120°F; hotter systems need mixing valves and scald protection. Use this demand to size the heater before totaling the gas-line load.
Check Flow Ratings and Maximum BTU/h Input
Estimate heat delivered to the water with GPM × temperature rise × 500 = BTU/h. The 500 factor converts gallons, temperature rise, and time to BTU/h.
Heating 4 GPM from 40°F to 120°F requires an 80°F rise: 4 × 80 × 500 = 160,000 BTU/h delivered to water, not fuel input.
These examples show how flow and temperature rise change the heat needed.
Example demand at the heater Temperature rise Delivered heat Manufacturer data needed 2.0 GPM 80°F 80,000 BTU/h Rated GPM at an 80°F rise; minimum activation flow 4.0 GPM 80°F 160,000 BTU/h Maximum input; delivered GPM at an 80°F rise; modulation range 5.0 GPM 80°F 200,000 BTU/h Maximum input; rated output; whether multiple units are needed 4.0 GPM 100°F 200,000 BTU/h High-rise performance data; maximum input
Minimum burner input is the lowest firing rate. It affects low-demand operation, but it isn’t the same as minimum activation flow. Maximum input is the appliance’s peak fuel demand. Rated GPM states capacity at a given temperature rise – not a flow limit that applies at every temperature. Compare the exact model’s performance chart with your calculated design demand. Collect its input ratings, activation flow, modulation range, gas type, and installation requirements.
Fuel input depends on operating efficiency: required input is roughly delivered heat ÷ efficiency. Use the manufacturer’s certified performance data. For the shared-line load calculation that follows, use the selected model’s maximum gas input, not its water-heating output.
sbb-itb-b5c10b1
How Do I Size The Gas Line For A Tankless Water Heater? – Plumbing DIY Daily
Calculate Loads on Shared Gas Lines
A tankless heater can be sized correctly on paper and still fall short on a shared gas line. Once you know the tankless unit’s input, add up the inputs of every appliance sharing the gas service.
List Appliance Gas Inputs
For each gas appliance on the service, record its manufacturer, model, fuel type, maximum input, minimum inlet pressure, connection size, and location. Include outdoor equipment, such as a pool heater or generator, if it uses the same service. Check the installation manual for any missing details.
Use maximum nameplate inputs in BTU/h for the inventory below.
| Appliance | Maximum input | Downstream segment | Sizing rule |
|---|---|---|---|
| Proposed tankless water heater | Manufacturer’s rating | Water-heater branch | Include at full input unless a code-approved diversity method applies. |
| Furnace | Listed rating | HVAC branch | Include at full input. |
| Boiler | Listed rating | Boiler branch | Include at full input. |
| Gas range or cooktop | Listed rating | Kitchen branch | Use the listed input; do not estimate. |
| Clothes dryer | Listed rating | Laundry branch | Include in the branch and upstream trunk load. |
| Gas fireplace | Listed rating | Fireplace branch | Include unless documented diversity is allowed. |
| Pool or spa heater | Listed rating | Outdoor-equipment branch | Include in the branch and all upstream sections. |
| Generator or commercial equipment | Listed rating | Dedicated or equipment branch | Treat as a connected load and verify meter, regulator, and pipe capacity. |
If you’re replacing a storage heater, swap its listed input for the proposed tankless input. Then recalculate the heater branch and every upstream section affected by the change. A gas line that served the old heater reliably may not support the replacement.
Separate Building, Trunk, and Branch Loads
Trace the piping from the meter to each appliance. On a sketch, mark tees, manifolds, shutoffs, regulators, and fittings. The building load includes every appliance on the meter. Each trunk or branch load includes only the appliances downstream of that segment. A dedicated tankless branch carries the heater’s demand; a shared heater-and-furnace branch carries both.
For each segment, record the material, nominal diameter, measured length, fittings, and downstream input. A qualified gas professional must apply the approved sizing method using the fuel, delivery pressure, allowable pressure drop, and applicable length procedure.
The heater’s inlet fitting does not determine upstream pipe size. A larger branch or trunk may be needed to maintain minimum inlet pressure when appliances share the load. These segment loads determine whether the meter, regulator, and piping can maintain pressure under full demand.
Verify Gas Supply Capacity and Pressure
Check the Meter, Regulator, and Delivery Pressure
Once you know the connected load, confirm that the gas system can deliver it to the heater before selecting equipment. Check that the utility service, meter, regulator, gas type, and heater inlet-pressure range support the calculated load. Coordinate work on utility-owned equipment separately from building-side piping.
Convert the calculated BTU/h load to CFH using the utility’s heating value, not an assumed value. Peoples Gas requires CFH load information and any special pressure requirements when requesting new service. Confirm those details before ordering equipment or requesting gas work.
Check Pressure Drop Under Shared Load
A qualified professional must calculate pressure loss using the approved sizing method for the pipe size, material, length, fittings, supply pressure, and connected load. That method determines whether to use longest-length or branch-specific sizing. There’s no single pipe-size rule that works for every system.
Static pressure alone is not enough. Qualified personnel should use calibrated equipment to measure heater inlet pressure while the heater fires and the required simultaneous load runs. Readings must stay within manufacturer and code limits. Low pressure can cause ignition faults, reduced output, shutdowns, or unsafe combustion. Record the loads tested and the results. This operating check is separate from the required piping pressure test.
If the pressure-drop check fails, locate the restriction – in the branch, trunk, regulator, or service – before changing equipment.
Match Gas Supply Limits to Design Changes
Identify the limiting component before approving upgrades, then coordinate the needed utility or building-side correction. Use that limit to decide whether to keep the final tankless input, reduce it while still meeting hot-water demand, or upgrade the service. Staging multiple heaters does not automatically reduce the design load. Any reduced-demand assumption must be allowed by the approved sizing method.
| Condition | Likely constraint | Design response | Equipment-selection effect |
|---|---|---|---|
| Supply and inlet pressure stay adequate under shared load | No gas-capacity limitation | Document results; check venting and combustion air | Keep desired input |
| Branch or trunk has excessive pressure loss | Building-side distribution | Recalculate, modify affected piping, and retest | Consider lower input or approved staging while meeting hot-water demand |
| Regulator cannot maintain required pressure | Regulator capacity or configuration | Coordinate regulator sizing and required protection | Match heater to pressure arrangement |
| Service or meter cannot support calculated load | Utility-side capacity | Request utility evaluation; revise service or meter | Upgrade service or reduce input; allow for delays |
A larger meter won’t fix excessive pressure loss in a long or undersized trunk. Likewise, larger piping won’t make up for an undersized meter or a service limitation.
Check Vent Routes and Installation Space
After confirming gas supply and pressure, check that the vent can reach the exterior within the required clearance and length limits.
Verify Venting and Combustion Air
Start with the vent route and available space. Direct-vent units draw combustion air from outdoors and exhaust outdoors. Power-vent units mechanically exhaust combustion gases but may use indoor or outdoor air, depending on their listing. If the heater uses indoor air, check the required openings and account for exhaust fans and other appliances. A crowded utility closet may not provide enough combustion air.
Use only the selected model’s approved vent material, diameter, fittings, and termination rules. Check its exact installation manual for equivalent length, elbow count, vent diameter, and termination limits. An existing shared vent or chimney isn’t automatically reusable. Common venting needs explicit approval for both the equipment and the configuration.
Check termination clearances from windows, doors, air intakes, walkways, property lines, and expected snow levels. Keep exhaust away from siding, masonry, and moisture-sensitive equipment. For condensing units, document the required vent slope and condensate drain route to an approved disposal point, including any required trap or neutralizer. Protect the drain from freezing. Slope and disposal requirements vary by manufacturer and local code.
Compare Installation Locations
Apply these same limits when comparing installation locations.
| Installation location | Gas access | Vent routing | Access and clearance | Likely limitations |
|---|---|---|---|---|
| Indoor placement near an exterior wall | Nearby shared branch; check load and pressure | Usually the shortest direct-vent route | Required clearances and access to filters, valves, and heat exchanger | Termination clearances, snow exposure, and condensate drainage |
| Basement or utility room | Main-trunk access; check branch capacity and shutoff location | Longer routes may use up the equivalent-length allowance | Working space clear of storage and utility obstructions | Flooding, freezing, combustion air, drainage, and exterior penetrations |
| Commercial mechanical area | Potential for larger input; check meter, regulator, piping, and building loads | Vertical routes, multiple units, or engineered vent systems | Service access and equipment separation | Permits, fire separation, combustion air, drainage, roof penetrations, noise, and required access |
Check utilities and service access separately from vent clearance. Confirm water connections, isolation valves, electrical supply, lighting, drainage, and enough room for maintenance. In Chicagoland, indoor placement is generally easier to protect from freezing. Exposed piping, terminations, and condensate drains still need protection.
Outdoor installation requires a unit listed for outdoor use and manufacturer-approved freeze protection. An indoor heater cannot be moved outdoors, even under an overhang.
If the vent route or installation space fails these checks, use those limits to narrow the heater configuration before comparing upgrade requirements.
Choose Equipment Based on Upgrade Requirements
Compare Heater Configurations and Required Upgrades
Choose equipment based on what limits the installation: heater capacity, a shared gas branch or trunk, the meter, or the vent path. Compare every option under the same design conditions: peak simultaneous GPM, winter inlet-water temperature, required temperature rise, maximum BTU/h, available gas pressure, vent route, electrical supply, installation space, and service access.
Ask for an itemized installed-cost proposal that includes equipment, gas work, venting, electrical work, permits, and restoration. If shared gas capacity or vent routing is the limiting factor, compare the options below to find the least disruptive choice that meets code.
| Configuration | Demand coverage | Gas-service changes | Venting/electrical requirements | Main cost drivers |
|---|---|---|---|---|
| Lower-input tankless on verified existing infrastructure | Must cover peak flow at the required temperature rise | Existing supply must pass load and pressure checks | Approved vent route | Any remaining infrastructure upgrades |
| One higher-output tankless with upgraded piping | Greater peak flow within its performance range | Larger branch or trunk; possible utility meter or regulator upgrade | Model-specific venting and condensate drainage | Pipe access, utility coordination, and restoration |
| Multiple tankless units | Combined capacity with coordinated operation | Supply sized for combined maximum input and other connected loads | Compatible controls, wiring, approved vents, and drainage | Added equipment, connections, and service space |
| Storage-based or electric system | Storage depends on tank volume and recovery rate; electric depends on service capacity | Gas storage needs verified supply; electric avoids gas work | Gas storage needs venting; electric needs adequate circuits and service | Tank space, wiring, and service upgrades |
A lower-input unit may mean limiting demand or staggering hot-water use. Multiple units need compatible sequencing controls, but staging does not eliminate the need to size the gas supply for simultaneous maximum input.
For storage systems, account for peak-hour demand, recovery rate, and reheating time. Electric tankless units can require approximately 50–200 amps at 208 or 240 volts, depending on size. Check the listed electrical requirements before treating electric as an easy workaround.
Plan a Chicagoland Installation
Once you choose a configuration, have the contractor document the work before you order equipment. That plan should cover gas piping, vent routing, electrical work, permits, pressure testing, combustion air, condensate disposal, inspections, and commissioning.
Utility approval of meter, regulator, and service capacity is separate from the contractor’s assessment. In Chicago, the water heater must be installed on an electrical circuit with a breaker size that matches the appliance listing.
For small businesses, map hot-water demand across restrooms, kitchens, laundry, and production areas. Record when those areas operate at the same time. Before work starts, agree on shutdown windows, temporary hot-water arrangements, and equipment-room access. Multiple units can provide redundancy, but check how much demand the remaining equipment can cover if one unit is unavailable.
Complete the Installation Checklist
Use this checklist to confirm that the selected unit fits the site’s gas, venting, and electrical limits.
- [ ] Demand: Confirm peak simultaneous GPM, winter inlet temperature, temperature rise, maximum heater BTU/h, and minimum activation flow.
- [ ] Gas supply: Verify connected loads; utility-approved meter, regulator, and delivery capacity; operating inlet pressure; allowable pressure drop; pipe lengths and fittings; and trunk and branch sizing.
- [ ] Installation: Confirm approved vents and terminations, combustion air, clearances, drainage, electrical capacity and circuit requirements, freeze protection, isolation valves, relief provisions, and service access.
- [ ] Approvals: Confirm permits, utility coordination, pressure testing, inspections, and final documentation.
- [ ] Commissioning: Test under simultaneous gas loads. Verify inlet pressure, leaks, combustion performance, outlet temperature, delivered flow, error codes, and the effect on other connected appliances.
Conclusion: Verify Infrastructure Before Choosing a Heater
Size the heater for peak simultaneous flow in GPM and the required temperature rise, using the manufacturer’s performance chart – not the headline BTU/h rating alone. Then check whether the site can support it. Confirm that the meter, regulator, and branch piping can maintain the specified inlet pressure under the full shared load. Even a correctly sized heater can fail if pressure falls below specification.
Before ordering, verify a code-compliant vent route, combustion air, condensate drainage, and service access. Choose a model the site can support. If the site fails any of these checks, change the equipment choice before placing the order.
FAQs
How can I tell if shared gas demand is limiting my hot water?
Watch for temperature swings or lukewarm water when several gas appliances run at once. A gas line that’s too small may not supply enough fuel to the burner, leading to uneven water temperatures or ignition failures.
To check whether the line is undersized, compare its diameter with the manufacturer’s recommendation – typically 1/2 inch to 3/4 inch. Also check that your gas meter and regulator can handle the full load when all gas appliances run at the same time.
Should I upgrade my gas line or choose a smaller tankless heater?
Choose your heater based on your household’s peak hot water demand – how much hot water you need at once. If several fixtures run at the same time, a smaller heater may struggle to keep temperatures steady, especially during cold Chicago winters. Supporting the required BTU input often calls for a 3/4-inch gas line upgrade.
If you only use one or two fixtures at a time, a smaller unit may be enough. Have a professional assess your setup to calculate your BTU and gallons-per-minute (GPM) needs.
Will future gas appliances affect my tankless heater’s performance?
Yes. Tankless water heaters often need 90,000–199,000 BTU/hour, which puts a heavy load on shared gas meters and main gas lines.
If you add furnaces, ranges, or dryers without recalculating the total gas load, you risk pressure drops, ignition failures, and uneven performance. Check that your meter, regulator, and piping can supply enough gas for all appliances running at the same time.