
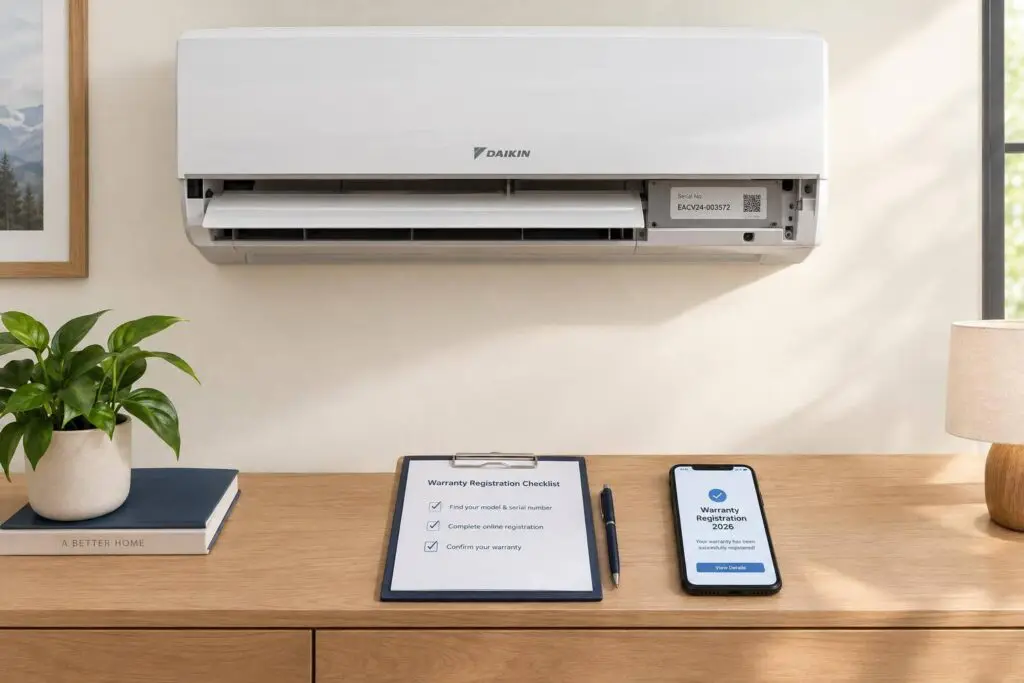
I recommend registering your mini-split during installation week, then saving and checking the confirmation. For qualifying Mitsubishi systems in single-family homes, registration within 90 days can provide 12-year parts-and-compressor coverage. Your warranty certificate sets the rules – not a product page.
Here’s the checklist I’d use:
- Gather your records: Collect the warranty certificate, installation invoice, and model and serial numbers for every required unit.
- Assign the task: Agree with your installer on who will submit through the manufacturer’s official portal.
- Check the result: Verify the owner, address, equipment, installation date, and coverage. Request corrections if anything is wrong.
- Keep proof: Save registration and maintenance records, and check claim requirements before approving repairs.
<u>Registration does not mean every repair expense is covered.</u> Check labor, refrigerant, and other charges separately. If Eco Temp HVAC installed your Chicagoland system, ask for paperwork and registration help – but rely on the manufacturer’s written terms to confirm coverage.
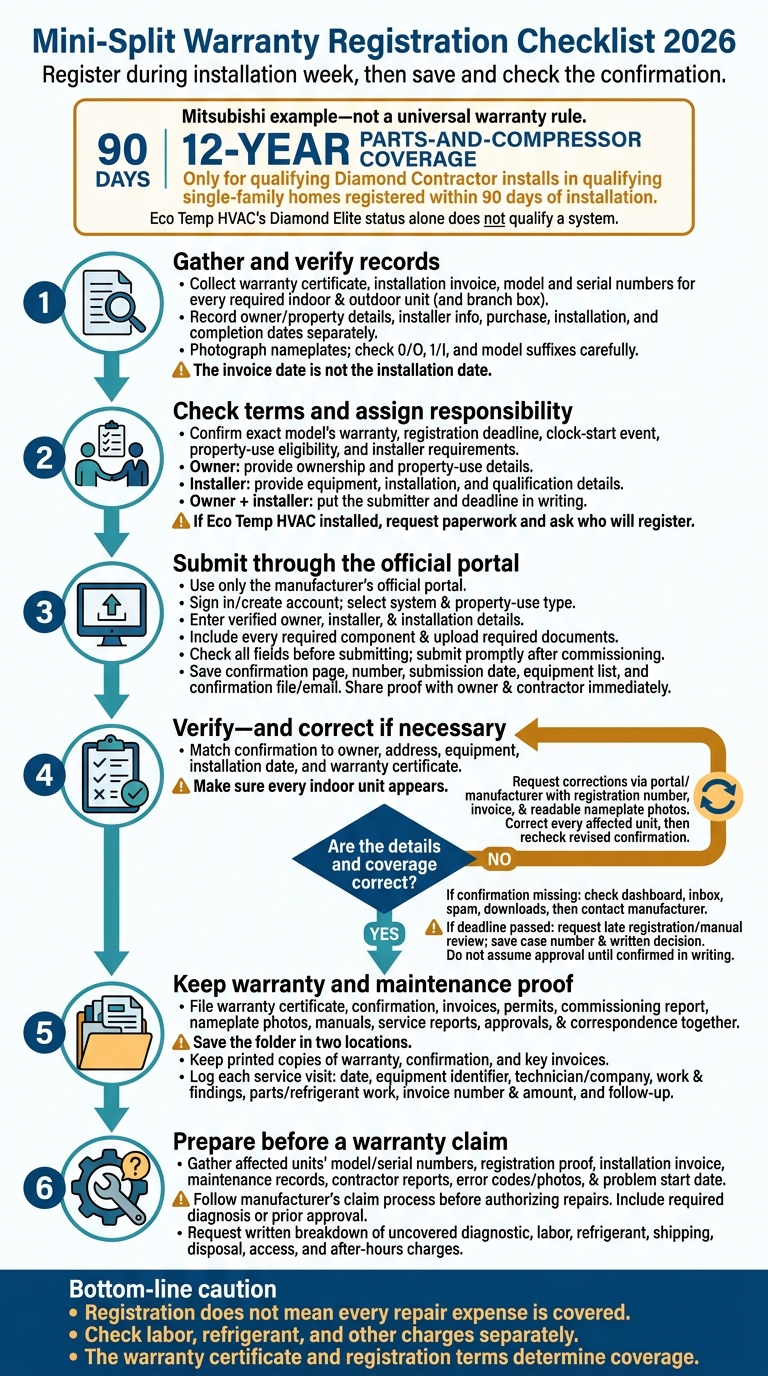
Mini-Split Warranty Registration Checklist 2026
Step 1: Gather Records and Check Warranty Terms
Collect Equipment and Installation Details
Record the manufacturer, model, and serial numbers for every indoor and outdoor unit, along with any branch box. Include the purchase and installation dates, installation address, original owner’s full legal name, current mailing address, phone number, email, and contractor’s business name and contact details.
Photograph each nameplate and compare the details with the invoice. Check 0/O, 1/I, and model suffixes carefully – small differences can lead to errors.
Keep the receipt, installation agreement, startup report, permits, and inspection records together. Record purchase, installation, and completion dates separately; the invoice date is not the installation date. Ask the installer to correct missing or conflicting details before you submit.
Check Registration Deadlines and Coverage Rules
Match the warranty to the exact model and installation date before submitting. Use the product-specific warranty statement that applies to your system, including the correct refrigerant version. Check:
- The registration deadline and the event that starts the clock.
- Residential or commercial use, property type, and original-owner residency requirements.
- Qualified installer requirements and whether registration is needed for enhanced coverage.
- Required documents and proof of registration.
Standard and enhanced coverage are different. Read the exclusions, then check coverage for parts, the compressor, labor, refrigerant, diagnostic charges, and workmanship separately. If a certificate’s terms are unclear, get written confirmation. Don’t use a residential warranty summary to determine coverage for a commercial installation.
Request Paperwork From Eco Temp HVAC
If Eco Temp HVAC installed your system, you can request startup or commissioning records, permits, and inspection records for your installation packet. Also request written confirmation of model eligibility, contractor qualification, and any separate labor or workmanship coverage.
Use the packet to complete the owner and contractor steps in the next section. Assign who will submit the registration and who will confirm the final details.
sbb-itb-b5c10b1
Step 2: Assign Registration Tasks and Submit
Assign Owner and Contractor Responsibilities
Once the packet is ready, choose one person to submit the registration through the manufacturer’s official portal. If Eco Temp HVAC installed your system, ask whether the company will register it or you need to handle it. Put that decision and the deadline in writing. Submit promptly after commissioning, using the verified packet.
| Task | Responsible party | Completion point |
|---|---|---|
| Provide ownership and property-use details | Owner | Before form entry |
| Provide equipment, installation, and qualification details | Eco Temp HVAC | Before submission |
| Record the submitter and deadline | Owner and Eco Temp HVAC | Before the deadline |
| Submit registration using the verified packet | Eco Temp HVAC or owner, as agreed in writing | After commissioning |
| Save and share the confirmation | Submitter | Immediately after submission |
| Verify the registered record | Owner and contractor | Upon receipt |
Fill Out and Submit the Registration Form
Use only the manufacturer’s official portal, linked from the warranty certificate, owner’s manual, or U.S. website. Keep the verified packet handy as you complete the form.
- Sign in or create an account if required. Use an email address you can access for future service.
- Select the system and property-use type, such as residential, rental, or commercial.
- Enter the owner and installation details: owner name, installation address, installer information, purchase date, and installation or commissioning date. Add dealer credentials if required.
- Include every required component. Enter the model and serial number for each outdoor and indoor unit. Follow the portal’s instructions for linked units, branch boxes, and accessories when required.
- Upload the required documents from the verified packet. Check every field against the installation packet before submitting.
- Submit and save proof. Keep the confirmation page, registration number, submission date, registered equipment list, and confirmation file or email. Send the confirmation to both the owner and contractor.
Next, check that the manufacturer’s record matches the system as installed.
Confirm Registration Details and Coverage
Compare the confirmation with the installed equipment, owner, address, installation date, and warranty certificate. Make sure every indoor unit appears and the coverage term matches the certificate – not just the receipt.
Submission does not prove enhanced coverage. Mitsubishi Electric’s 12-year parts-and-compressor coverage applies only to qualifying Diamond Contractor installs in qualifying single-family homes registered within 90 days of installation; Eco Temp HVAC’s Diamond Elite status alone does not qualify a system.
If you can’t find the confirmation, check your account dashboard, inbox, spam folder, and downloads. Still missing? Contact the manufacturer through its official customer-service channel. Provide the owner name, installation address, submission date, model and serial numbers, and submission or reference number.
If any details are wrong, contact both the manufacturer and Eco Temp HVAC for correction instructions. If the deadline has passed, request late registration or manual review. Save the written response, case number, and attachments. Do not assume approval until the manufacturer confirms it in writing.
Step 3: Fix Errors and Save Service Records
If the confirmation doesn’t match the installed system, correct it right away and save every record. If it’s correct, store the proof before your first service call.
Find and Correct Registration Mistakes
Fix errors that could affect eligibility first. These include missed or approaching deadlines, incorrect dates or serial numbers, missing indoor units, wrong owner or property details, and incorrect residential-versus-commercial classification.
If the invoice is incomplete, ask for an itemized installation invoice showing the installation date, model and serial numbers, installer details, and property address. If a missing confirmation remains unresolved, contact the manufacturer’s warranty department and save the case number. Check the installer’s qualifications and the warranty terms for your exact models.
Make corrections through the portal’s edit tool. If that’s not an option, send the manufacturer’s warranty department your correction request, registration number, invoice, and readable nameplate photos. For a multi-zone system, correct every indoor and outdoor unit – not just the condenser.
Keep the original and revised records together. If the deadline has passed, save the manufacturer’s written eligibility decision. Once the corrections are complete, put all warranty and service documents in one place.
Build a Warranty and Maintenance Folder
Keep one digital folder for your warranty certificate, registration confirmation, invoices, permits, commissioning report, nameplate photos, manuals, service invoices, technician reports, repair approvals, and manufacturer correspondence. Check that each equipment-specific document matches the registered unit and installation address.
Save the folder in two locations, such as your computer and encrypted cloud storage. Keep printed copies of the warranty, confirmation, and key invoices with the manual. Photograph labels while they’re still readable; an illegible or damaged serial number can affect warranty eligibility.
For each service visit, log:
- The date, equipment identifier, and technician or company
- Work performed, findings, parts installed, and refrigerant work
- The invoice number and amount, plus recommended follow-up
Attach the matching service documents to each entry. Use the manufacturer’s lookup tools, but keep your own copies, too.
Gather Documents for a Warranty Claim
Pull the affected units’ model and serial numbers, registration proof, installation invoice, maintenance records, and contractor reports from your folder. Add any error codes or photos and the date the problem began. Ask the contractor for missing installation or service reports.
Follow the manufacturer’s claim process before authorizing repairs, including any required diagnosis or prior approval. Ask for a written breakdown of diagnostic, labor, refrigerant, shipping, disposal, access, and after-hours charges that aren’t covered. Parts coverage doesn’t mean every service expense is paid.
Conclusion: Register on Time and Keep Proof
Register on time and save the confirmation. After you submit, check the confirmation and file it with your warranty and service records.
Keep proof of eligibility, when you submitted your registration, and maintenance. You’ll need these records for any warranty claim. The warranty certificate and registration terms determine coverage.
Chicagoland customers with systems installed by Eco Temp HVAC can request paperwork and help with registration. Keep the contractor’s certification records and the manufacturer’s written confirmation.
FAQs
Can I transfer my mini-split warranty when I sell my home?
Whether your warranty transfers to a new owner depends on the manufacturer’s terms. Some warranties cover only the original purchaser. Check the manufacturer’s documentation or the warranty terms you received at installation to confirm whether your coverage can transfer.
Store your original installation records, commissioning reports, and warranty registration confirmation in a safe place. That way, you’ll have them ready for a potential buyer.
Do replacement units need separate warranty registration?
Yes. Register every indoor unit connected to your mini-split system, plus the outdoor condenser. This keeps the full, matched system on file, helps maintain valid warranty coverage, and reduces the chance of problems with parts claims. Check your manufacturer’s documentation for your model’s exact registration rules.
What maintenance is required to keep my warranty valid?
Have a licensed professional install your mini-split and register it within the manufacturer’s deadline – typically 60 to 90 days. Proper commissioning requires documented vacuum logs, torque checks, and refrigerant verification. Manufacturers often require proof of annual professional maintenance to keep parts coverage active.
Keep your installation permits, startup records, maintenance documentation, and registration confirmation organized so they’re ready for future warranty claims.