
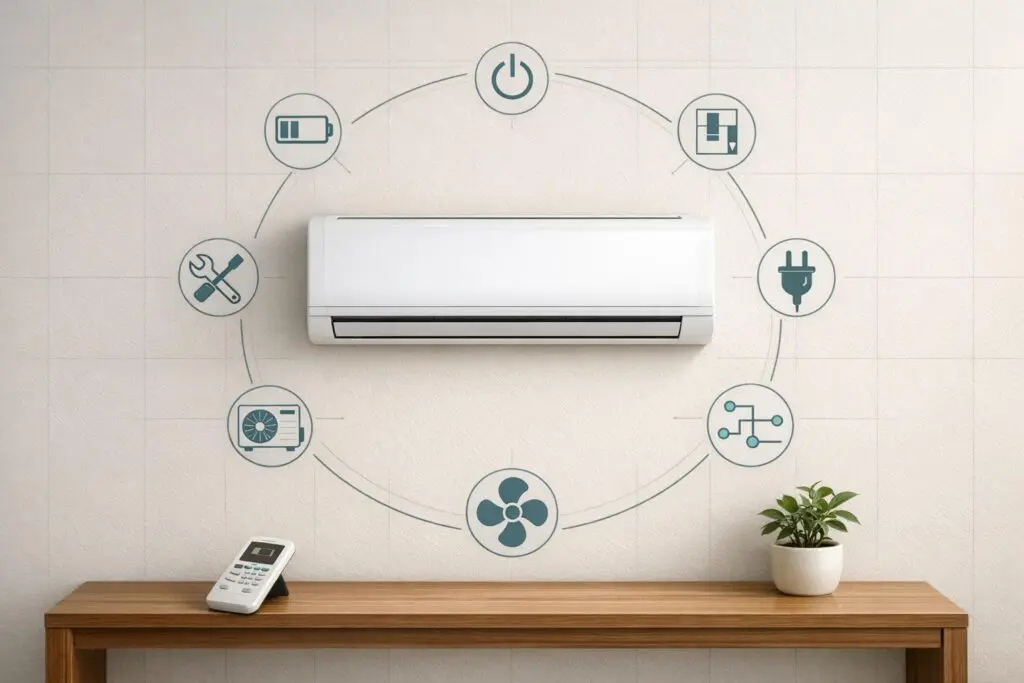
When your mini-split system won’t turn on, the solution could be simpler than you think – or it might require professional help. Here are the top eight reasons why this happens and what you can do:
- Dead Remote Batteries: Weak or dead batteries in the remote are the most common issue. Even if the remote lights up, it might not send signals. Replace both batteries and test using your smartphone camera.
- Incorrect Settings: Check the mode (cool, heat, fan) and temperature setpoint. Ensure timers or sleep functions aren’t preventing the system from starting.
- No Power Supply: Verify the breaker, outdoor disconnect switch, or GFCI outlet. If the breaker trips repeatedly, stop resetting and call a technician.
- Tripped Breaker or Blown Fuse: A tripped breaker might sit in a middle position. Fully switch it off, then back on. If it trips again, there’s likely a short or fault.
- Wiring Issues: Loose, damaged, or corroded wires, especially in the communication cable, can disrupt the system. Polarity errors or reversed connections can also stop the unit.
- Indoor Unit Problems: A clogged drain line may trigger the float switch, cutting power. Dusty sensors or a failed control board can also cause shutdowns.
- Outdoor Unit Failures: Components like the start capacitor, fan motor, or control board might fail, preventing startup. Error codes often indicate the issue.
- Installation Errors: Incorrect sizing, wiring mistakes, or refrigerant issues can trigger safety lockouts. Check the breaker rating and refrigerant levels if installation is suspected.
Quick Tip:
If the breaker trips immediately or you notice burning smells, stop troubleshooting and call a certified technician. For minor fixes, like battery replacement or resetting timers, you can handle it yourself.
For more complex issues, professional help ensures safety and prevents further damage.
Why does my ductless unit not turn on?
sbb-itb-b5c10b1
1. Dead or Weak Remote Control Batteries
When a mini-split system becomes unresponsive, the most common culprit is dead or weak batteries in the remote control. In fact, this issue is the leading cause of service calls for "broken" mini-splits. Surprisingly, around 40% of "no-cool" service calls are resolved by simple fixes like replacing batteries.
Here’s the catch: even if the remote’s display lights up, the batteries might not have enough power to send commands. The LCD screen requires less voltage than the infrared (IR) LED, which communicates with the indoor unit. So, don’t let a working display fool you into thinking the batteries are fine.
"Low battery voltage is the number one cause of service calls for ‘broken’ mini-splits. Always replace both batteries simultaneously with a reputable brand to ensure consistent signal strength." – HVAC Pro Sales Technical Team
How to test your remote: Use your smartphone’s front or rear camera. Point the remote at the camera and press the power button. If the remote is functioning, you’ll see a flickering light on your phone’s screen. If there’s no light, it’s time to replace the batteries.
Most remotes run on AA or AAA alkaline batteries, which typically last between 6–12 months. Always replace both batteries at the same time with a reliable brand for consistent performance. If you notice white powder or rust on the battery terminals, clean them with a swab dipped in white vinegar before inserting new batteries.
If new batteries don’t solve the issue, try pressing the manual "AUTO" or "TEST" button on the indoor unit. Keep in mind that a 3–5 minute startup delay is normal because of compressor protection. However, if the delay stretches beyond this, the remote itself might need replacing.
Lastly, double-check the remote’s settings to ensure it’s sending the proper signals to the unit.
2. Wrong Remote or Thermostat Settings
If swapping out the batteries didn’t solve the issue, the next step is to double-check the remote settings. Ductless mini-splits are designed not to start the compressor unless the settings specifically call for it, and this often confuses users.
A common oversight is leaving the system in Fan Only or Dry mode. In these modes, the indoor fan will run, but the compressor stays off. To ensure proper operation, look for a snowflake icon on the remote for cooling or a sun icon for heating. Another frequent issue is the temperature setpoint. In cooling mode, the compressor won’t kick in if the set temperature is higher than the room temperature. Similarly, in heating mode, the compressor won’t start if the set temperature is lower than the room temperature. A quick solution? Adjust the temperature by at least 5°F – set it 5°F lower than the room temperature for cooling or 5°F higher for heating. This forces the compressor to engage.
You should also review any active timer or Sleep settings. If you see a clock icon, it means a timer is active, which could be keeping the unit off. Clearing these settings usually resolves the issue right away. The table below summarizes these common settings and their effects for easy reference.
"’DF’ isn’t an error code. It’s your heat pump doing exactly what it was designed to do." – AC Direct
| Setting | What It Looks Like | What’s Actually Happening |
|---|---|---|
| Fan Only / Dry | Air blows, but no temperature change | Compressor is off by design |
| Setpoint Too Close | Unit stays off | No demand to trigger the compressor |
| Timer / Sleep Active | Unit doesn’t start | Following a programmed schedule |
| Defrost (DF) | Heating temporarily stops in winter | Normal ice-clearing cycle, lasting 3–10 minutes |
| Compressor Protection Delay | 3–5 minute pause after restarting | Built-in safeguard to protect the compressor |
3. No Power at the Outlet or Dedicated Circuit
If remote control issues are ruled out, the next step is to check the power supply. Mini-split systems operate on a dedicated circuit, meaning they have their own breaker in your electrical panel, separate from other circuits in your home. Events like power surges, thunderstorms, or circuit overloads can trip the breaker without you noticing.
Start by checking the LED indicator on your indoor unit. If the LED is off, it’s a sign the problem is likely upstream – at the breaker, the disconnect box, or somewhere in the wiring. This makes external power sources the next logical place to investigate.
"A tripped breaker sits in a middle position between ON and OFF." – Dua Jones, Boldr
This middle position can be subtle and easy to overlook. To reset the breaker correctly, push the switch all the way to OFF before flipping it back to ON. Skipping this step might prevent the breaker from resetting properly.
Don’t forget to check external power cutoffs, especially the outdoor disconnect box. This box, typically mounted within 6 feet of your outdoor condenser, may have been switched off during a service visit or a storm. Ensure the handle is set to ON. Additionally, if your outdoor unit is connected to a GFCI outlet, check if the RESET button has popped out. Heavy rain or moisture can trip these outlets.
"If the condenser is on a GFCI receptacle, press RESET." – Mark Callahan, The Furnace Outlet
After restoring power, wait 3–5 minutes before trying to turn the unit back on. Many mini-splits use a compressor protection timer that delays startup after power is restored. If the breaker trips again immediately, it’s time to call a technician. Similarly, if the power supply seems fine but the system still won’t start, the issue could involve internal wiring or controls.
| Symptom | Likely Cause | What to Do |
|---|---|---|
| No LED on indoor unit | Tripped breaker or disconnect off | Reset breaker; check outdoor disconnect |
| Unit won’t start after power outage | Compressor protection timer active | Wait 3–5 minutes |
| Breaker trips immediately after reset | Electrical short or fault | Call a technician |
| Indoor unit has power, outdoor unit doesn’t | Outdoor disconnect is off | Verify outdoor disconnect is engaged |
4. Tripped Breaker or Blown Fuse on the Mini-Split Circuit
A tripped breaker on the mini-split’s dedicated circuit can leave the unit completely unresponsive. This issue might stem from power surges, a failing start capacitor, a struggling compressor, or even clogged filters.
When checking the breaker panel, don’t expect a tripped breaker to look completely "off." It usually sits in a middle position – neither fully ON nor OFF. To reset it properly, you need to switch it fully OFF before turning it back ON. Skipping this step can lead to a partial reset, which won’t solve the problem.
"After any power interruption, the mini-split has a 3-minute compressor protection timer built in… Do not repeatedly press buttons or cycle the breaker – this just resets the timer." – Dua Jones, Boldr
Once the breaker is reset, wait 3–5 minutes before attempting to power the unit back on. This pause allows the built-in compressor protection timer to finish its cycle. Avoid repeatedly flipping the breaker, as this will only restart the timer and delay the process.
"If it trips again immediately, stop and investigate. Repeated resets can damage components." – MRCOOL DIY Direct
If the breaker trips again right away, it’s a sign of a more serious issue, such as a short circuit, damaged wiring, or a failing internal component. Electrical repairs for mini-split systems typically cost between $150 and $500, while fixing major components could range from $500 to $1,500 or more. Addressing the problem early with a certified technician can help avoid escalating costs or even a full system replacement.
If the breaker holds steady but the system still won’t power on, it’s time to look deeper into potential internal wiring or component failures.
5. Loose, Damaged, or Corroded Wiring
Once you’ve checked the batteries, settings, and power supply, it’s time to take a closer look at the wiring connections. Even with a functioning breaker, faulty wiring can prevent your mini-split system from starting. These systems rely on a shielded communication cable – either 3-wire or 4-wire – that links the indoor and outdoor units. If any of these wires are loose, damaged, or corroded, the data link between the units is disrupted, halting the startup process.
Common culprits for wiring issues include rodent damage, vibrations that loosen terminal screws, and corrosion caused by salt air. These problems can expose wires or increase electrical resistance, breaking the communication link.
"A communication error means the indoor and outdoor units have lost their data link. The most common causes are a damaged or reversed communication wire, corrosion at the terminal connections, or a failed indoor or outdoor control board." – ServiceMag
Polarity matters too. Swapping communication wires (such as reversing S1 and S2) can trigger a fault, stopping the system from starting. Always double-check that each wire is connected to the correct terminal as outlined in the installation manual.
For a quick DIY check, examine wires and terminal boards for signs of damage like scorch marks, melted insulation, or odd smells. If you notice any of these, turn off the system immediately and call a technician. Ignoring these signs could lead to more serious problems.
Wiring damage that affects the control board can result in higher repair costs. While fixing a simple wiring issue might cost around $100, replacing a damaged control board could set you back anywhere from $350 to $900, depending on the brand. Spotting and addressing wiring issues early can save you money and keep your system reliable.
If the wiring looks fine but the system still won’t start, the problem might lie with the control boards. In such cases, professional help is essential. Companies like Eco Temp HVAC specialize in diagnosing and repairing wiring and control board problems, ensuring your mini-split system operates smoothly.
6. Faulty Indoor Unit Controls or Safety Lockouts
Sometimes, even when the wiring appears fine, the indoor unit itself might be why your mini-split system won’t start. These systems rely on smart control boards that automatically shut down the unit if anything seems off, protecting expensive components from potential damage.
One common issue is a triggered float switch. If the condensate drain line gets clogged, water can back up into the drain pan, prompting the float switch to cut power to the unit entirely to prevent water damage. If your system is completely unresponsive, start by inspecting the drain line. A simple fix like using a wet/dry vacuum on the outdoor end of the drain line often clears blockages and resets the float switch.
Another useful troubleshooting step is the manual button test. Open the front panel of the indoor unit and locate a small recessed button labeled "AUTO/STOP" or "TEST." Pressing this button bypasses the remote control. If the unit responds to the manual button but not the remote, the issue likely lies with the remote or the infrared receiver. However, if the unit’s LEDs are on but it doesn’t respond to either the manual button or the remote, the problem may be with the indoor control board (PCB).
"If the indoor unit shows an error code or blinking LED pattern, the system detected a specific problem and has stopped operation to prevent damage." – Dua Jones
Faulty temperature sensors can also trigger safety lockouts. Dust buildup on the sensor near the air intake can block readings, causing the system to think the room has already reached the desired temperature, so it won’t start. A failing sensor might also cause the unit to power on briefly and then shut off within a minute, a telltale sign of short cycling. Replacing a faulty sensor or PCB outside of warranty typically costs between $80 and $300, while replacing the control board in an older system can cost anywhere from $600 to $1,200.
Before calling a professional, double-check these potential issues. If you’ve recently cycled power or switched modes, remember that the system may take 3 to 5 minutes to restart.
7. Outdoor Unit Component Failure Blocking Startup
The outdoor unit is responsible for key mechanical functions, and when it fails, the entire system may refuse to start.
One frequent issue is a failed start capacitor. This component supplies the compressor and fan motors with the extra electrical charge they need to start. If a capacitor fails, you might notice the outdoor unit making a humming or clicking sound before falling silent.
"A weak or dead capacitor prevents the compressor and fan motors from getting the extra torque they need at startup." – Nespolo Mechanical
Other outdoor components can also prevent startup when they malfunction. For instance, a seized fan motor can trigger a safety lockout, as the system won’t allow the compressor to run if the fan isn’t spinning. A failed outdoor control board (PCB) can disrupt communication between the indoor and outdoor units, often indicated by an error code like E6 on the indoor display. Similarly, a faulty contactor or start relay – the mechanism that powers the compressor – can leave the outdoor unit unresponsive, even when the indoor unit is signaling for cooling.
| Component | Symptom | Error Code (if applicable) |
|---|---|---|
| Start Capacitor | Humming or clicking; fan won’t spin | N/A (may trip breaker) |
| Outdoor Fan Motor | Fan is stationary or makes a grinding noise | Daikin E7 or H6 |
| Compressor | Breaker trips immediately; no activity | Mitsubishi U6 or P6 |
| Outdoor Control Board | No response between indoor and outdoor units | Mitsubishi E6; LG CH38 |
| Pressure Sensors | System starts, then shuts off after a few seconds | LG CH21; Mitsubishi P1 |
When diagnosing outdoor unit failures, wait 3–5 minutes after restoring power for the unit’s protection timer to reset. Ensure the outdoor disconnect switch is set to ON. If the breaker trips immediately when the outdoor unit starts, stop trying to reset it and call a professional. This could point to a serious electrical issue, such as a shorted compressor, and repeated resets might cause additional damage.
If these initial checks don’t resolve the issue, professional help is essential due to the dangers of high-voltage electricity and pressurized refrigerants. For dependable assistance with outdoor unit problems, reach out to Eco Temp HVAC in the Chicagoland area.
8. Incorrect Installation or Sizing Triggering System Protection
Sometimes a mini-split won’t power on, and the root cause can often be traced back to installation errors. Issues like poor installation practices or incorrect sizing are frequently mistaken for hardware failures but can significantly affect functionality.
Getting the sizing right is crucial. If a unit is too large for the space, it cools the area too quickly, causing short cycling. This incomplete cooling cycle can trigger safety lockouts. On the other hand, an undersized unit is forced to run nonstop, which can lead to overheating and activate thermal protection systems.
Electrical issues are another common culprit. Mini-splits list their MCA (Minimum Circuit Ampacity) and MOCP (Maximum Overcurrent Protection) on the nameplate. If the breaker is underrated – like using a 15‑amp breaker instead of the required 20‑amp – or if the wiring is too long or undersized, it can cause voltage drops. This might trip the circuit or prevent the compressor from getting enough power to start up.
Communication wiring errors also play a role. Using the wrong type of cable or having loose connections can result in a "talk" error, often displayed as an E6 code on the indoor unit. Additionally, mistakes during refrigerant charging – whether overcharging or undercharging – can trigger high- or low-pressure safety lockouts, preventing the compressor from running.
"When a mini-split is installed correctly, it should run smoothly for years. But when corners get cut or measurements get guessed instead of calculated, you end up with those mini split heat pump problems that show up right away." – Big H & A Solutions
If you suspect installation issues, start by checking the breaker’s rating against the unit’s MOCP, look for any displayed error codes, and try a hard reset. Turn the breaker off for 60 seconds, then back on, and allow 5 minutes for the compressor protection timer to reset. If the problem persists, it’s time to call a licensed technician to inspect the wiring, refrigerant levels, or load calculations. Addressing these installation issues is just as important as tackling other common mini-split problems.
What You Can Check vs. What Needs a Pro
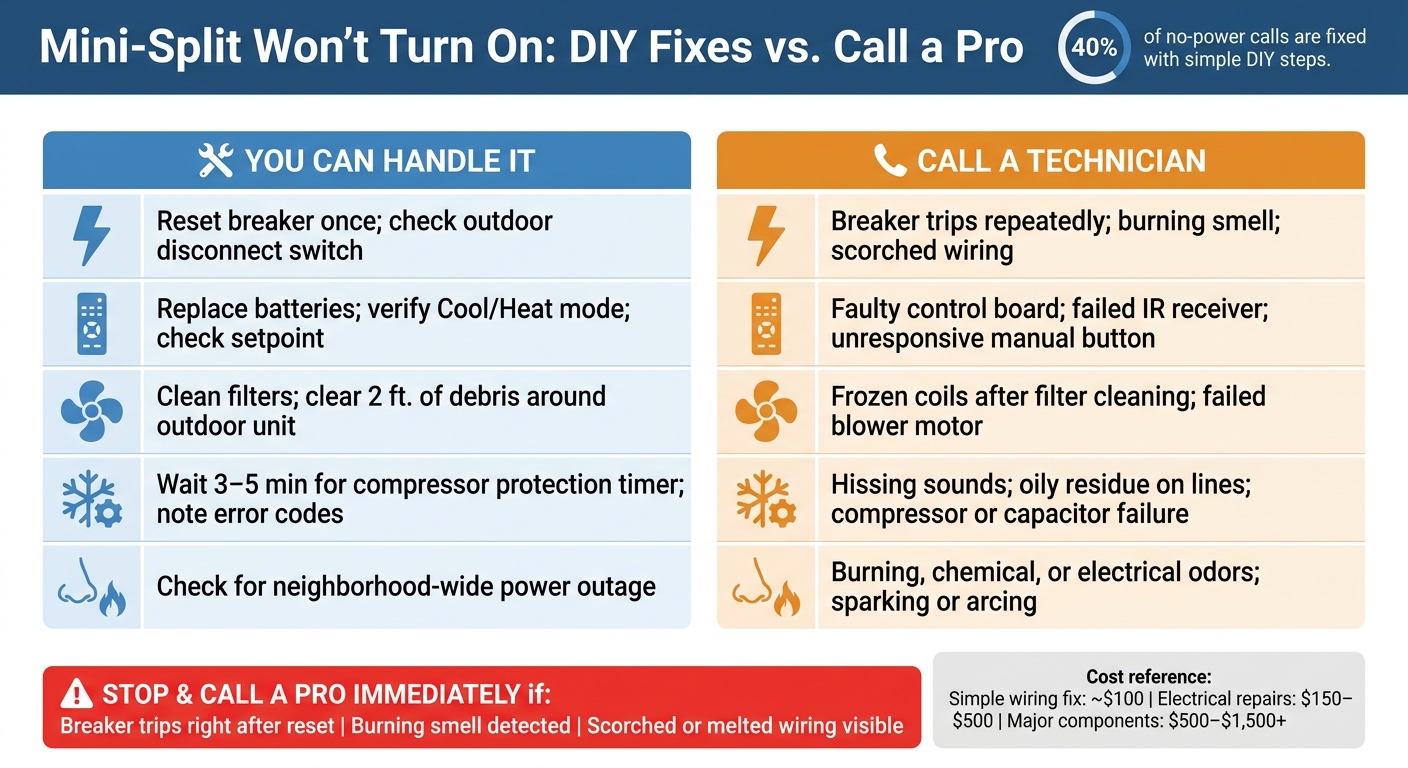
Mini-Split Won’t Turn On: DIY Fixes vs. Call a Pro
Once you’ve identified some common issues, it’s time to figure out whether you can handle the fix yourself or if it’s better to call in a professional. Fun fact: about 40% of "no power" calls are resolved with simple fixes like replacing remote batteries, resetting breakers, or adjusting settings.
That said, knowing when to stop is crucial. For example, if you reset a breaker and it trips again immediately, don’t keep trying – it could lead to more damage:
"Resetting the circuit breaker and restarting the unit [repeatedly] could cause further damage."
Here’s a quick breakdown of what you can safely troubleshoot and when to call a technician:
| Issue Category | DIY Solutions | Requires Technician |
|---|---|---|
| Power & Electrical | Reset breaker once; check outdoor disconnect switch | Breaker trips repeatedly; burning smell; scorched wiring |
| Remote & Controls | Replace batteries; verify Cool/Heat mode; check setpoint | Faulty control board; failed IR receiver; unresponsive manual button |
| Airflow & Maintenance | Clean filters; clear debris around outdoor unit (keep 2 ft. of clearance) | Frozen coils after filter cleaning; failed blower motor |
| Mechanical/Refrigerant | Wait 3–5 minutes for compressor protection timer; note error codes | Hissing sounds; oily residue on lines; compressor or capacitor failure |
| Safety & Odors | Check for a neighborhood-wide power outage | Burning, chemical, or electrical odors; sparking or arcing |
Before calling a technician, double-check your steps to ensure you’ve ruled out the quick fixes. Persistent error codes, refrigerant leaks, or major component failures are clear signs it’s time for professional help.
If you’re in the Chicagoland area, Eco Temp HVAC can help. As a Mitsubishi Diamond Elite Contractor, their certified technicians specialize in diagnosing complex issues and offer an exclusive 12-year parts warranty on Mitsubishi repairs.
Conclusion
Mini-split power failures often stem from simple problems like dead remote batteries, tripped breakers, incorrect settings, loose wiring, safety lockouts, or even a malfunctioning outdoor unit component. The good news? Many of these issues can be resolved with basic troubleshooting.
Always prioritize safety. If your breaker trips immediately after resetting or you detect a burning smell or scorched wiring, disconnect the power and stop immediately. Serious problems, such as refrigerant leaks or compressor failures, require the expertise of an EPA-certified technician.
Once safety concerns are addressed, regular maintenance is key. Cooling-only systems should have annual check-ups, while heat pump systems benefit from biannual tune-ups – ideally in spring and fall. These inspections can catch small issues, like a weak capacitor or dirty coil, before they turn into major power failures.
For those in the Chicagoland area, Eco Temp HVAC provides 24/7 diagnostics and repairs. As a Mitsubishi Diamond Elite Contractor, their technicians offer an exclusive 12-year parts warranty on Mitsubishi repairs. They serve Chicago and nearby suburbs like St. Charles, Bartlett, Lemont, Downers Grove, and Palatine. Addressing power issues promptly not only restores comfort but also helps extend the lifespan of your mini-split system.
FAQs
Why does my mini-split have power but still won’t start?
If your mini-split has power but isn’t starting, a few common culprits might be at play. Start by checking the remote control – are the batteries still good? Also, confirm that the mode and temperature settings are correct. If everything seems fine, locate the manual override button behind the front panel of the unit. Pressing this can help determine if the issue lies with the remote itself.
Still no luck? Blocked airflow or possible component failures could be the cause. In such cases, it’s best to reach out to a professional technician, like those at Eco Temp HVAC, for a proper diagnosis and repair.
What do the mini-split error codes mean when it won’t turn on?
If your mini-split displays an error code or a blinking LED pattern, it’s indicating a problem – this could be anything from communication issues to sensor malfunctions or refrigerant troubles. To figure out what’s wrong, refer to the error code guide in your model’s user manual. In some cases, a simple power reset might resolve the issue. However, more complex problems often require professional repairs. If the error doesn’t go away or you’re uncertain about the next steps, it’s best to reach out to a technician for help.
When should I stop troubleshooting and call Eco Temp HVAC?
If basic troubleshooting steps – like replacing remote batteries, inspecting the circuit breaker, or ensuring the filter is clean – don’t fix the problem, it’s time to call Eco Temp HVAC. Stop immediately and contact a professional if you notice the breaker tripping repeatedly, detect burning or chemical odors, or spot scorched wiring. Other issues that require expert attention include recurring error codes, possible refrigerant leaks, strange noises, or a unit that remains unresponsive even after a manual reset.