
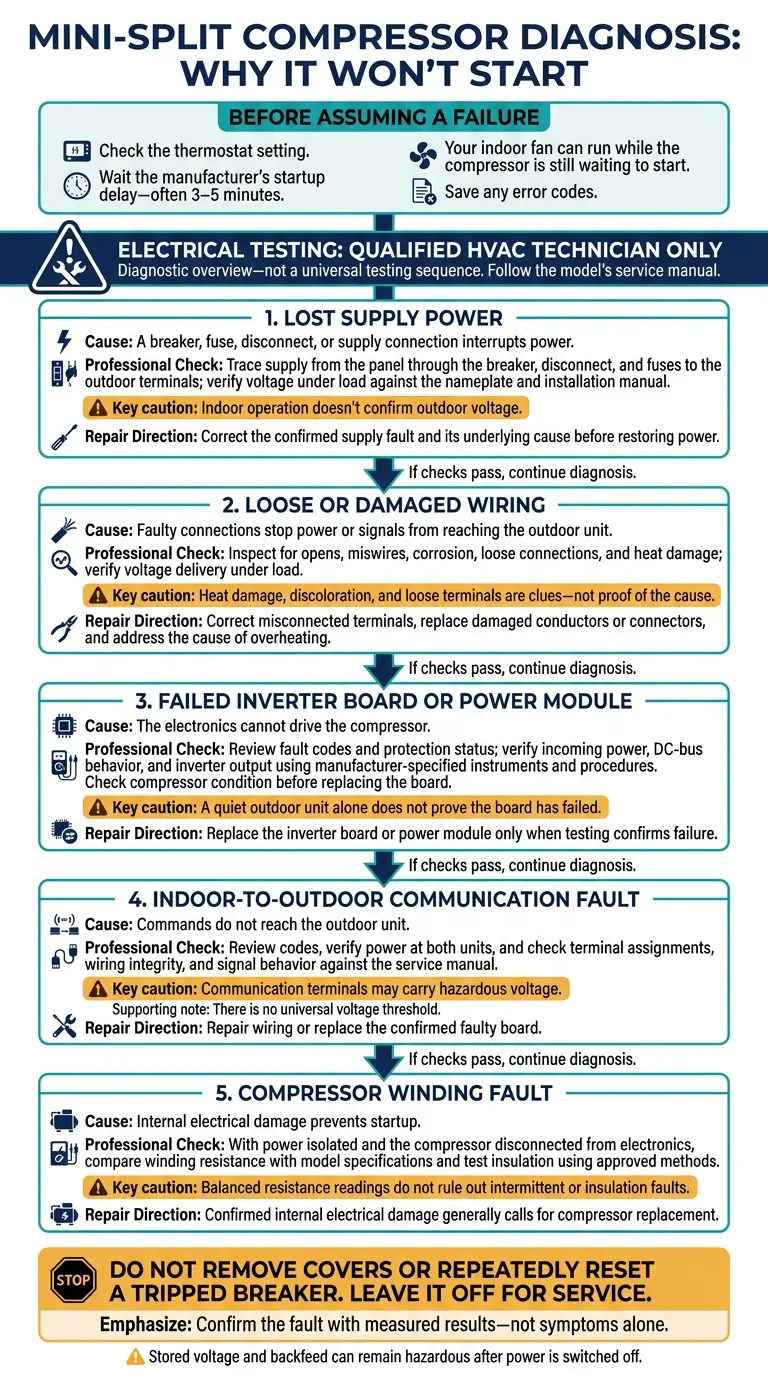
If your mini-split compressor won’t start, I recommend checking the thermostat setting and waiting the manufacturer’s startup delay – often 3–5 minutes – before assuming a part has failed. Your indoor fan can run while the compressor is still waiting to start.
If it stays off, five electrical faults may explain why:
- Lost supply power: A breaker, fuse, disconnect, or supply connection interrupts power.
- Loose or damaged wiring: Faulty connections stop power or signals from reaching the outdoor unit.
- Failed inverter board or power module: The electronics cannot drive the compressor.
- Indoor-to-outdoor communication fault: Commands do not reach the outdoor unit.
- Compressor winding fault: Internal electrical damage prevents startup.
My advice: save any error codes and leave electrical testing to a qualified HVAC technician. <u>Do not remove covers or repeatedly reset a tripped breaker.</u> These faults can look alike, so measured test results – not symptoms alone – should guide repairs.
Mini-Split Compressor Not Starting: 5 Electrical Causes
Causes 1–2: Supply Power and Wiring Faults
1. Lost Supply Power
If the compressor still won’t start after the delay, check the supply power first. Utility outages, tripped breakers, open disconnects, blown fuses, and damaged supply connections can leave the outdoor unit without line voltage. Indoor operation doesn’t confirm outdoor voltage. Many residential systems use 208/230-volt, single-phase power and need both line legs.
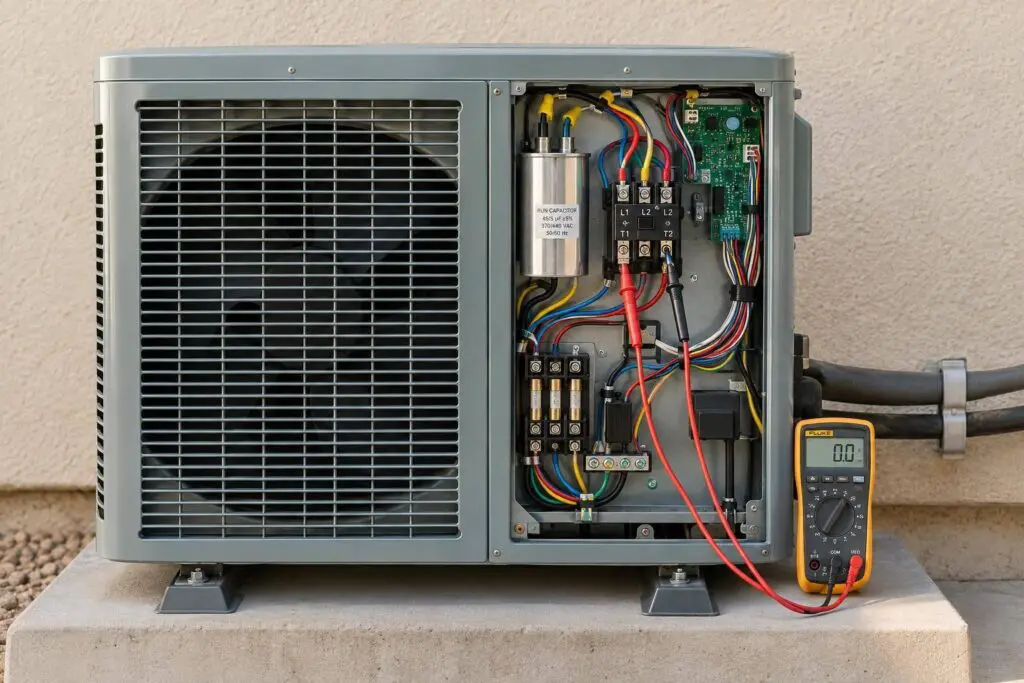
A technician traces power from the panel to the outdoor unit, checking the breaker, disconnect, fuse, and outdoor line terminals under load. Readings must match the nameplate and installation manual. A no-load reading can miss voltage drop.
| Symptom | Test point | Likely finding | Repair direction |
|---|---|---|---|
| Tripped breaker; outdoor unit inactive | Breaker output and disconnect input | Open or failed breaker; missing supply leg | Find the overload, short, or ground fault before restoring power. |
| Open disconnect | Disconnect line and load terminals | Voltage enters but does not leave | Repair the switch or terminals before restoring service. |
| Blown fuse | Fuse input/output; isolated fuse test | Open fuse interrupts supply | Find the overcurrent cause, then install the specified fuse type and rating. |
| Low voltage; aborted startup | Panel and outdoor terminals under load | Low incoming voltage or excessive voltage drop | Correct utility, conductor sizing, connection, or circuit-loading problems. |
If supply power is present, the next step is checking the wiring path for opens, miswires, or heat damage.
2. Loose or Damaged Wiring
Loose, corroded, overheated, miswired, or damaged conductors can interrupt power or communication at the disconnect, terminals, or board connections. These faults can prevent startup even when the unit appears to have power.
Heat damage, discoloration, and loose terminals are clues – not proof of the cause. Excessive current or incorrect conductor sizing may be to blame, rather than a loose terminal alone.
Before touching conductors, technicians isolate power, apply lockout/tagout where required, and verify zero voltage. They must also account for backfeed and stored voltage.
Repairs follow the manufacturer’s wiring diagram. That means correcting misconnected terminals, replacing damaged conductors or connectors, and fixing the cause of overheating. Do not use twisting or tape as a temporary repair, bypass a fuse, or upsize a breaker.
Load testing checks whether the repair restored voltage delivery. Follow-up checks confirm supply voltage, operating current, abnormal heating, communication, and outdoor startup. If voltage and wiring hold under load, move to the inverter board, communication circuit, and compressor windings.
Mini Split Air Conditioner the compressor won’t run
Causes 3–5: Inverter, Communication, and Compressor Faults
If supply power and wiring check out, the next likely causes are the inverter, communication link, or compressor itself.
3. Failed Inverter Board or Power Module
The inverter board converts incoming AC to DC, then supplies variable-frequency power to the compressor. The layout varies by model. Once technicians confirm demand and verify that the startup delay has passed, they review fault codes and protection status. They then check incoming power, fuses, protection components, heat damage, DC-bus behavior, and inverter output. A quiet outdoor unit alone does not prove the board has failed.
Inverter output uses pulse-width modulation, which can make standard meter readings misleading. Testing requires the instruments and procedures listed in the service manual. Before replacing a board, technicians check compressor connections, winding resistance, and insulation. A shorted compressor can damage the replacement module. These tests are for professionals only.
If the inverter checks out, the communication circuit is next.
4. Indoor-to-Outdoor Communication Fault
A running indoor fan or working display does not mean commands reached the outdoor unit. Technicians review codes, check power at both units, and compare terminal assignments with the wiring diagram. Open, reversed, loose, or misconnected conductors can interrupt communication, as can grounding problems, interference, or failed boards. Signal behavior must match the service manual – there is no universal voltage threshold.
Communication terminals may carry hazardous voltage. A communication fault code helps narrow the search, but it does not automatically point to a failed board.
If communication is intact, technicians test the compressor windings next.
5. Compressor Winding Fault
Open, shorted, or insulation-damaged windings can prevent startup even when the compressor has power and a run command. Before testing, technicians isolate power, wait the specified discharge time, and disconnect the compressor from the electronics. They compare terminal-to-terminal resistance with the model’s specifications, then test terminal-to-shell insulation using approved methods. Never run an insulation tester through connected inverter electronics.
Balanced resistance readings do not rule out intermittent or insulation faults. Confirmed internal electrical damage generally calls for compressor replacement. Follow-up checks cover wiring, grounding, supply protection, inverter operation, and refrigerant-system requirements to help prevent another failure.
Diagnostic Summary: Symptoms, Tests, and Repairs
Symptoms can overlap. Confirm the fault with measured results, not error codes or visible damage alone.
Check the startup delay and supply power first. Then use the patterns below to narrow down the electrical fault. Once you’ve ruled out supply power and wiring, focus on the inverter, communication circuit, and compressor.
| Observed symptom | Professional test | Likely fault | Repair |
|---|---|---|---|
| Starts after a 3–5-minute pause, with no codes or abnormal symptoms | Compare startup timing with the manual | Normal compressor protection cycle | No repair needed |
| No display, LEDs, or response | Measure supply voltage at the breaker, disconnect, and outdoor terminals | Lost supply power or blown fuse | Restore supply power at the failed component. |
| Hums or clicks but won’t start | Inspect wiring and check continuity | Loose or damaged wiring | Tighten connections or replace damaged wire. |
| Indoor unit runs, but the outdoor unit stays off | Verify supply power, check the DC communication signal as directed by the manual, then test inverter output and compressor condition | Failed inverter board or power module, if other checks pass | Replace the inverter board or power module. |
| Communication error code | Check communication cable continuity and polarity (S1-S2-S3), as applicable | Communication fault or failed board | Repair wiring or replace the confirmed faulty board. |
| Breaker trips as soon as startup begins | Check for circuit shorts; test isolated compressor winding resistance and insulation | Circuit short or shorted or grounded compressor | Repair the short or replace the confirmed faulty compressor. |
Use Startup Behavior to Guide Testing
Startup behavior helps narrow down the fault, but it doesn’t confirm which part failed. If a replacement board doesn’t fix the problem, retest the supply, wiring, and compressor. Use those results to decide which final test comes next.
Conclusion: Confirm the Fault Before Replacing Parts
These symptoms overlap, so testing – not symptoms alone – confirms which part has failed. Each fault calls for different tests and repairs. Have a qualified technician confirm the problem before replacing parts.
Wait for the manufacturer-specified delay and save any error codes. Do not keep resetting a tripped breaker. Leave it off for service.
If the compressor still won’t start after proper diagnosis, contact Eco Temp HVAC for Chicagoland mini-split service. The company is a Mitsubishi Diamond Elite Contractor, with certified technicians available 24/7 in Chicago, St. Charles, Bartlett, Lemont, Downers Grove, and Palatine.
FAQs
What should I record before calling for service?
Before calling Eco Temp HVAC, check the operating mode and thermostat setting. For cooling, set the thermostat below room temperature; for heating, set it above. Also, make sure the circuit breakers and outdoor disconnect switches are on.
If the system still won’t start, note any persistent error codes or flashing lights, the selected fan speed, and the heating or cooling mode. Record the room and outdoor temperatures in °F, plus whether the issue affects one indoor unit or several.
Can a power surge damage my mini-split’s inverter board?
Yes. Power surges can damage your mini-split’s sensitive inverter board. A surge protector can help guard against voltage spikes, especially if your area has frequent electrical storms or unstable power.
Incorrect wiring can also cause control board failure. That includes using communication wires as a ground path. If you suspect surge damage or another electrical issue, have a professional test the system to help prevent further component damage.
How do I decide between compressor repair and replacement?
Start with your system’s age and what caused the failure. Compressor replacement typically costs $1,200–$2,500. If your system is older, replacing the entire system with modern, energy-efficient equipment may be more cost-effective.
Have a certified technician confirm the root cause before deciding. Acidic oil caused by poor commissioning or failed windings may warrant a full system replacement. Eco Temp HVAC offers diagnostics to help Chicagoland homeowners weigh their options.