
If refrigerant lines are left open even for a short time, moisture, dirt, air, or the wrong refrigerant can get in and lead to poor cooling, acid buildup, blocked metering parts, or compressor damage. In HVAC work, many compressor failures start with installation mistakes, not bad equipment.
Here’s the short version: keep line ends sealed, keep tools clean, flow dry nitrogen while brazing, pressure test with dry nitrogen, pull a deep vacuum, and charge only with the refrigerant on the nameplate. If the charge is mixed or unknown, stop and recover it before anything else is added.
What I’d want you to know right away:
- Open tubing can pull in humidity fast
- Brazing without nitrogen can form oxide scale inside copper lines
- Compressed air should not be used inside refrigerant piping
- Many systems target 500 microns or lower before charging
- A mixed refrigerant charge can turn a simple install into a repair that costs hundreds or even thousands of dollars
The main idea is simple: contamination control starts the moment a line is opened and does not stop until charging is done.
If I were boiling the full article down to one plain answer, it would be this: a clean install depends on sealed lines, clean tools, dry nitrogen, a verified vacuum, and the exact refrigerant listed by the manufacturer.
Things to Keep Out of the System
sbb-itb-b5c10b1
Protecting Open Refrigerant Lines Before Connection
This step is simple: keep every line end sealed until the connection is ready. Open tubing can pull in humid air and debris fast, especially on unfinished job sites or in busy work areas.
The rule is straightforward: keep every line-set end sealed until the technician is ready to make the connection. Don’t take the cap off just because the tubing is near its spot or the equipment is already in place. Hold off until brazing, flaring, or the final connection is about to start.
What Should Stay Capped, Plugged, or Sealed
Every open end needs protection: the liquid line, suction line, coil connections, branch connections, and any section that gets disconnected for a short time. If the factory cap is still in good shape, leave it alone. If it’s cracked, missing, loose, or dirty, swap it for a clean, dry cap or plug. For any temporary seal, use only a clean, dry cap or plug.
It also helps to watch for small problems that can snowball. Caps can fall off while the line is being routed. Ends can sit uncovered when work gets delayed. Some manufacturer exposure limits are short, so if work stops, re-cap the line right away and check the equipment manual if a line has been left open past that limit.
What Happens if a Line Sits Open Too Long
Moisture can lead to restrictions, corrosion, acid formation, and added stress on the compressor. Dirt in the line causes trouble too. That includes metal filings, insulation fibers, dust, and construction debris, all of which add to the risk of clogging.
If tubing sat open too long or was exposed to moisture or dust, a qualified HVAC technician needs to decide what comes next. That may mean evacuating the system again, replacing the filter drier, or replacing the line itself. Don’t try to blow out dirty tubing with compressed air. What starts inside one open line can spread into a system-wide cleanup problem, not just a line-set issue.
Once the lines stay sealed, the next contamination risk comes from tools and brazing work.
Keeping Tools, Components, and Brazing Work Clean
Sealed lines won’t help much if your tools bring residue straight into the system. Gauges, hoses, recovery machines, vacuum pumps, and tube-prep tools can all leave behind contamination.
Dirty Tools and Reused Components Can Carry Oil or Refrigerant Residue
Any tool that comes into contact with refrigerant, oil, or moisture can carry contamination into the next system. Hoses and manifold passages often hold leftover refrigerant, compressor oil, moisture, or debris from the last job. If that earlier system used a different refrigerant or oil, connecting those same hoses without cleaning or purging them first can push that residue right into the new circuit.
Do not move hoses between refrigerants without purging them. And never mix refrigerants in the same recovery cylinder. Store recovered refrigerant in a clearly labeled cylinder set aside for that refrigerant only.
The simplest way to avoid tool-related contamination is to control what each tool has touched.
| Item | Contamination risk | Required precaution |
|---|---|---|
| Manifold and charging hoses | Residual refrigerant, oil, moisture, or debris from a prior job can be carried into the new system | Use hoses dedicated to, or verified compatible with, the refrigerant and oil type; inspect and purge or clean them before connecting |
| Recovery machine and cylinder | Residual refrigerant or contaminants can carry over if the equipment is not clean, and mixed refrigerants should not be combined | Use a clearly labeled cylinder reserved for that refrigerant; use a separate labeled cylinder for unknown or mixed refrigerant |
| Vacuum pump and evacuation hoses | Oil residue or moisture can enter the evacuation path, and restrictive hoses slow evacuation | Keep pump oil clean and at the correct level; use clean, vacuum-rated hoses with secure seals |
| Flare or braze tools | Burrs, cutting oil, and filings can remain inside tubing or compromise the joint | Cut square, deburr carefully, clean joint surfaces, and cap the tube if assembly is delayed |
| Service-port connection surfaces | Dirt or damaged seals can enter the circuit or cause leaks | Wipe fittings clean, inspect O-rings and Schrader cores, and keep caps on when not in use |
Check the refrigerant type on the equipment nameplate before connecting any tool. Don’t assume a hose or cylinder is clean just because it looks clean.
Once the tools are clean, the next risk shows up at the braze.
Why Nitrogen Purging Matters During Brazing
When copper tubing is heated in air, black oxide forms on the inside of the tube. That scale can break loose later and damage valves, metering devices, and compressor oil. Trane‘s installation guidance ties nitrogen purging during brazing to stopping internal copper oxides that can harm the system.
Use a continuous low-flow stream of clean, dry nitrogen in the tubing before and during heating. The nitrogen pushes out oxygen so scale does not form. Flow control matters. Too much nitrogen can disturb the molten brazing alloy or create unsafe pressure. Too little may fail to stop oxidation.
A safe brazing sequence looks like this:
- Cut and deburr the tube
- Clean the joint
- Flow dry nitrogen through a regulator
- Protect nearby parts from heat
- Keep nitrogen flowing during heating and cooling
If work stops at any point, cap the open line. Do not leave it open to room air while nitrogen is not flowing.
Nitrogen purging protects the braze, but the system still needs pressure testing and evacuation.
Pressure Testing, Evacuation, and Charging Without Contamination
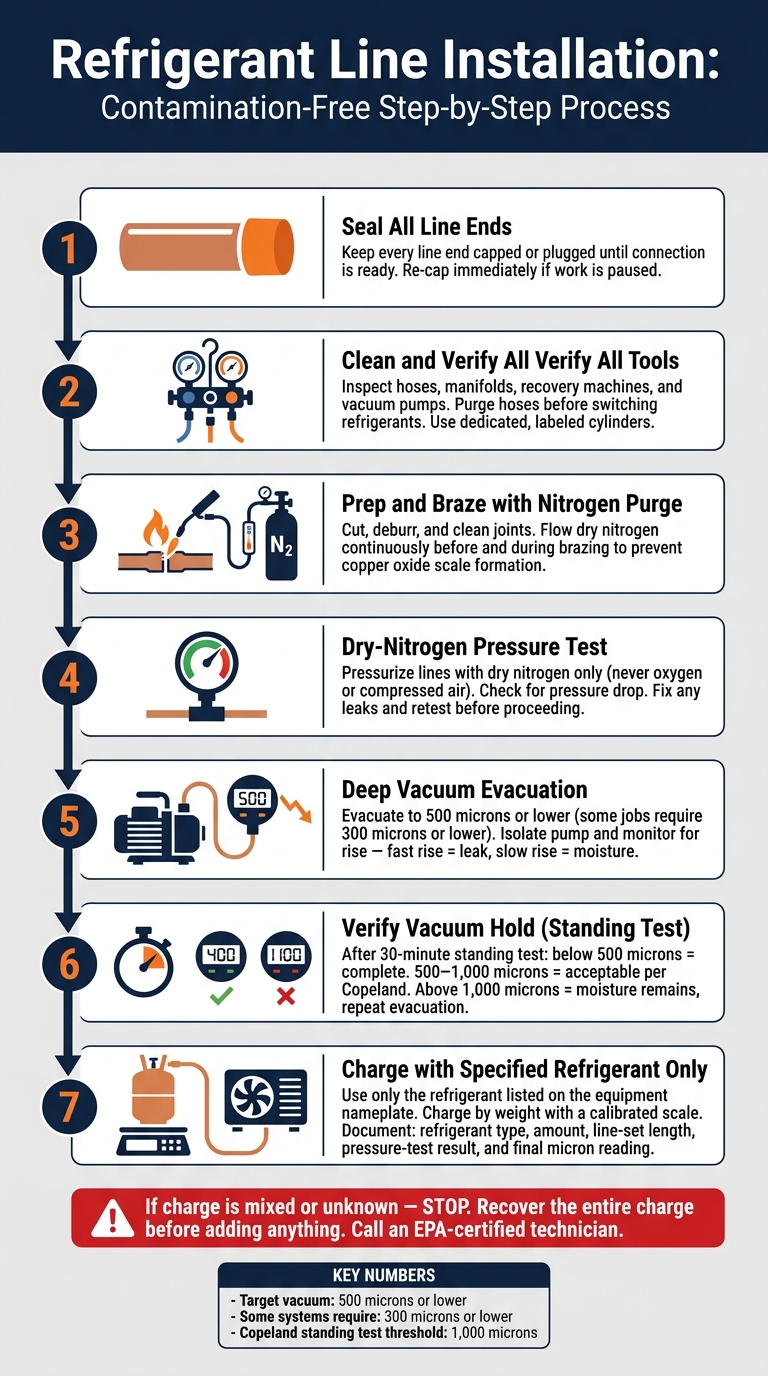
Refrigerant Line Installation: Contamination-Free Process Checklist
After brazing, follow the sequence: pressure test, evacuate, then charge. That order helps catch leaks, moisture, and the wrong refrigerant before startup.
Dry-Nitrogen Pressure Testing Confirms the Line Is Leak-Free
The pressure test uses regulated, dry nitrogen to pressurize the installed refrigerant lines and connections. That includes brazed joints, flares, service valves, Schrader cores, and other field connections. If the pressure drops after you account for temperature change, there’s likely a leak. Find it, fix it, and test again before moving on.
Use only dry nitrogen. Oxygen creates a fire risk, and compressed air adds moisture and non-condensables.
Follow the equipment manual for the test pressure and hold time. Use a regulator, add pressure slowly, and inspect joints with an approved leak-detection solution.
Once the line holds pressure, move to evacuation.
Deep Evacuation Removes Moisture Before Charging
Even a leak-free system can still hold moisture and air. Evacuation removes both with a vacuum pump, vacuum-rated hoses, and an electronic micron gauge placed at the system.
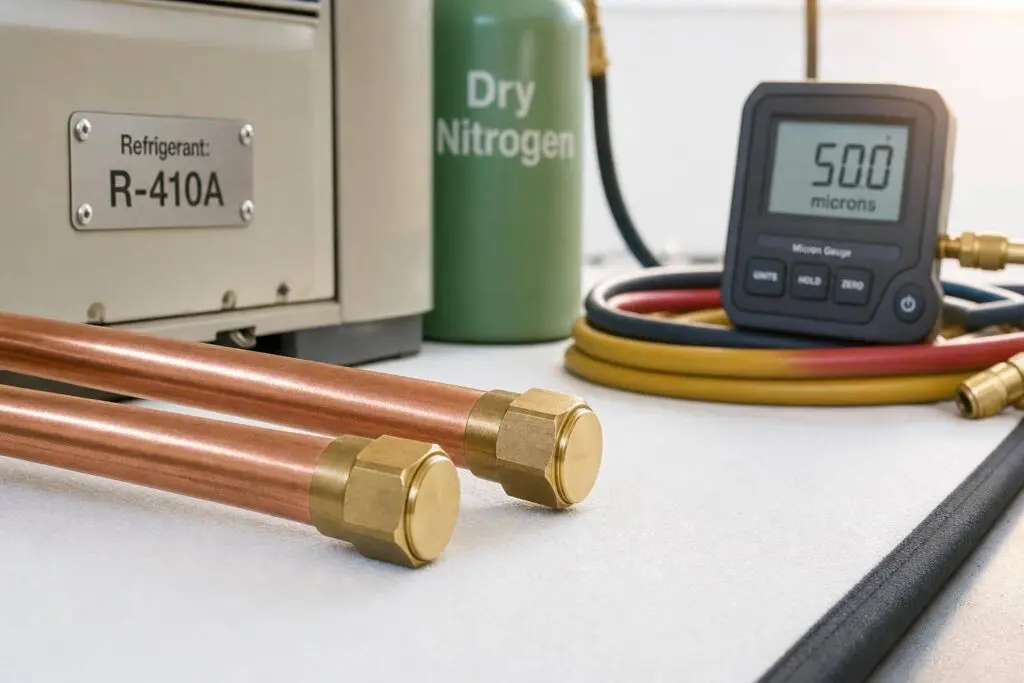
The manufacturer’s instructions set the target. In many cases, that means 500 microns or lower, and some jobs call for 300 microns or lower. After you reach the target, isolate the pump and watch the micron reading. A fast rise usually points to a leak or an open connection. A slower rise often means trapped moisture or outgassing.
Copeland‘s procedure treats a stabilized reading between 500 and 1,000 microns after a 30-minute standing test as complete, while a reading above 1,000 but below 5,000 microns means moisture has not been fully removed.
If needed, break the vacuum with dry nitrogen and repeat the evacuation to remove leftover moisture, based on the manufacturer’s procedure.
After the vacuum holds, the system is ready for the correct refrigerant charge.
Using Only the Specified Refrigerant and a Clean Charge Path
Charge only with the refrigerant listed on the equipment nameplate and in the installation instructions. Use clean, dry charging equipment and hoses rated for that refrigerant. Charge by weight with a calibrated scale, and document:
- refrigerant type
- amount added
- line-set length
- pressure-test result
- final micron reading
A wrong charge can turn the next service call into an expensive mess. If mixed or wrong refrigerant has entered the system, a qualified technician will need to recover the entire charge, identify the contamination, replace affected components as needed, and start the pressure test and evacuation sequence over from the beginning.
Mixed refrigerants are the contamination problem that matters most next.
Conclusion: Preventing Mixed Refrigerants and Knowing When to Call a Technician
Think of these steps as one contamination-control process. Skip one piece, and the rest can fall apart.
Because refrigerant circuits need to stay sealed and charged the right way, this is work for certified technicians. Refrigerant-circuit work calls for EPA-certified technicians and special equipment, so it’s not a DIY job.
If an installation was left open, the refrigerant type isn’t clear, or the charge needs to be checked, Eco Temp HVAC can inspect the system in Chicagoland. Their certified technicians can inspect the lines and confirm that the charge matches the equipment nameplate. If the charge is uncertain, stop before adding anything else.
Why Mixed Refrigerants Create Expensive Service Problems
If the charge is already mixed or unknown, the next step is recovery, not topping it off. Open lines, dirty tools, skipping a brazing purge, or not finishing the evacuation can all lead to a mixed or unknown charge.
Never mix refrigerants in the same recovery container because the resulting mixture may be impossible to recover or reuse. If the charge is unknown or contaminated, recover it into a clearly labeled container, treat it as contaminated, and stop until a qualified technician checks the system.
FAQs
How fast can open refrigerant lines absorb moisture?
Very fast. Open refrigerant lines can pull moisture from the air in no time, and that’s an even bigger issue in newer systems that use POE oil. POE oil attracts moisture and holds onto it fast.
Even tiny amounts of moisture can lead to acid, corrosion, and compressor failure. That’s why refrigerant lines should stay sealed until you make the connection. After that, the system needs a full evacuation to 500 microns or lower.
How do I know if a refrigerant charge is mixed or contaminated?
Look for system performance issues and signs of internal damage. A contaminated charge can lead to restricted flow, unstable superheat, lower cooling output, or ice and frost on lines and metering devices.
You may also see oil breakdown or sludge when moisture or debris reacts with the refrigerant and oil. Since this kind of damage can build over time, prevention during installation matters a lot.
Why is a micron gauge needed during evacuation?
A digital micron gauge is a must during evacuation because it gives precise, real-time readings that show whether moisture and non-condensable gases have actually been removed. Standard analog manifold gauges just aren’t sensitive enough to measure vacuum at this depth.
When the system reaches 500 microns or lower, that’s a clear sign the pressure is low enough to drop the boiling point of water so trapped moisture can evaporate. That matters because leftover moisture can lead to acid formation, compressor damage, and even system failure.