Your mini-split heating system not working? Start here. Most issues, from no heat to strange noises, stem from simple problems like power supply, dirty filters, or incorrect settings. Fixing these can save you time and money. Here’s a quick breakdown of the troubleshooting process:
- Check Power: Ensure the unit is plugged in, breakers are on, and the outdoor disconnect switch is set to "on."
- Thermostat Settings: Set your thermostat to "Heat" mode and raise the temperature at least 5–10°F above room temperature.
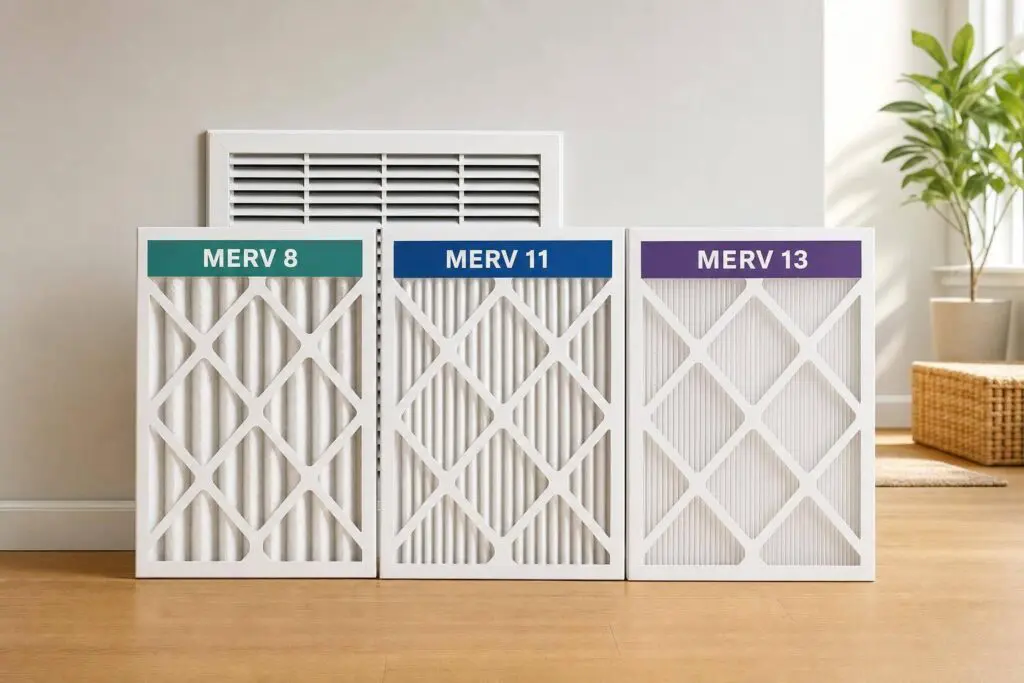
- Clean Filters: Dirty filters block airflow and reduce efficiency. Clean or replace them every 2–4 weeks.
- Inspect Indoor and Outdoor Units: Remove debris, ensure proper airflow, and look for ice buildup or refrigerant leaks.
If these steps don’t resolve the issue, more complex problems like refrigerant leaks, frozen coils, or mechanical failures may require professional help. For persistent issues, call a certified technician to diagnose and repair the system. Regular maintenance is key to preventing future problems and keeping your mini-split running efficiently.
Pro Tip: 1 in 4 "dead" units are fixed with simple checks like resetting the breaker or replacing remote batteries. Start with these basics before calling for service.
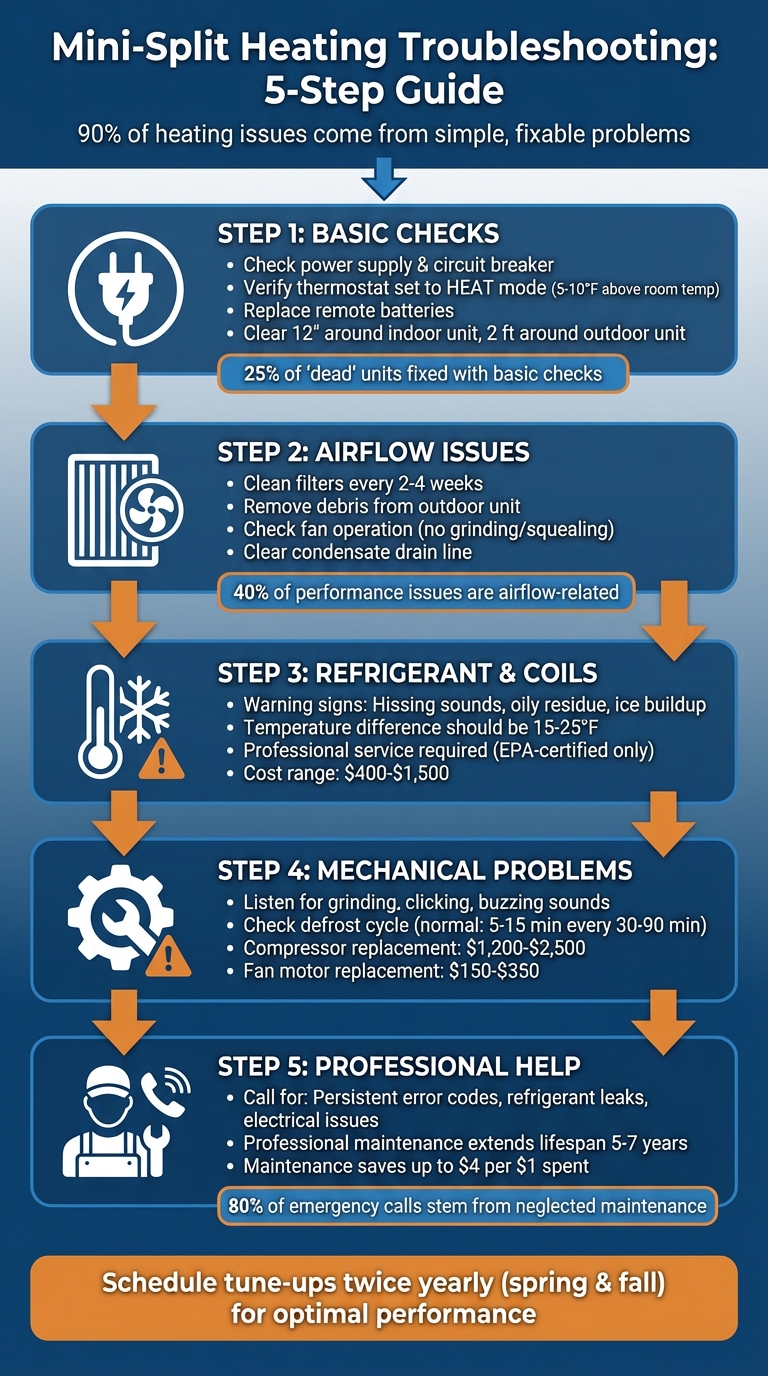
5-Step Mini-Split Heating Troubleshooting Process
TOP 5 CAUSES of Mini Split Heat Pump FAILURE!
sbb-itb-b5c10b1
Step 1: Basic Checks Before You Start
Before diving into complex diagnostics, take some time to rule out the simple stuff. Believe it or not, around 90% of heating complaints come from easily fixable problems like incorrect settings, dirty filters, or blocked coils – not mechanical failures. A quick check of these basics can save you both time and the cost of a service call.
Verify Power Supply and Electrical Connections
Start by ensuring your heating system has power. Check your electrical panel for a tripped circuit breaker. Plug in another device, like a lamp or phone charger, to confirm the outlet is working. If the breaker is flipped to "off", reset it – but only once. If it trips again, this might signal a more serious electrical issue that needs professional attention.
Next, locate the outdoor HVAC disconnect switch (usually a gray box near the unit) and make sure it’s turned "on". Additionally, verify that the indoor emergency shutoff switch hasn’t been accidentally turned off. If everything looks fine and the unit still won’t start, try a hard reset: turn off the circuit breaker for 1–2 minutes, then switch it back on to clear any electronic glitches.
Review Thermostat Settings
Double-check that your thermostat is set to "Heat" mode, often represented by a sun icon. Avoid using "Auto" mode in winter – it’s best to manually select "Heat" for consistent performance. Set the temperature at least 5 to 10°F higher than the current room temperature to kickstart the heating cycle.
"Check that the unit’s mode is set to ‘Heat’ and the temperature setting is at least 4 to 5 degrees higher than the current room temperature." – Top-Notch Plumbing, Heating & Air
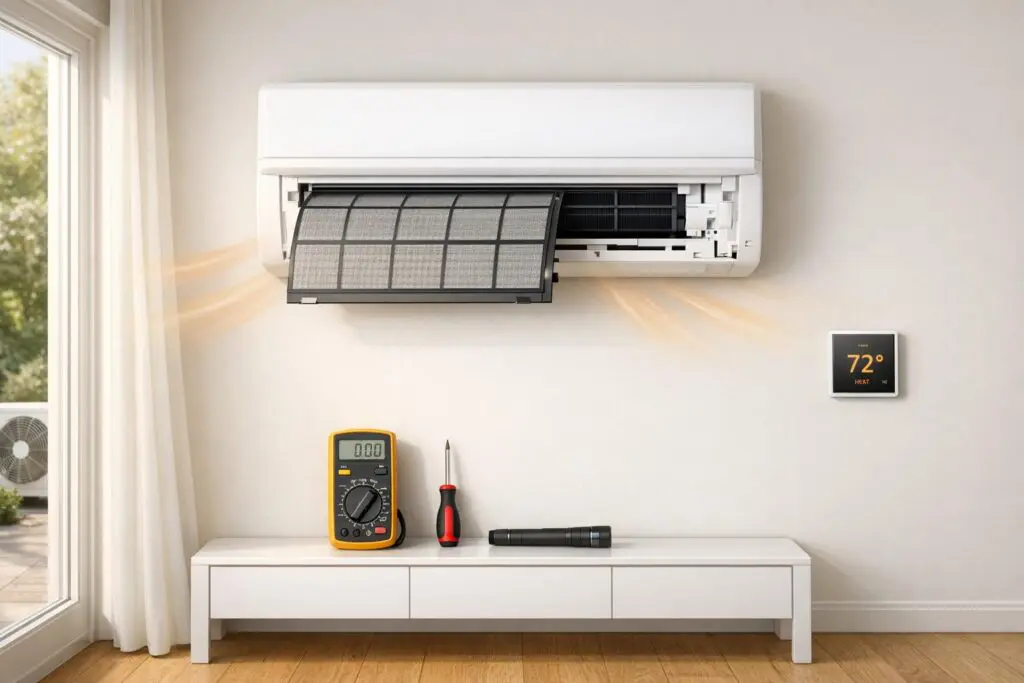
If you’re using a remote control, replace the batteries – even if the display looks fine. Weak batteries can power the screen but may not send proper signals to the unit. After adjusting the thermostat, give it 3 to 5 minutes for the reversing valve to redirect refrigerant flow before expecting warm air. To test if the remote is working, point it at your smartphone camera; a working remote will display a flashing infrared light on the screen.
Now, move on to a visual inspection of your system.
Conduct a Visual Inspection
Once you’ve checked the power and thermostat, take a closer look at both the indoor and outdoor units. Indoors, make sure nothing is blocking airflow – keep furniture or curtains at least 12 inches away from the air handler. Check the mesh filters behind the front panel; if they’re dusty or opaque, clean them thoroughly.
For the outdoor unit, ensure there’s at least 2 feet of clearance on all sides. Clear away any snow, ice, leaves, or overgrown plants that could be restricting airflow. Inspect the copper refrigerant lines for oily residue, which might indicate a refrigerant leak. Lastly, look for flashing LED lights or error codes on the indoor unit’s display panel. These signals can provide valuable clues about what’s wrong and whether you need professional help.
| Component | Action Required | Potential Issue |
|---|---|---|
| Circuit Breaker | Reset only once if tripped | Electrical surge or short circuit |
| Remote Control | Replace batteries and confirm "Heat" mode | Weak batteries or incorrect mode |
| Air Filters | Clean and dry completely | Restricted airflow |
| Outdoor Unit | Clear debris (ensure 2 ft clearance) | Airflow obstruction |
| Thermostat | Set 5–10°F above room temperature | Temperature differential too small |
Step 2: Fixing Airflow Issues
Once you’ve completed the basic checks, it’s time to tackle airflow problems, which are a major cause of mini-split inefficiencies – responsible for about 40% of performance issues. When air can’t circulate properly, your system works harder, leading to reduced heating efficiency, higher energy bills, and faster wear on components. The upside? Many airflow problems can be fixed with a few straightforward DIY steps.
Clean or Replace Air Filters
Clogged air filters are the most common reason your mini-split might struggle to heat effectively. Dirty filters force the system to overwork, increasing energy consumption and stressing internal parts. In severe cases, blocked filters can even cause the indoor evaporator coils to freeze into a block of ice.
"Dirty filters force your unit to work significantly harder, which increases energy consumption, reduces cooling and heating capacity, and puts stress on components." – RepairMeYourself
To clean your filters, start by powering down the unit and opening the front panel of the indoor air handler. Carefully slide out the reusable mesh filters and rinse them under lukewarm water. For heavy buildup, use a small amount of mild dish soap. Let the filters dry completely for 4–24 hours before reinstalling. During periods of heavy use, clean the filters every 2 to 4 weeks, or at least every 90 days under normal conditions.
If your filters are so dirty that ice has formed on the coils, turn off the system but set the fan to "ON" to speed up the melting process. It can take anywhere from 1 to 6 hours for the ice to thaw naturally. Avoid scraping or chipping at the ice – this can damage the delicate aluminum fins.
Remove Blockages from Indoor and Outdoor Units
Proper airflow depends on keeping both the indoor and outdoor units clear of obstructions. For the indoor unit, check that no furniture, curtains, or wall hangings are blocking the air handler’s vents. Also, make sure the louvers are positioned to distribute air evenly. If you notice water dripping, it might signal a clogged condensate drain line caused by algae or grime. Use a wet/dry vacuum at the exterior end of the drain pipe to clear blockages, and pour a small amount of vinegar down the line occasionally to prevent future buildup.
For the outdoor unit, inspect for debris like leaves, twigs, grass clippings, or snow. Use a garden hose with a sprayer attachment at a 45-degree angle to rinse dirt off the coils. Keep shrubs and plants trimmed back to maintain at least 2 feet of clearance around the unit.
| Component | Common Blockages | DIY Fix |
|---|---|---|
| Indoor Unit | Furniture, curtains, dust, clogged drain lines | Remove obstructions; vacuum drain; clean filters |
| Outdoor Unit | Leaves, snow, grass clippings, overgrown shrubs | Clear debris; trim plants; hose down coils |
Check Fan Operation
Pay attention to how the fans sound during operation. Unusual noises like grinding, squealing, or rattling could mean a failing fan motor or a loose blade. The outdoor fan should spin smoothly without hesitation. If it isn’t moving or makes odd sounds, shut the unit off immediately and call a professional HVAC service in Chicago. What seems like a minor blockage could actually be a mechanical issue that requires expert attention. Once airflow problems are resolved, you’re ready to move on to diagnosing refrigerant and coil issues.
Step 3: Diagnosing Refrigerant and Coil Problems
Once you’ve optimized airflow, the next step is tackling refrigerant and coil issues. Unlike cleaning filters, these tasks require a professional touch. Refrigerant work is legally restricted to EPA-certified technicians, so spotting the warning signs early is key.
Recognizing Refrigerant Problems
Refrigerant levels don’t just drop on their own. If they’re low, it’s usually due to a leak or an installation error. A telltale sign is lukewarm air that never cools to your desired temperature, even when the system runs non-stop. A properly functioning mini-split should create a 15–25°F temperature difference between the return and supply air. Anything less could point to refrigerant trouble.
"Your system shouldn’t be low on refrigerant unless there’s a refrigerant leak or the system was improperly charged at installation." – Anne Fonda, Content Writer, Trane Technologies
Other red flags include hissing or bubbling sounds near the refrigerant lines, which often indicate a leak [35, 36]. You might also see oily stains around line connections, as refrigerant leaks often carry compressor oil [17, 36]. Some homeowners report a sweet, chemical smell near the indoor unit, another potential sign of a refrigerant leak [19, 38]. Additionally, your system may short cycle – turning on and off rapidly – because low refrigerant levels trigger pressure sensors to shut down the compressor.
Understanding Frozen Coils
Ice on your evaporator coils is never a good sign. When refrigerant levels drop, the pressure in the evaporator coil decreases, causing it to dip below freezing. Moisture in the air then freezes on the coil, forming an ice layer that blocks heat transfer [37, 39]. Look for visible frost or ice on the metal fins inside the indoor unit, weak airflow, and water dripping as the ice melts [13, 19, 28].
If you’ve already cleaned the filters and ice is still forming, low refrigerant could be the culprit [13, 29, 37, 39]. Turn off your system immediately to avoid damaging the compressor permanently [13, 39].
When Professional Service Is Needed
Handling refrigerant isn’t something you can do yourself – it’s illegal for unlicensed individuals to buy, add, or work with refrigerant [13, 17, 38]. HVAC professionals use tools like electronic leak detectors, bubble tests, and pressure gauges to identify and fix issues that aren’t visible to the untrained eye [13, 35]. Depending on the severity, refrigerant leak detection and repair can cost between $200 and $1,500. Complete repairs and recharges typically range from $400 to $1,200 [13, 17].
"Only a trained HVAC professional can detect and fix a refrigerant leak and safely perform a refrigerant recharge." – Anne Fonda, Content Writer, Trane Technologies
If you’ve already cleaned filters, cleared debris, and still notice lukewarm air, ice buildup, odd smells, or hissing sounds, it’s time to call a certified HVAC technician. For those in the Chicagoland area, Eco Temp HVAC provides professional mini-split diagnostics and repairs, with certified technicians available 24/7. Their Mitsubishi Diamond Elite Contractor certification ensures expert care for refrigerant systems, backed by comprehensive warranty coverage. With refrigerant and coil issues resolved, you can move on to diagnosing mechanical problems in the next step.
Step 4: Diagnosing Mechanical Problems
Once you’ve tackled refrigerant and coil concerns, it’s time to shift your attention to the compressor, fan motors, and defrost controls. These components often bear the brunt of cold weather, and when they falter, your mini-split might start making odd noises, blow lukewarm air, or stop heating entirely. Many heating issues can be traced back to these mechanical failures.
Identifying Compressor and Motor Issues
After checking airflow and refrigerant levels, it’s essential to inspect the mechanical components. The compressor acts as the heart of your mini-split. If it’s failing, you might hear clicking, grinding, or buzzing sounds. A seized compressor may hum but won’t actually start running. If your circuit breaker keeps tripping, it could indicate the compressor is pulling too much power – a sign of impending failure.
Take a moment to observe the outdoor unit during startup. A properly functioning compressor should start smoothly. If you hear repeated clicking or humming and the fan isn’t spinning, the compressor might be struggling to start. In heating mode, the outdoor suction line should feel warm. If it’s cold, the refrigerant isn’t reversing correctly, which could point to issues with the reversing valve or compressor pressure.
Fan motors also provide clear warning signs. If the compressor is running but the outdoor fan isn’t spinning, the fan motor or its start capacitor might have failed. Grinding or squeaking noises often mean the fan bearings are worn out. With the power off, try manually spinning the fan blades – they should move freely. Resistance or grinding usually indicates bearing failure. A burning smell could signal motor failure or damaged wiring.
"A loud banging noise coming from the outdoor unit… indicates a problem with the condenser pump, and it’s very important that you stop using the system and call for help." – Specialty Heating & Cooling LLC
Repair costs can vary significantly. Replacing a compressor is a major expense, ranging from $1,200 to $2,500. Fan motor replacements are more affordable, typically costing $150 to $350, while swapping out a capacitor is relatively inexpensive at $20 to $50. For older units, replacing the entire system with eco-friendly HVAC solutions might make more sense financially.
Understanding the Defrost Cycle in Cold Weather
In freezing conditions, it’s normal for moisture in the air to freeze on the outdoor coil. To prevent ice buildup from blocking airflow, mini-splits periodically switch to cooling mode to warm the coil and melt the ice. This process, known as the defrost cycle, is entirely normal.
During a typical defrost cycle, the indoor unit will stop blowing warm air – or may blow cool air – for about 5 to 15 minutes. This cycle usually occurs every 30 to 90 minutes in freezing weather. You might also hear popping or hissing sounds as the refrigerant reverses direction.
However, problems arise when the defrost cycle becomes too frequent or lasts too long. If your system defrosts every 10 minutes or the cycle extends beyond 20 minutes, there’s likely an issue. Thick ice that doesn’t melt completely on the outdoor unit often points to a faulty defrost sensor (thermistor), low refrigerant levels, or a malfunctioning control board.
Here’s a quick comparison of normal and abnormal defrost behavior:
| Symptom | Normal Defrost Operation | Abnormal/Malfunction |
|---|---|---|
| Frequency | Every 30–90 minutes | Every 10 minutes or less |
| Duration | 5–15 minutes | 20+ minutes |
| Indoor Behavior | Fan stops or blows neutral air | Unit displays error codes or stays off |
| Outdoor Unit | Visible frost melts away | Unit remains encased in thick ice |
If you notice excessive ice buildup, don’t try to chip it away with sharp objects, as you could puncture the refrigerant lines. Instead, turn off the system and gently use a garden hose to melt the ice, or switch to cooling mode briefly to trigger a manual defrost. Ensure the outdoor unit has at least 24 inches of clearance on all sides to promote airflow and minimize frost.
For persistent defrost problems or mechanical failures, professional diagnosis typically costs between $100 and $200. Replacing a reversing valve can cost $300 to $600, while replacing a sensor or thermistor ranges from $150 to $300, including labor. Once you’ve identified these mechanical issues, the next step is seeking professional assistance.
Step 5: Getting Professional Help from Eco Temp HVAC

After you’ve completed the basic checks and troubleshooting, it’s time to call in a certified technician if you notice signs like refrigerant leaks (hissing sounds, a sweet chemical smell, or ice forming on indoor coils) or electrical problems (burning smells, blown fuses, or tripping breakers). Refrigerant issues, in particular, require specialized handling. Many common mini-split heating problems demand expert diagnostics to pinpoint the root cause.
Persistent error codes that don’t clear after a 10-minute power reset are a red flag for deeper system issues, requiring professional evaluation of the failing component. Strange sounds like grinding, squealing, or loud banging may indicate motor or compressor problems – both of which need specialized diagnostic tools. Water leaks caused by clogged drains or failed condensate pumps also require professional tools to fix without damaging the unit. Other warning signs, such as sudden spikes in electricity bills or short cycling (frequent on-and-off cycles), suggest internal issues that shouldn’t be ignored.
"If you see any ice or frost on the metal fins inside your indoor unit, turn the system off immediately and call a technician. This is a classic sign of a refrigerant leak." – Signature Heating & Air Conditioning
These symptoms often mean your system needs a thorough inspection before more severe complications arise.
What Happens During a Professional Service Visit
When an Eco Temp HVAC technician arrives, they perform a detailed evaluation of your system. This includes checking error codes, testing refrigerant levels, inspecting electrical connections, and calibrating temperature sensors. Refrigerant leaks are identified using specialized tools, with the cost for this service ranging between $200 and $1,500.
Their services also cover coil cleaning, clearing drains, lubricating components, and tightening electrical connections.
As a Mitsubishi Diamond Elite Contractor, Eco Temp HVAC provides factory-trained technicians who meet rigorous quality standards – achieved by only about 2% of HVAC companies. This certification comes with a 12-year parts warranty for Mitsubishi systems, offering far better coverage than standard warranties. Additionally, all technicians are background-checked and drug-tested, and the company backs its work with a two-year money-back guarantee.
"Eco Temp HVAC is a certified Mitsubishi Diamond Elite Contractor, making us the top choice in Chicagoland for professional installations and repairs." – Eco Temp HVAC
Repair costs vary depending on the component. For example:
- Replacing a reversing valve: $300 to $600
- Control board repairs: $250 to $600
- Temperature sensor replacement: $150 to $300
- Compressor replacement: $1,200 to $2,500
To help with these expenses, Eco Temp HVAC offers a $40 coupon for any repair service.
Benefits of Preventive Maintenance Plans
Routine maintenance is essential to keep your system running efficiently and avoid costly repairs. Neglected systems can lose 5% to 10% of their performance annually. On the other hand, well-maintained mini-splits can operate up to 20% more efficiently, potentially cutting energy consumption by as much as 30%. These savings can add up to noticeably lower utility bills during the heating season.
Maintenance also extends your system’s lifespan. While neglected units may fail after just 10 years, those receiving regular care can last 12 to 20 years – a difference of 5 to 7 years of reliable use. Additionally, 75% of catastrophic failures show early warning signs that routine maintenance could catch. Every dollar spent on maintenance can save up to $4 in repair costs.
Addressing small issues – like a worn fan bearing or slightly low refrigerant levels – before they escalate is crucial. Many manufacturers require documented annual maintenance to keep parts warranties valid, so skipping a year could void coverage for costly components.
Eco Temp HVAC’s maintenance visits include all the essentials: refrigerant testing and recharging, electrical inspections, coil cleaning, thermostat calibration, and condensate drain clearing. They also perform safety checks for cracked heat exchangers and test emergency shut-offs to prevent carbon monoxide leaks. Scheduling tune-ups twice a year – once in spring for cooling and once in fall for heating – ensures your mini-split stays in top shape.
Eco Temp HVAC serves Chicago and nearby suburbs like Lemont, Palatine, St. Charles, Downers Grove, and Bartlett. They’re available 24/7 for emergency repairs. To make the experience even smoother, they provide notification reminders and send photos of your assigned technician before arrival. With ENERGY STAR-certified mini-splits using up to 60% less energy than standard electric radiators, regular maintenance ensures you continue to enjoy these savings year after year.
Conclusion
Troubleshooting your mini-split system starts with simple steps. First, check the power supply, set the thermostat to HEAT mode at least 5–10°F higher than the room temperature, and clean or replace filters every 2–4 weeks. These quick fixes solve about 25% of "dead" unit issues and 40% of performance-related complaints. If the outdoor unit is obstructed by snow or debris, clearing a two-foot radius around it can improve airflow and heat absorption.
If these steps don’t resolve the issue, try a 10-minute hard reset at the circuit breaker to clear any system glitches. In freezing temperatures, allow 5–15 minutes for the defrost cycle to complete. However, if the system produces hissing sounds, persistent error codes, unusual noises, or blows cold air in heat mode, these could be signs of refrigerant leaks, reversing valve issues, or electrical malfunctions – problems that require professional attention.
Routine maintenance is your best defense against major problems. Industry data reveals that 80% of emergency HVAC calls stem from neglected maintenance. Keeping your mini-split in good condition not only ensures reliable performance but also helps reduce utility bills throughout the heating season.
For those in need of professional expertise, Eco Temp HVAC offers comprehensive service visits, including refrigerant testing, electrical checks, coil cleaning, and thermostat calibration. As a Mitsubishi Diamond Elite Contractor, they provide a 12-year parts warranty on Mitsubishi systems and are available 24/7 across Chicago, Lemont, Palatine, St. Charles, Downers Grove, and Bartlett for both routine maintenance and emergency repairs.
Whether it’s a quick DIY check or professional service, every step contributes to keeping your system running smoothly. Scheduling professional tune-ups twice a year – once before the heating season and once before the cooling season – can catch minor issues early, ensuring your home stays comfortable all year round. Regular maintenance, whether it’s a simple cleaning or a full diagnostic, makes all the difference.
FAQs
Why is my mini-split blowing cold air in heat mode?
If your mini-split is blowing cold air when it’s set to heat mode, there are a few common culprits to consider. Start with the thermostat settings – they might be incorrect or accidentally switched. Another possibility is restricted airflow, which can happen if the filters or vents are blocked. A refrigerant leak could also prevent the system from heating properly. Finally, a faulty reversing valve might be to blame, as this component is responsible for switching between heating and cooling modes. Checking these areas can often help pinpoint and resolve the issue.
How can I tell if a defrost cycle is normal or a problem?
During cold weather, a defrost cycle helps prevent frost from building up in your system. These cycles happen periodically and may briefly switch to cooling mode before returning to normal heating.
However, if you notice defrost cycles happening too often, lasting too long, or if the system struggles with frost or performance afterward, it could signal a problem. Pay attention to how often and how long the cycles occur, and if the issue continues, it’s a good idea to reach out to a professional for assistance.
When should I stop troubleshooting and call Eco Temp HVAC?
If your mini-split system is acting up and you’re dealing with problems like refrigerant leaks, electrical issues, or damaged refrigerant lines, it’s time to call Eco Temp HVAC. While basic troubleshooting – like checking thermostat settings, cleaning filters, or inspecting accessible components – can sometimes fix minor issues, more complex or persistent problems need professional attention. For your safety and to keep your system running smoothly, let the experts handle serious repairs or signs of system failure.