Installing a furnace involves more than just connecting parts – it’s about ensuring safety, efficiency, and compliance with codes. Faulty installations can lead to serious risks like carbon monoxide poisoning, electrical fires, or gas leaks. Here’s a breakdown of key steps to get it right:
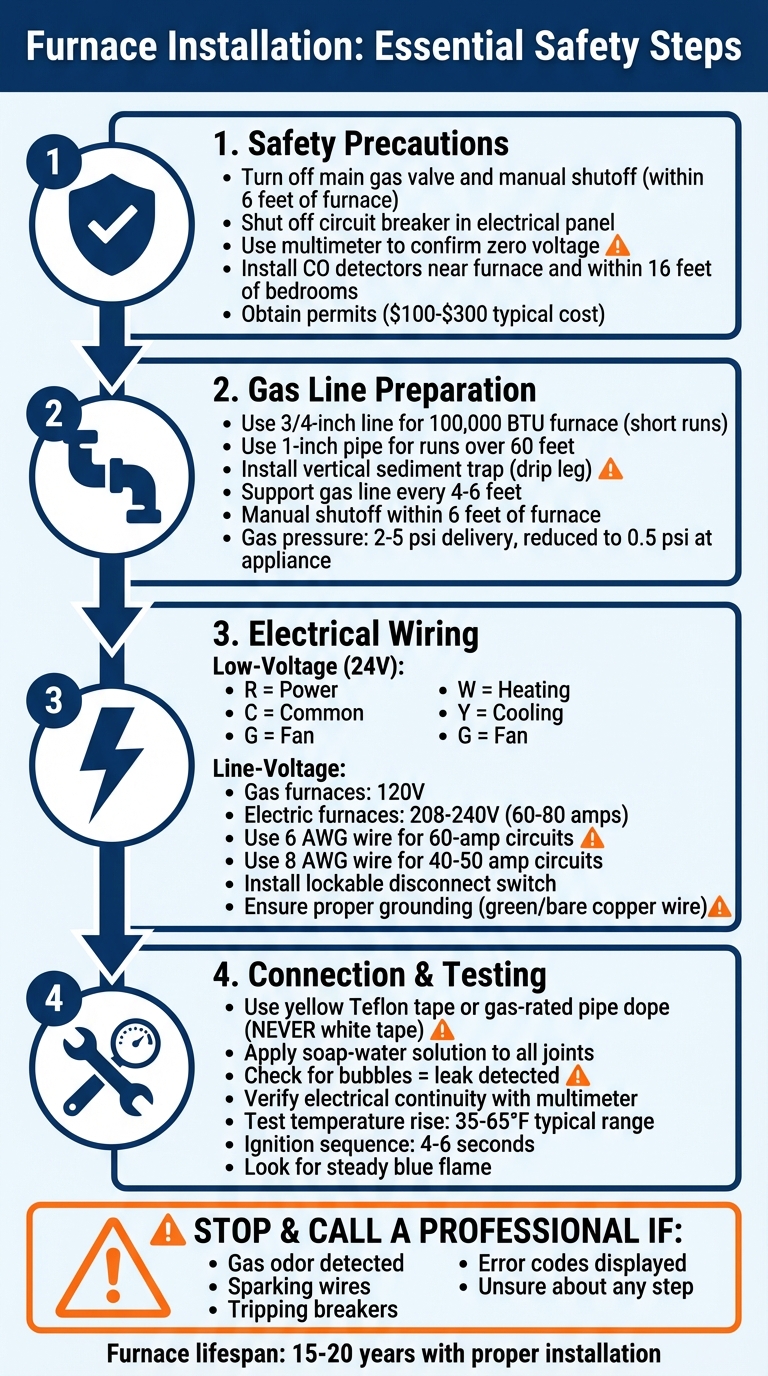
- Safety First: Shut off power and gas supply, use a multimeter to check for voltage, and install carbon monoxide detectors near the furnace and bedrooms.
- Gas Line Preparation: Use the correct pipe size for your furnace’s BTU rating, install a sediment trap, and test for leaks with a soap-and-water solution.
- Electrical Wiring: Separate high-voltage and low-voltage wires, ensure proper grounding, and use the right wire gauge for the furnace’s circuit requirements.
- Permits and Inspections: Obtain necessary permits to meet building codes and avoid fines or voided warranties.
- Testing: Confirm gas connections are leak-free and electrical systems are functioning properly before startup.
If you’re unsure about any step, contact a licensed HVAC professional to ensure proper installation and avoid costly mistakes.
Furnace Installation Safety Checklist: Gas Line and Electrical Wiring Steps
90%+ Furnace Install (Start to finish)
sbb-itb-b5c10b1
Safety Precautions Before Installation
Creating a safe work environment is the first and most important step. Skipping these precautions can lead to serious risks like electrical shock, gas explosions, and carbon monoxide exposure.
Turn Off Power and Gas Supply
Start by shutting off the main gas valve along with the manual shutoff valve located within 6 feet of the furnace. Make sure these valves are easy to access.
Next, turn off the circuit breaker in your main electrical panel that powers the furnace. To be absolutely certain, use a multimeter to confirm there’s no voltage at the furnace control board – don’t rely on breaker labels alone. This simple step can prevent dangerous shocks. Before disassembling anything, take photos and label all connections for easy reassembly.
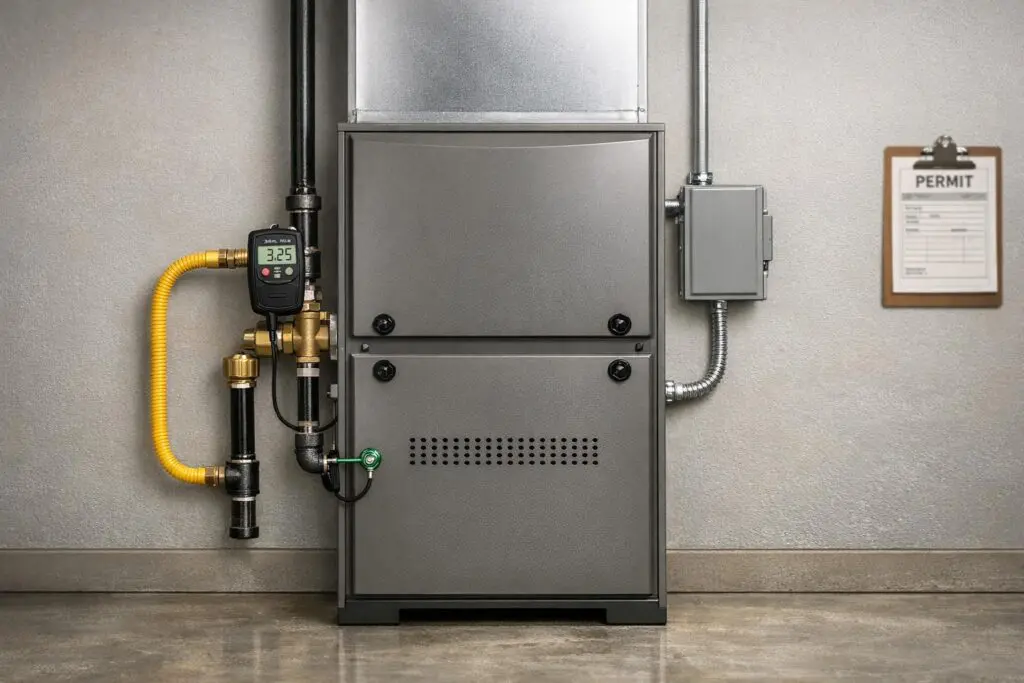
Check for Required Permits
In many areas, you’ll need permits for gas, electrical, and mechanical work before starting the project. For instance, in Chicago, permit fees usually range between $100 and $300. Skipping permits for gas installations could void your homeowner insurance and result in legal penalties.
Permits also ensure professional inspections, which confirm your installation complies with the International Fuel Gas Code (IFGC) and National Electrical Code (NEC). These inspections aren’t just red tape – they’re essential for verifying that your system is safe and built to last 15–20 years. Without permits, you risk voiding manufacturer warranties, leaving you on the hook for future repair costs.
Install a Carbon Monoxide Detector
Place carbon monoxide detectors near your furnace and on every floor of your home. These devices are crucial for detecting harmful gases that could leak from cracked heat exchangers or improperly vented flues. Install detectors within 16 feet of bedrooms to ensure early warnings while you sleep. If the detector goes off or you smell gas during installation, stop immediately and contact emergency services. Don’t forget to test and maintain your detectors annually, ideally during your gas system inspection.
Once these safety steps are complete, you can move on to preparing the gas line connection.
Preparing Gas Line Connections
Make sure your gas line is compatible with your furnace’s BTU rating. For example, a 100,000 BTU furnace typically requires a 3/4-inch line for shorter runs, while runs over 60 feet call for a 1-inch pipe. Natural gas is usually delivered at 2–5 psi and reduced to 0.5 psi at the appliance.
Inspect Existing Gas Lines
Support your gas line every 4 to 6 feet to prevent sagging or potential leaks. Check for a vertical sediment trap (also called a drip leg) near the furnace inlet – this feature helps catch debris and moisture that could damage the system. Samantha Reyes from Smart Comfort highlights the importance of this:
If the inspector sees no drip leg, the inspection often ends right there.
Additionally, ensure the manual shutoff valve is within 6 feet of the furnace and easy to access. If you’re installing a high-efficiency or multi-stage furnace, your gas meter might need an upgrade to accommodate the higher demand. Once the gas line’s condition is confirmed, focus on selecting the right materials for the job.
Choose Suitable Materials
Black iron pipe is the go-to choice for interior gas lines because of its strength and compliance with building codes. For tight or awkward spaces, Corrugated Stainless Steel Tubing (CSST) can be an effective alternative. Just ensure it’s properly bonded to your home’s grounding system to minimize lightning risks. When working with threaded connections, stick to yellow Teflon tape or pipe dope rated specifically for gas – standard white plumbing tape is not safe for this purpose.
If you’re running a new natural gas line, expect costs to range from $15 to $25 per linear foot. In areas like Chicago and Crest Hill, basic installations usually fall between $500 and In areas like Chicago, basic installations usually fall between $500 and $1,000,000.
Perform Initial Leak Testing
To check for leaks, apply a soap-and-water solution or a UL-listed leak detection spray to all threaded fittings and joints. Slowly open the main gas valve and watch for bubbles. If bubbles appear, it means there’s a leak. Mark Callahan advises:
If you see bubbling, shut everything down immediately and re-seat your fittings. Never light the furnace until you’re 100% sure there are no leaks.
After fixing any leaks, test the system again during the furnace’s first heat cycle to confirm the connections hold up under heat and pressure. Never use an open flame to test for leaks. Once the gas connections are secure and thoroughly tested, you can move on to preparing the electrical wiring.
Preparing Electrical Wiring
Furnaces need two distinct electrical circuits: a 24V low-voltage line for the thermostat and control board, and a 120V/240V line for the motor and heating elements. Before starting any work, always use a multimeter to check for zero voltage. As Mark Callahan from The Furnace Outlet advises:
Use a multimeter to confirm that there’s no voltage in the control board before you touch anything electrical. No sparks today, thank you.
Keep the high-amp furnace conductors separate from the low-voltage thermostat wires. Combining them in the same conduit can lead to interference and safety risks.
Understand Low-Voltage Wiring
Thermostat wiring operates at 24V and connects to color-coded terminals on the control board: R for power, C for common, W for heating, Y for cooling, and G for the fan. Use a thin, thermostat-specific screwdriver to avoid damaging the plastic housing during installation. Tools like wire strippers and cutters are essential for preparing clean, precise connections for these small-gauge wires.
Set Up Line-Voltage Connections
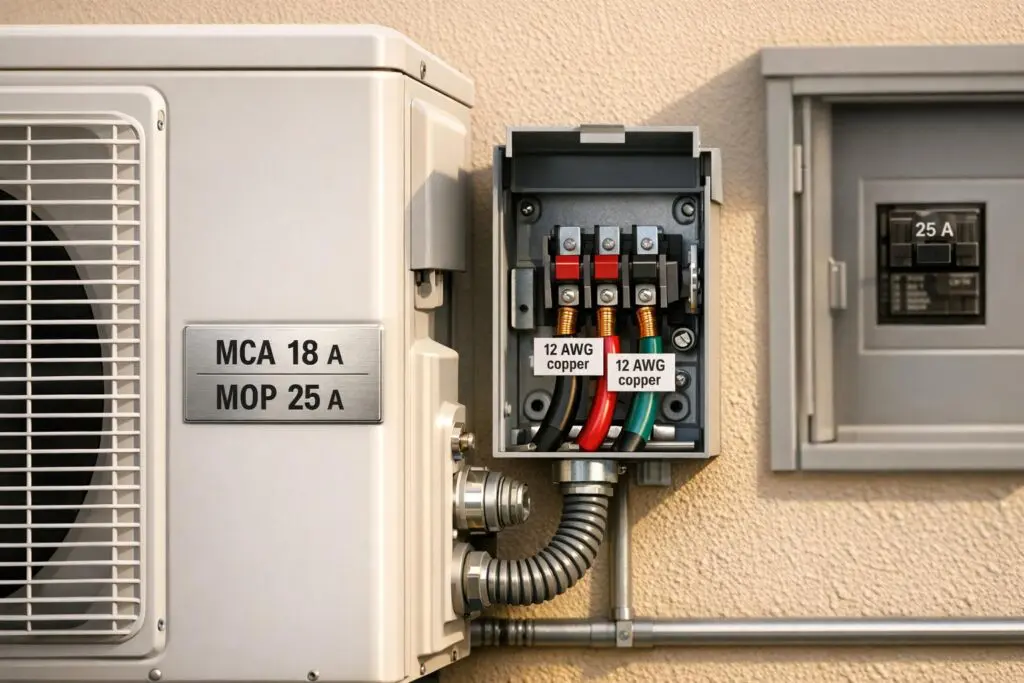
Gas furnaces typically require 120V for the blower motor, while electric furnaces need 208–240V circuits that draw 60–80 amps. For these higher-amperage electric units, use 6 AWG wire for 60-amp circuits and 8 AWG wire for 40–50 amp circuits. Install a lockable disconnect switch within sight of the furnace to meet safety and code requirements.
If your main electrical panel is rated at 100 amps, you might need to upgrade to a 200-amp panel to handle the added load. This upgrade typically costs between $1,500 and $3,000. Mike Sanders shared his personal experience:
When I upgraded my furnace, my electrician discovered my main panel maxed out at 100 amps. We upgraded to 200 amps for safety.
Once these connections are in place, focus on proper grounding to ensure safety.
Ensure Proper Grounding
The green or bare copper ground wire directs stray current safely to the earth, reducing the risk of shocks or fires. Securely connect the ground wire to the furnace chassis and your home’s grounding system. Tighten all wire lugs according to the manufacturer’s torque specifications to avoid loose connections, which can lead to heat buildup. Protect wires from abrasion using metal conduit or approved cable clamps.
After completing all connections, use a multimeter to verify continuity and confirm proper grounding. The National Electrical Code mandates correct grounding and bonding for all furnace installations.
Connecting Gas Lines and Electrical Wiring
With the gas lines inspected and the electrical wiring prepped, it’s time to make the final connections to ensure your furnace operates smoothly. These steps require precision – rushing can lead to serious issues like gas leaks or electrical malfunctions. Samantha Reyes emphasizes the importance of understanding each step:
If you can’t explain why each step exists, pause and reassess. That’s how professionals stay safe.
Before starting, always turn off the gas supply and the circuit breaker. Begin with the gas line connections, followed by the electrical components.
Secure Gas Line Connections
Start by installing a manual shutoff valve within 6 feet of the furnace. Make sure it’s accessible and located in the same room. Then, add a vertical sediment trap (or drip leg) just downstream of the shutoff valve but before the furnace inlet. This trap is essential for catching debris and moisture, keeping them out of the burners.
When attaching the gas line to the furnace, use yellow Teflon tape or gas-rated pipe dope – never standard white plumbing tape. Use two wrenches for tightening: one to hold the furnace gas valve steady and another to tighten the supply line. This prevents unnecessary stress on the valve, which could damage internal components.
Once all connections are secure, perform a leak test. Apply a soapy water solution or use an electronic combustible gas detector at each joint. If you see bubbles forming, shut off the gas immediately and re-seat the fittings.
Wire Electrical Components
With the gas lines set, turn your attention to the electrical connections. Route the high-voltage wires (black and white) to the furnace junction box. Secure them with wire nuts, ensuring black connects to black and white to white. Keep these wires separate from the low-voltage thermostat wires to avoid interference and code violations.
Next, connect the thermostat wires to the appropriate terminals on the control board. Use the following labels as a guide:
- R: Power
- C: Common
- W: Heating
- Y: Cooling
- G: Fan
Finally, ensure the ground wire (green or bare copper) is securely attached to both the furnace chassis and your home’s grounding system.
Integrate Systems for Proper Operation
With both gas and electrical connections complete, check that the systems work together seamlessly. Ensure proper communication between the thermostat and the control board. Restore power and confirm there are no errors in the thermostat-control board link. Also, double-check that the manual gas shutoff valve is accessible and clearly labeled for future use.
Your furnace is now ready for the next step: startup testing. Keep in mind that most residential furnaces lock out after three failed ignition attempts, so getting these connections right the first time helps avoid unnecessary troubleshooting later.
Testing and Final Inspection
Final testing ensures the gas and electrical systems work safely and efficiently. The process involves checking for gas leaks, verifying electrical connections, and performing a complete system startup.
Check for Gas Leaks
Start by pressurizing the system – turn on the gas supply but keep the furnace off. Use a leak detector, such as a soap-and-water solution or a UL-listed spray, on all connections to detect leaks. If you see bubbling, turn off the gas and adjust the fittings before testing again. Never use an open flame or rely solely on smell to identify leaks. After the furnace completes its first heat cycle, repeat the leak test for extra assurance.
Verify Electrical Continuity
Before working on any components, confirm there’s no voltage on the furnace cabinet and that grounding is secure. Check the electrical polarity – incorrect polarity can cause ignition failures or flame-sensing problems. Inspect all wiring to ensure connections are tight. Wire nuts should be secure on high-voltage connections, and terminals must be firmly seated on the control board. Once power is restored, watch the control board LED for status indicators or fault codes. To test the blower, set your thermostat to "Fan ON" and confirm the low-voltage control circuit is operating as expected before proceeding to heat settings. Once all electrical parameters are verified, move on to system startup.
Perform System Startup
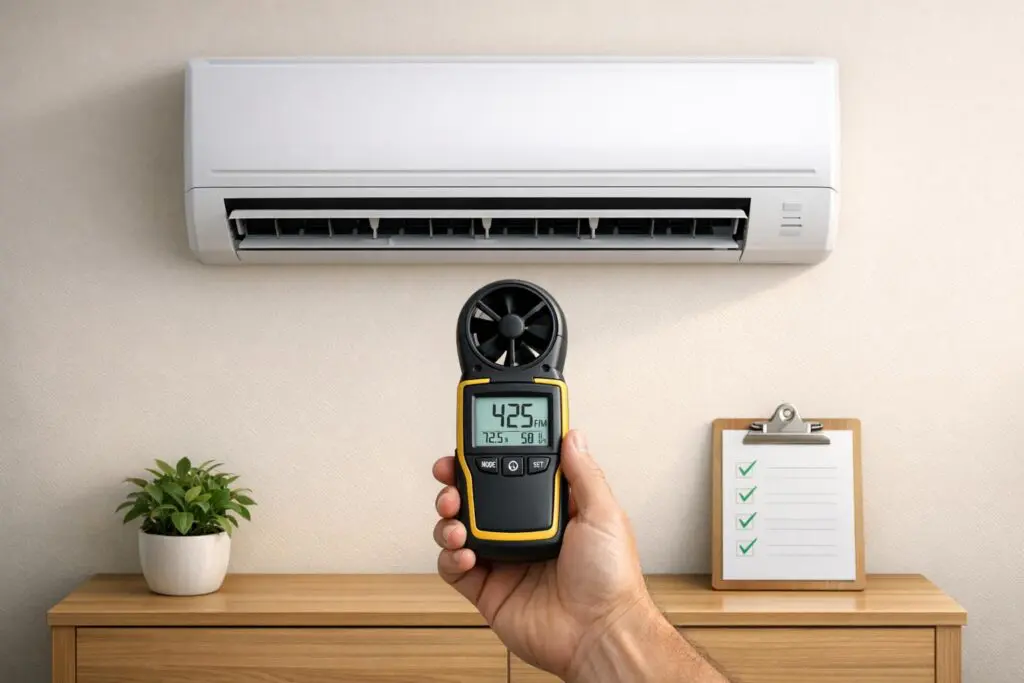
After completing the gas and electrical checks, set the thermostat to call for heat and observe the system’s startup sequence. You should see the inducer fan start, the pressure switch close, the igniter heat up, the gas valve open, and the burners ignite within 4–6 seconds. Look for a steady blue flame with even cones – yellow tips or delayed ignition indicate issues that need attention. Measure the temperature difference between the return and supply air, referred to as "temperature rise." This value should match the range listed on the furnace’s rating plate, typically 35–65°F. For high-efficiency systems, check that the condensate drain is flowing freely without any gurgling sounds.
As Tony Marino, an experienced installer, puts it:
"If you don’t commission it, you didn’t install it."
Finally, record key measurements like gas pressure, temperature rise, and any system adjustments. These readings are essential for warranty coverage and future service needs.
When to Contact Eco Temp HVAC Professionals
Installing a furnace involves more than just following instructions – it requires precision and attention to safety. While basic checks can confirm if things are working, some situations demand the expertise of a professional. That’s where trained technicians step in to handle challenges beyond the average homeowner’s skill set.
Benefits of Certified Technicians
If you smell gas, notice sparking wires, or feel unsure about any part of the installation process, it’s time to call in a professional. As Mark Callahan from HVAC Guide puts it:
"There’s a fine line between a capable DIY effort and a hazardous mistake."
Certified technicians have training that goes far beyond basic installation knowledge. They use advanced tools like manometers to ensure the inlet gas pressure (2–5 psi) is properly reduced to 0.5 psi at the appliance. They also verify that flame signals exceed 1.5 µA and that the inducer draft falls within 0.10–0.50 in. w.c. – measurements that most homeowners aren’t equipped to handle. Professional installation also protects manufacturer warranties, which DIY work often voids.
For homes with older systems – like aluminum wiring, outdated gas lines, or electrical panels rated under 200 amps – licensed technicians are essential to ensure everything meets current codes. Electric furnaces, for instance, can draw between 60 and 80 amps, which may require upgrading your panel. These upgrades can cost anywhere from $1,500 to $3,000. Professionals provide the oversight needed to address both routine and unexpected issues.
24/7 Availability for Service Calls
Heating problems don’t stick to a schedule. If your furnace displays error codes, frequently trips breakers, or has gas pressure issues, you’ll need help right away. That’s why 24/7 professional support is crucial. Eco Temp HVAC offers round-the-clock service in Chicago, St. Charles, Bartlett, Lemont, Downers Grove, and Palatine, ensuring quick responses during emergencies – especially in the middle of winter when your home’s safety and comfort are on the line.
Samantha Reyes highlights why quick action matters:
"Calling a pro at this stage isn’t quitting – it’s protecting your home and family."
This level of availability is paired with industry-recognized certifications for added reliability.
Specialized Certifications and Warranties
Eco Temp HVAC holds key certifications, including the Mitsubishi Diamond Elite Contractor designation. This certification provides a 12-year warranty on Mitsubishi products, which is much longer than standard warranties. Additionally, their Navien Service Specialist and American Standard Customer Care Dealer certifications ensure technicians follow manufacturer guidelines for installation. These certifications guarantee critical safety steps are taken, such as installing sediment traps to protect gas valves and ensuring proper grounding to prevent electrical hazards and maintain control board functionality.
In many areas, gas and high-voltage electrical work must be performed by licensed professionals to meet inspection requirements and avoid potential fines. With professionals like Eco Temp HVAC, you can trust that your system will be installed safely and up to code.
Conclusion
Proper furnace installation is all about following the right steps to ensure safety and efficiency. Start by turning off the main gas valve and circuit breaker, and always confirm the system is de-energized with a multimeter before beginning any work. When connecting gas lines, use only yellow gas-rated Teflon tape or approved pipe dope. After assembly, check every joint for leaks using a soap-and-water solution or a UL-listed leak detector – never an open flame.
Key safety measures include installing a manual gas shutoff valve within 6 feet of the furnace, adding a sediment trap to protect the gas valve, and ensuring the electrical circuit is dedicated and properly grounded to avoid shocks or fires. Don’t forget to place carbon monoxide detectors near bedrooms and on every level the furnace serves. These steps ensure the gas and electrical systems work together safely and meet code requirements.
If you encounter gas odors, tripping breakers, or error codes after installation, stop immediately and contact a licensed technician. As Mike Sanders from HVAC Guide wisely points out:
The difference between a safe home and a risky one isn’t luck – it’s habits.
Finally, remember that some areas require licensed professionals for gas and high-voltage work. Always check your local codes before starting the job.
FAQs
Do I need a permit to install a furnace?
Installing a furnace typically requires a permit, especially if the work involves gas lines or electrical wiring. Local building codes usually demand permits for tasks related to gas or high-voltage systems. Skipping this step can lead to fines, voided warranties, or even safety hazards. To avoid these issues, make sure to check with your local building department and confirm the requirements before beginning the installation process.
How do I know if my gas line is sized correctly?
To make sure your gas line is sized properly, confirm it aligns with your furnace’s specifications and meets local code requirements. Correct sizing is crucial to avoid issues like flame instability or pressure drops. Stick to approved materials such as black iron pipe or CSST, and maintain appropriate pressure levels – typically between 2 and 5 psi for natural gas. Additionally, install a shut-off valve within 6 feet of the furnace for safety. Before completing the installation, always perform a leak test.
Should I hire a pro for gas or electrical hookups?
It’s always a smart move to hire a licensed professional when dealing with gas or electrical hookups during a furnace installation. Working with gas lines can be dangerous, with risks like leaks, explosions, or carbon monoxide exposure. Similarly, electrical connections involve high voltage and must align with local building codes. Attempting these tasks on your own can lead to serious safety issues, code violations, or even void your warranty. Bringing in a qualified expert ensures the job is done safely and up to code.