Smart thermostats can save you money, but only if they’re compatible with your HVAC system. For heat pumps, this means handling reversing valves, auxiliary heat, and defrost cycles. Furnaces, on the other hand, require compatibility with staging configurations and often need a C-wire for power.
Here’s what you need to know:
- Heat Pumps: Require advanced thermostats to manage reversing valves, auxiliary heat, and defrost cycles. Incompatible models can lead to higher energy costs.
- Furnaces: Easier to pair with smart thermostats but still need staging support and a C-wire for modern features.
- Dual-Fuel Systems: These combine heat pumps and furnaces, needing thermostats capable of managing balance points for efficient operation.
- Wiring Matters: Check for essential terminals like R, C, Y, W, and O/B. Missing a C-wire? Many thermostats include adapters or power extenders.
Key takeaway: Match your thermostat to your system’s wiring and features to avoid inefficiency or damage. Professional installation is often necessary for complex setups like dual-fuel systems.
Heat Pump Changeover adjustments on Ecobee thermostat
sbb-itb-b5c10b1
How Smart Thermostats Work and Wiring Basics
As Jake Emerson from The Furnace Outlet explains, "A smart thermostat is a compact computer that learns your schedule and adjusts temperatures accordingly."
Smart thermostats work by using algorithms and geofencing to adapt to your daily habits and real-time conditions. Geofencing, for instance, allows the thermostat to detect when you’re approaching home and adjust the temperature beforehand, ensuring comfort while avoiding wasted energy when no one is home. These features make understanding the wiring basics even more important.
In addition to scheduling, these devices rely on environmental sensors to monitor room occupancy and adjust settings as needed. For homes with modern multi-stage heat pumps or furnaces, smart thermostats can manage different operational stages. This allows for longer, low-speed cycles, which help control humidity while reducing the energy spikes caused by frequent starts and stops. Some advanced models even perform "load shifting", which means they pre-heat or pre-cool your home when solar energy production is high or electricity rates are lower.
Low-Voltage vs. High-Voltage Systems
To make the most of a smart thermostat, you’ll need to understand your HVAC system’s wiring setup. Most gas furnaces, electric furnaces, and heat pumps in the U.S. operate on 24V low-voltage systems. These systems are easily identified by their multicolored wires (commonly labeled R, C, W, Y, G) connected to a terminal strip on the HVAC control board. Popular smart thermostats like Nest and Ecobee are designed to work seamlessly with these systems.
On the other hand, high-voltage systems (120V or 240V) are typically used for electric baseboard or radiant heaters. These systems feature thicker wires secured with wire nuts and require specialized thermostats designed for line-voltage systems. Connecting a standard 24V smart thermostat to a high-voltage system can cause serious and irreversible damage. Before purchasing a smart thermostat, check your wiring: multicolored wires indicate a low-voltage system, while thicker, house-style wiring means you’ll need a line-voltage-compatible model.
The C-Wire and Power Requirements
The C-wire, or common wire, plays a critical role in powering smart thermostats. It delivers a continuous 24V current, which is necessary to support features like Wi-Fi connectivity, touchscreens, and advanced sensors. However, older HVAC systems often lack a dedicated C-wire, which can prevent the thermostat from functioning properly. To check for a C-wire, turn off the power at the breaker, remove the thermostat cover, and look for a wire connected to the "C" terminal. If none is visible, check behind the wall plate for any unused wires.
If your home doesn’t have a C-wire, many smart thermostats include a Power Extender Kit (PEK) or a C-wire adapter that can be installed at the furnace or air handler. It’s best to avoid thermostats that rely on "power stealing", as this can cause erratic behavior and potential system issues. Additionally, if you have a heat pump system, make sure the thermostat supports O/B terminals for reversing valve control. Without proper configuration, your system could mistakenly heat during summer or cool during winter. Ensuring proper wiring not only keeps your thermostat powered but also guarantees smooth operation with your HVAC system’s specific needs.
Heat Pump and Smart Thermostat Compatibility
Heat pumps require more sophisticated controls than traditional furnaces. One critical feature is the thermostat’s ability to manage the reversing valve, which determines whether the system operates in heating or cooling mode. This valve is controlled via an O terminal (activated during cooling) or a B terminal (activated during heating), depending on the brand. For instance, Rheem, Ruud, Lennox, and Trane use the "O" terminal, while Carrier, Bryant, and Payne rely on the "B" terminal. Without proper control over the reversing valve, your system might heat when it’s supposed to cool – or the other way around.
Another key function is auxiliary heat management. When outdoor temperatures fall below the "balance point" – usually between 30°F and 40°F – the heat pump alone may struggle to maintain indoor temperatures. In these cases, the thermostat activates backup electric resistance heat through the Aux/E terminal. However, this backup heat is costly, running 2 to 3 times more expensive than the heat pump itself. An incompatible thermostat could lead to inefficient use of auxiliary heat, potentially increasing heating costs by $200–$400 annually. To avoid this, it’s essential to configure the auxiliary heat lockout to around 30°F–32°F.
Smart thermostats must also work seamlessly with defrost cycles. During these cycles, the heat pump temporarily switches to cooling mode to melt ice on the outdoor coils. A compatible thermostat ensures that auxiliary heat kicks in during this process to keep indoor air warm. Additionally, the emergency heat (EM HEAT) mode allows the system to bypass the heat pump entirely and rely solely on backup heat. While this mode is useful during heat pump failures, it’s expensive – costing $0.40 to $0.60 per hour compared to the $0.12 to $0.15 per hour for standard heat pump operation. These factors highlight the importance of checking your system’s wiring or scheduling a smart thermostat installation to ensure critical control terminals are properly configured.
Auxiliary Heat and Reversing Valve Control
Before investing in a smart thermostat, inspect your current wiring for essential terminals like Y (compressor), O/B (reversing valve), and Aux/E (auxiliary heat). These terminals are non-negotiable for heat pump compatibility. Additionally, the thermostat should include algorithms that decide when to use the heat pump versus auxiliary heat, based on factors like indoor demand, outdoor temperature, and efficiency goals. Some advanced models feature "Adaptive Recovery", which gradually reaches the desired temperature without triggering costly auxiliary heat. This feature alone can save hundreds of dollars annually.
To maximize efficiency, avoid setting your thermostat back more than 2°F to 4°F overnight. Large temperature setbacks can cause the system to rely on auxiliary heat during the morning warm-up, driving up costs. Instead, use smart thermostat features like geofencing and scheduling to make gradual adjustments, keeping the heat pump efficient without overusing backup heat. Beyond wiring considerations, understanding whether your system is single-stage or multi-stage is equally important.
Single-Stage vs. Multi-Stage Heat Pumps
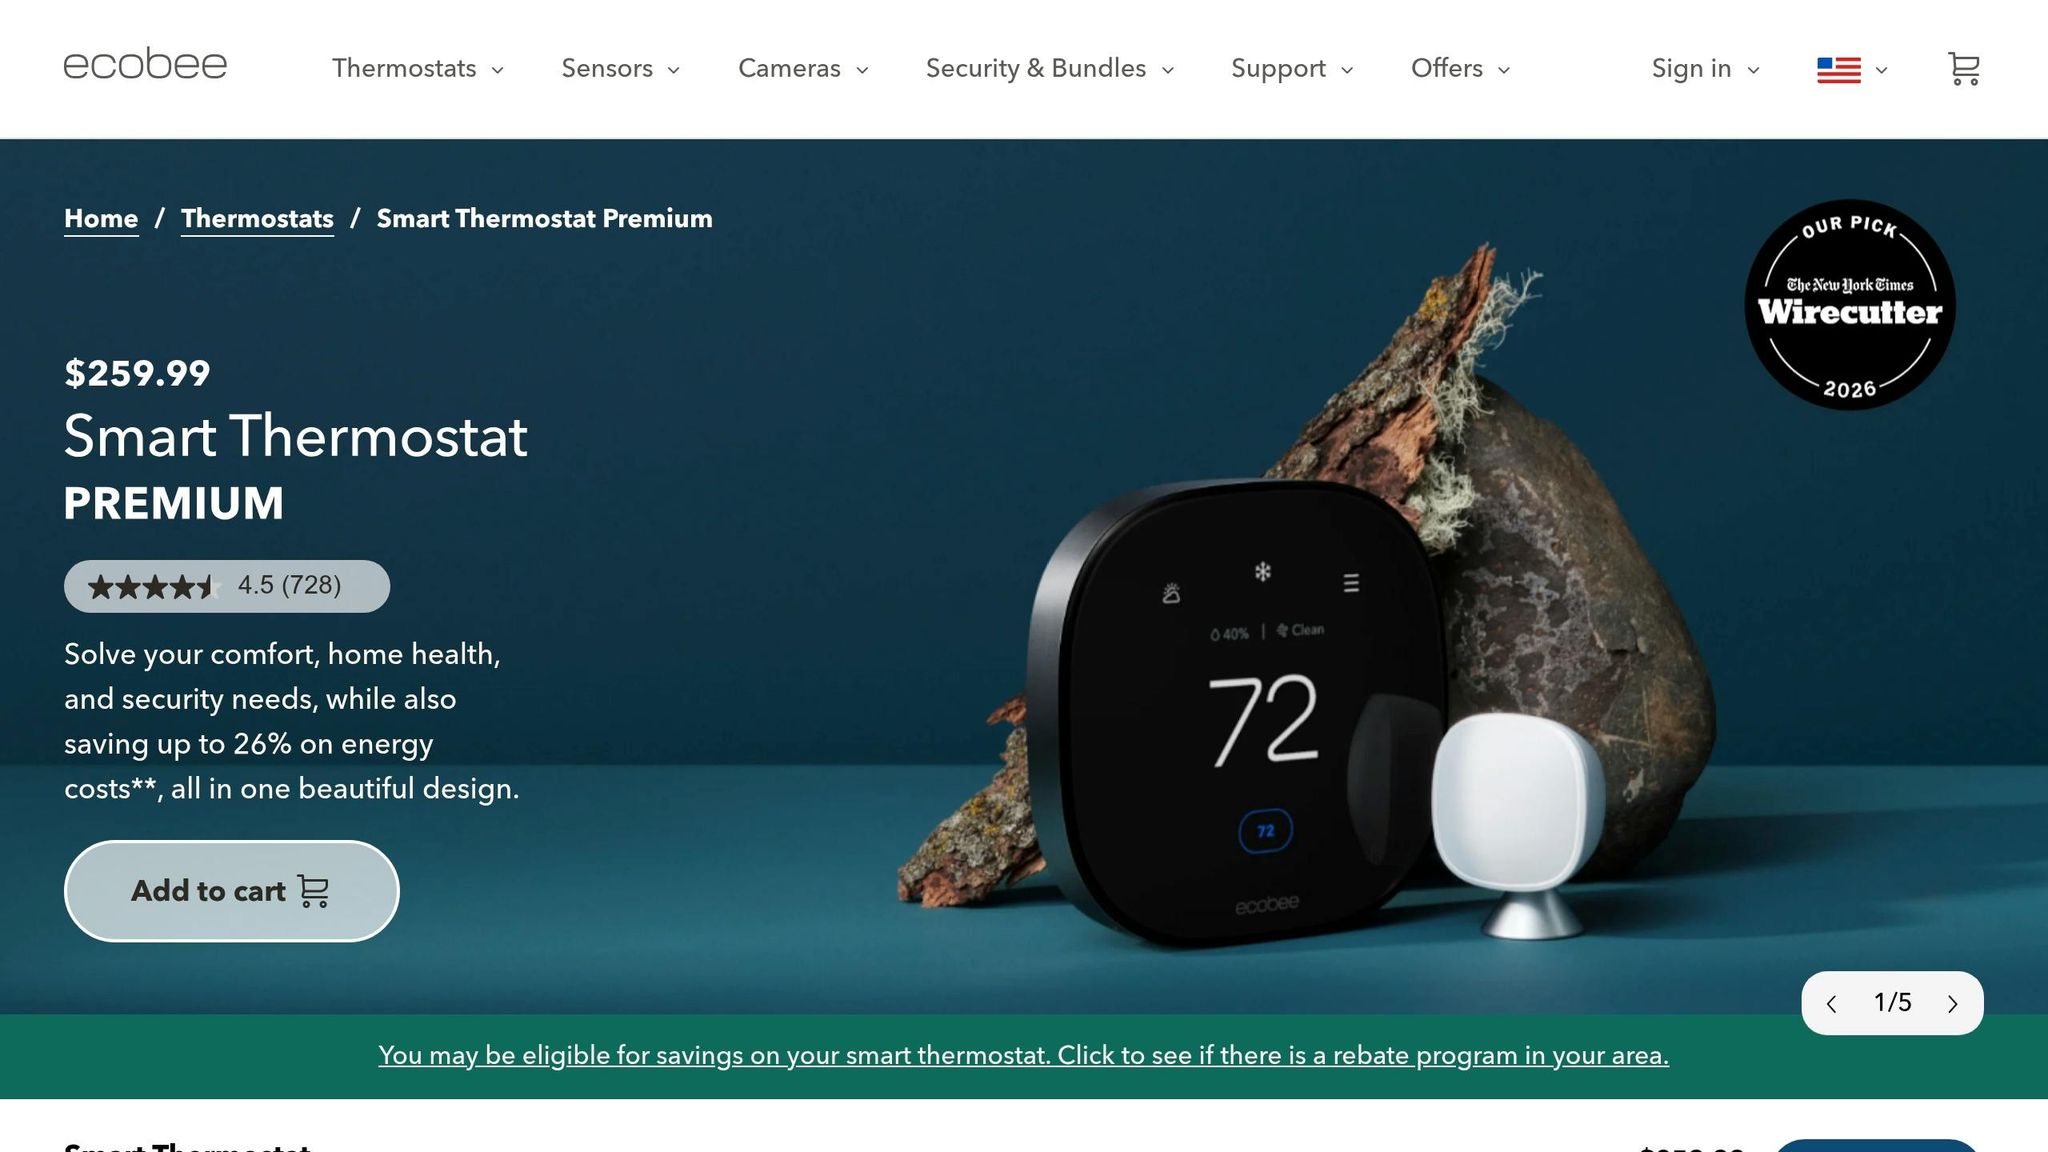
Single-stage heat pumps operate in simple on/off cycles and require standard terminals such as R, C, Y1, O/B, G, and Aux/E. Popular smart thermostats like the Ecobee Premium ($199) and Nest Learning Thermostat ($279) are compatible with these systems. Multi-stage systems, however, require additional terminals – such as Y2 for a second compressor stage and W2 for extra heating stages. To determine compatibility, check the wiring behind your thermostat cover.
High-end variable-speed heat pumps, which can adjust capacity from 20% to 120%, require thermostats with advanced staging logic to fully utilize their capabilities. Using a basic thermostat with a premium 21 SEER2 variable-speed heat pump can reduce its efficiency to that of a 16–18 SEER2 unit. In such cases, manufacturer-specific thermostats like the Carrier Infinity ($859) or Lennox iComfort ($786) are often necessary to optimize performance.
"If you’re not integrating smart controls with your 3-ton heat pump, you’re using 50% of the machine you paid for." – Jake Lawson
Furnace and Smart Thermostat Compatibility
Matching a furnace with the right smart thermostat can improve energy efficiency and ensure consistent performance. While furnaces are often easier to pair with smart thermostats than heat pumps, several factors still influence compatibility. Most modern gas and central electric furnaces operate on 24V low-voltage systems, making them compatible with leading smart thermostat brands like Nest, ecobee, and Honeywell. However, it’s essential to consider your furnace’s age, voltage, and staging capabilities before making a decision.
One critical aspect of compatibility is the presence of a C-wire. This wire supplies continuous 24V power to support Wi-Fi and touchscreen features. Older furnaces without a dedicated C-wire may require additional hardware, like a power-extender kit or a 24V transformer, to ensure proper operation. This highlights the importance of understanding your system’s age and wiring setup when selecting a thermostat.
Modern vs. Older Furnace Systems
Most forced-air furnaces built after 1975 use standard 24V controls, making them compatible with smart thermostats. If your furnace is less than 10–15 years old, it’s likely to work with major smart thermostat brands. On the other hand, older systems, such as millivolt or gravity furnaces, generate very low power and require adapters to function with modern thermostats. A relay adapter can convert these systems to 24V at a relatively low cost.
High-voltage systems, like electric baseboard heaters (120V or 240V), are an exception. These require specialized line-voltage thermostats rather than standard smart thermostats. To avoid compatibility issues, confirm that your wiring follows standard low-voltage configurations.
"If you have a single-stage furnace and a clear C-wire, a homeowner with a screwdriver can swap thermostats in under 30 minutes." – Jake Emerson, HVAC Expert
Beyond wiring, the operational stage of your furnace also plays a role in thermostat compatibility.
Single-Stage vs. Multi-Stage Furnaces
Single-stage furnaces operate in basic on/off cycles and need only a few terminals: R (power), W (heat), C (common), and optionally G (fan control). These systems are straightforward to install and work with entry-level smart thermostats. Two-stage furnaces, however, require thermostats that support multi-stage operation, which involves terminals W1 and W2. Without this support, a two-stage furnace might default to single-stage operation, reducing its efficiency.
Modulating furnaces are more complex. These advanced systems use proprietary communication protocols instead of standard 24V wiring. For these, you’ll need a manufacturer-specific controller from brands like Trane, Carrier, or Lennox. Given the complexity, professional installation is highly recommended to avoid potential damage or performance issues.
Heat Pumps vs. Furnaces: Compatibility Differences
Heat Pump vs Furnace Smart Thermostat Compatibility Comparison Chart
When it comes to compatibility, heat pumps and furnaces have some key differences – especially in how they interact with thermostats. While both can pair with smart thermostats, their wiring and control needs are quite distinct. Heat pumps, for instance, manage both heating and cooling, which includes tasks like switching between modes and activating auxiliary heat. This makes their thermostat setup more intricate compared to furnaces, which focus solely on heating.
Furnaces rely on simpler wiring, typically centered on the W wire. Heat pumps, on the other hand, require multiple connections, including Y, O/B, and Aux/E terminals. This means that thermostats for heat pumps need extra terminals and more advanced programming to handle these functions.
Temperature setback strategies also differ significantly. Gas furnaces can easily recover from large overnight setbacks of 5–10°F because they generate heat quickly. Heat pumps, however, are more efficient with smaller setbacks of just 2–4°F. Larger drops can force them to use auxiliary heat, which is much more expensive – costing 2 to 3 times more than normal operation.
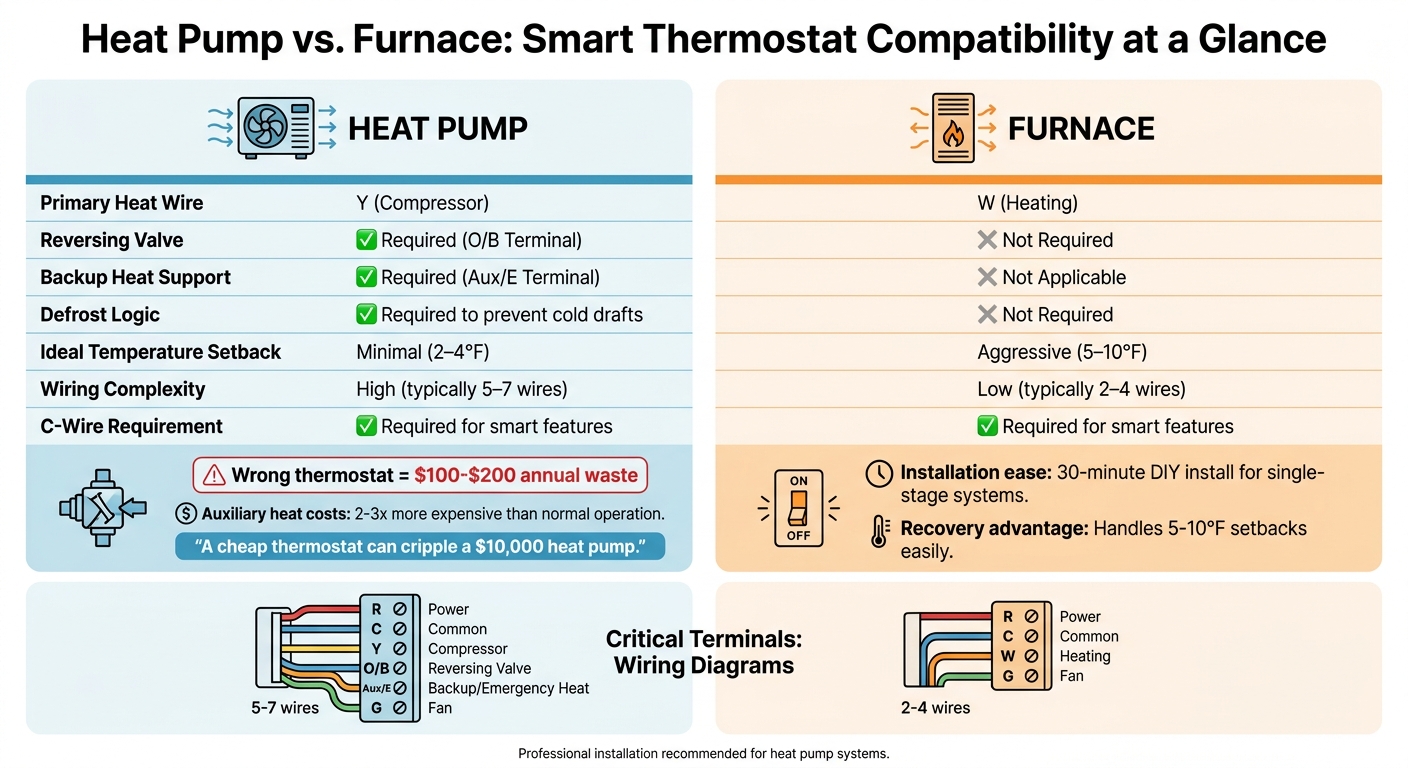
"A cheap thermostat can cripple a $10,000 heat pump." – Jake Lawson, The Furnace Outlet
Choosing the wrong thermostat for a heat pump can lead to wasted energy, costing homeowners $100–$200 annually by failing to optimize advanced staging. Furnaces are less sensitive in this regard; even a basic smart thermostat can work effectively with most single-stage or two-stage furnace systems.
The table below outlines the major compatibility differences between heat pumps and furnaces:
Comparison Table: Compatibility Factors
| Feature | Heat Pump | Furnace |
|---|---|---|
| Primary Heat Wire | Y (Compressor) | W (Heating) |
| Reversing Valve | Required (O/B Terminal) | Not Required |
| Backup Heat Support | Required (Aux/E Terminal) | Not Applicable |
| Defrost Logic | Required to prevent cold drafts | Not Required |
| Ideal Temperature Setback | Minimal (2–4°F) | Aggressive (5–10°F) |
| Wiring Complexity | High (typically 5–7 wires) | Low (typically 2–4 wires) |
| C-Wire Requirement | Required for smart features | Required for smart features |
Dual-Fuel Systems and Complex Configurations
Dual-fuel systems, often referred to as hybrid systems, combine the efficiency of a heat pump with the reliability of a gas furnace. This pairing allows for efficient heating throughout most of the season, with the furnace stepping in during extreme cold when the heat pump becomes less effective. In fact, this type of setup can cut heating energy use by over 30% in many regions.
The thermostat plays a critical role in managing this system by determining the "balance point" – the temperature at which the system switches from the heat pump to the furnace. For high-efficiency heat pumps, this typically occurs between 25°F and 35°F. Some advanced thermostats go a step further by calculating an "economic balance point", which factors in the cost per BTU of electricity versus natural gas to decide the most cost-effective fuel source automatically. In climate zone 5, for example, only 10% to 20% of heating hours typically fall below 20°F, meaning the heat pump can handle most of the season.
"Dual fuel is the pragmatic answer for climate zone 5 and 6 homeowners who want heat pump savings without betting everything on one technology." – Michael Haines, AC Direct
However, these systems can be technically demanding. Variable-speed systems may require specific wiring setups, with some high-end models relying on proprietary four-wire data buses instead of standard 24V wiring. This can make standard smart thermostats incompatible without professional rewiring or manufacturer-specific controls. For multi-zone setups, the thermostat must also manage dampers, airflow, and static pressure, adding another layer of complexity.
Smart Thermostat Setup for Dual-Fuel Systems
To ensure your dual-fuel system runs smoothly, follow these smart thermostat setup guidelines:
- Professional installation is a must. Improper configuration could cause the heat pump and furnace to run simultaneously, potentially damaging the compressor due to high pressure.
- Disable electric resistance heat strips and set the gas furnace as the sole backup heat source. Adding outdoor temperature sensors (wired or wireless) helps the system make accurate fuel-switching decisions based on real-time weather conditions.
- Check furnace blower performance. It must meet airflow standards, and all system components should be AHRI-matched to maintain warranty eligibility.
"Multi-stage or zoned systems require a technician with a manometer and a solid meter to confirm staging, airflow, and balance points." – Jake Emerson, HVAC Specialist
Set the initial switchover temperature at 30°F, then adjust it by ±5°F after monitoring utility usage for a month. Dual-fuel system installations, including equipment and labor, usually cost between $8,000 and $15,000+. For smart thermostat compatibility, models like the Ecobee Premium, Honeywell T10, or manufacturer-specific options (e.g., Carrier Infinity or Trane ComfortLink) are well-suited for dual-fuel setups. Professional thermostat installation generally costs $125–$200. Homeowners seeking HVAC services in Skokie, IL can contact local experts for precise calibration.
How to Check Smart Thermostat Compatibility
Before investing $120–$270 in a smart thermostat, it’s important to confirm if your HVAC system is compatible. While most modern furnaces and heat pumps work with popular smart thermostats, there are a few critical steps you’ll need to follow to ensure everything checks out.
Inspecting Your Current Thermostat Wiring
Start by turning off the HVAC power at the breaker. Then, remove the thermostat faceplate to reveal the terminal block and take a photo of the wiring for reference.
Pay close attention to the terminal labels – not the wire colors, as these can vary depending on the installer. Look for key labels such as R (24V power), C (common/ground), W (heating), Y (cooling), G (fan), and O/B (heat pump reversing valve).
One of the most important wires to look for is the C-wire. If it’s missing, check for an unused wire tucked inside the cable. If your system doesn’t have a C-wire, you can either install an add-a-wire kit (usually $20–$30) or opt for an Ecobee thermostat with a built-in power extender.
For heat pump systems, ensure there’s an O/B terminal wire. This wire controls the reversing valve, which allows the heat pump to switch between heating and cooling. If you have a dual-fuel system, you’ll also need an O/B connection and a second-stage (W2) wire to manage the interaction between the heat pump and furnace.
Once you’ve identified your wiring setup, use the thermostat manufacturer’s tools to confirm compatibility.
Using Manufacturer Compatibility Tools
After documenting your wiring, check compatibility online. Many brands, like Google Nest, Ecobee, and Honeywell, offer free compatibility tools. Simply enter your terminal labels (e.g., R, C, Y, W), and the tool will let you know which thermostat models work with your system. These checks are quick, taking only a few minutes.
Keep in mind, these tools don’t support certain systems, such as high-voltage (110V/240V) baseboard heaters, millivolt systems (like those used in some gas fireplaces), or ductless mini-splits. These setups typically require specialized controllers. Additionally, systems with proprietary communication protocols – such as Carrier Infinity or Trane ComfortLink – usually need thermostats made by the same manufacturer.
If you’re still unsure after using the compatibility tools, it’s time to consult a professional.
When to Consult an HVAC Professional
Taking these steps will help ensure your smart thermostat integrates seamlessly with your HVAC system, optimizing its performance. However, there are situations where professional assistance is the best route.
For example, two-stage or communicating systems often require adjustments to hidden jumpers or dip switches on the control board. Without these adjustments, you could face performance issues or even void your warranty. Dual-fuel systems are another area where expertise is crucial, as they require precise balance point settings to coordinate the heat pump and furnace effectively.
"A cheap thermostat can cripple a $10,000 heat pump." – Jake Lawson, The Furnace Outlet
If your system lacks a C-wire and you’d prefer not to use a power extender kit, an HVAC technician can install a new 18/5 thermostat cable. For homeowners in the Chicagoland area, Eco Temp HVAC (https://ecotemphvac.com) offers professional installation services. Their certified technicians handle everything from basic single-stage systems to complex dual-fuel setups, ensuring your thermostat is installed correctly without compromising efficiency or warranty coverage.
Before reaching out to a professional, review the photo of your wiring terminal block and note which wires are connected to which labels. This will help the technician quickly diagnose any compatibility issues and suggest the best solution for your system.
Conclusion
After diving into compatibility and configuration details, the final piece of the puzzle is understanding how these factors impact your system’s overall performance. Picking the right smart thermostat means knowing your system’s wiring and control needs. For furnaces, this typically involves simple staging controls (like W1 and W2). On the other hand, heat pumps require more advanced features, such as managing the reversing valve, handling defrost cycles, and setting up auxiliary heat lockouts to avoid unnecessary energy costs.
Getting the integration right is non-negotiable. Skipping this step can lead to voided warranties, higher energy bills, and underperforming systems – an expensive mistake for equipment that can cost over $10,000. If you’re working with dual-fuel systems, multi-stage setups, or inverter-driven heat pumps, professional installation is a must. These systems often involve hidden dip switches, proprietary communication protocols, and precise balance point settings that demand a level of expertise far beyond a DIY project.
For those in the Chicagoland area, Eco Temp HVAC (https://ecotemphvac.com) offers professional installation services to ensure your smart thermostat is set up correctly. Their certified technicians handle everything from basic single-stage systems to intricate dual-fuel configurations. Whether you’re upgrading to a heat pump or adding smart controls to your furnace, working with experts ensures your system delivers the energy efficiency, comfort, and performance you expect.
FAQs
How do I tell if my system is 24V or line-voltage?
To determine whether your system is a 24V or line-voltage setup, take a close look at the thermostat wiring.
- 24V systems, typically found in furnaces and heat pumps, use thin wires that connect to labeled terminals like R, C, or W. These systems often include a C-wire to supply power.
- Line-voltage systems (120V or 240V) rely on thicker wires or connect directly to high-voltage terminals.
If you’re unsure, check your system’s manual for guidance or consult a professional to avoid any mistakes.
What can I do if my thermostat wiring doesn’t have a C-wire?
If your thermostat wiring doesn’t include a C-wire, don’t worry – there are smart thermostats designed to work around this issue. Many models use power-stealing technology or come with adapters like Power Extender Kits. These options provide continuous power to the thermostat, making them a great solution for older homes that lack C-wire compatibility.
Do I need a special thermostat for a dual-fuel system?
A dual-fuel system needs a smart thermostat capable of managing the transition between an electric heat pump and a gas furnace. These thermostats automatically determine which fuel source to use based on outdoor temperatures, ensuring the system runs efficiently and saves energy. Without this functionality, the system won’t perform as intended or deliver its full potential.