Upgrading to a smart thermostat can save energy, lower utility bills, and offer better control over your home’s temperature. This guide walks you through the entire installation process, ensuring your device works seamlessly with your HVAC system. Here’s what you’ll learn:
- Preparation: Gather tools like screwdrivers, a level, wire labels, and a voltage tester. Confirm compatibility with your HVAC system, especially the presence of a C-wire for power.
- Safety First: Turn off power at the breaker and double-check with a circuit tester before handling wires.
- Old Thermostat Removal: Document and label all wires, carefully disconnect them, and prepare the wall for the new device.
- New Installation: Mount the baseplate, connect wires to the correct terminals, and attach the thermostat display.
- Setup and Testing: Power on the system, connect to Wi-Fi, and test heating, cooling, and fan functions.
Smart thermostats also enable remote control via apps, provide energy reports, and integrate with smart home systems. Follow these steps to enjoy better comfort and efficiency in your home.
How to Install ANY Smart Thermostat | No "C" Wire | Detailed Version
What You Need Before Starting
Before diving into installation, make sure you’ve gathered all the tools, checked safety measures, and confirmed your system’s compatibility. This preparation will make the process smoother and safer.
Required Tools and Materials
Here’s what you’ll need to get started:
- Screwdrivers: Both Phillips and flat-head screwdrivers are essential for removing your old thermostat and securing the new one.
- Level: Ensures the thermostat is mounted straight on the wall.
- Wire labels or tape: Use masking or painter’s tape to label wires and mark mounting holes.
- Drill and bits: Necessary for creating new mounting holes or using anchors if required.
- Non-contact circuit tester or voltage detector: Critical for verifying the power is off before handling wires.
- Wire stripper: Handy for cleaning up frayed or corroded wire ends.
- Pliers: Useful for dealing with stiff wires or removing older thermostats.
- Pencil: Marks the spots for mounting holes.
Your smart thermostat kit should include the thermostat, a baseplate or wall plate, mounting screws, wire labels, and possibly wall anchors. Many kits also include a trim kit to cover up any marks left by the old thermostat.
Don’t forget to download the manufacturer’s app ahead of time. You’ll also need your Wi-Fi network name and password to connect the thermostat to your home network. Check if the thermostat requires batteries – some models use disposable ones, while others are rechargeable.
If your system lacks a C-wire (common wire), which supplies continuous power to the thermostat, you might need a power accessory or C-wire adapter. Many manufacturers include this in the box, but it’s also available for purchase separately.
Once all tools are ready, focus on safety before moving forward.
Safety Steps
Electrical safety is non-negotiable when working with thermostat wiring. Start by locating your home’s electrical panel and flipping the circuit breaker for your HVAC system to the off position. The breaker is often labeled "furnace", "AC", or "HVAC." If the labels are unclear, you may need to test a few breakers to find the right one.
To double-check, return to your thermostat and use a non-contact circuit tester near the wire terminals. If it lights up or beeps, power is still active, and you’ll need to identify the correct breaker.
Some HVAC systems also have a power switch located near the furnace or air handler. Turning this off adds an extra layer of safety. If you’re unsure about handling electrical components, it’s a good idea to call a professional.
Once you’ve confirmed it’s safe to proceed, the next step is ensuring your system is compatible with the new thermostat.
Verifying System Compatibility
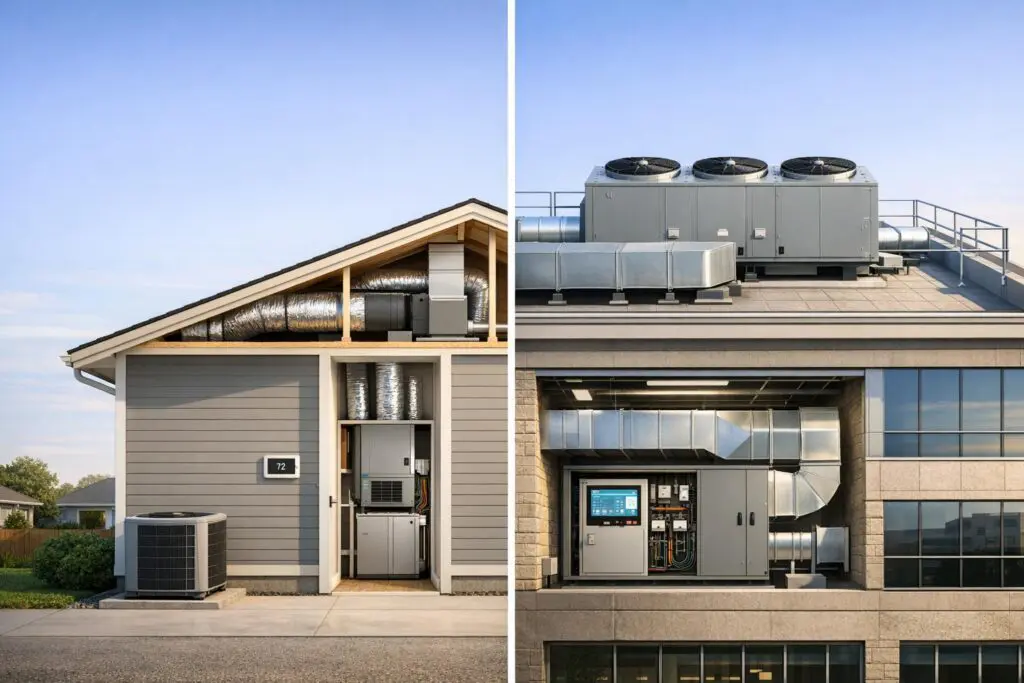
Not all smart thermostats work with every HVAC system, so confirming compatibility beforehand can save you from unnecessary frustration. Most thermostat manufacturers provide online compatibility tools where you can input details about your heating and cooling setup. These tools typically ask about your system type – whether it’s a furnace, air conditioner, heat pump, or ductless mini-split – and the number of wires connected to your current thermostat.
Pay special attention to the C-wire. This wire delivers a constant 24-volt power supply, which is crucial for maintaining your thermostat’s Wi-Fi connection and display without relying on batteries. Check your current thermostat’s wiring and see if a "C" labeled wire is present.
If your system doesn’t have a C-wire, you have a few options: use the power adapter included with your thermostat, install a C-wire adapter kit at your furnace, or hire an HVAC professional to run a new C-wire from your furnace to the thermostat location. More detailed troubleshooting for C-wire issues is covered later in this guide.
Before removing your old thermostat, document the existing wiring. Note the terminal labels and wire colors (e.g., R, W, Y, G, C), and consider writing this information down or taking a photo as a backup.
Retailers like Lowe’s often stock a variety of thermostats and can help you identify compatible options or additional tools you might need. They can also guide you toward the right C-wire adapters if necessary.
Once you’ve confirmed compatibility and taken all safety precautions, you’re ready to move on to removing the old thermostat.
Removing Your Old Thermostat
Once you’ve confirmed safety and checked that your system is compatible with the new thermostat, it’s time to remove the old one. This step requires a bit of care, especially when handling and documenting the wiring, to ensure a smooth transition to your new device.
Turning Off Power and Disconnecting
Since you’ve already turned off the power in the earlier safety steps, you can now remove the thermostat’s display or cover. Most models have a faceplate that either pulls straight off or requires pressing release tabs on the sides. Gently pull the cover off – no tools should be needed. If it feels stuck, check for small screws or tabs holding it in place.
Once the cover is off, you’ll see the baseplate attached to the wall with wires connecting to various terminals. Resist the urge to touch the wires just yet. Instead, take a moment to carefully document their current setup.
Keep in mind that a small amount of residual power might linger even after disconnecting, so handle everything cautiously and avoid touching exposed wire ends directly.
Labeling and Photographing Wires
Before disconnecting any wires, take several clear photos of the wiring setup from different angles. These photos should clearly show which colored wire is connected to which terminal (e.g., R, W, Y, G, C). These images will be your safety net in case labels fall off or you forget the wiring configuration.
After photographing, label each wire. Use wire labels or even a piece of masking tape to mark each wire with its corresponding terminal letter. For example, if a red wire is connected to the "R" terminal, wrap tape around it and write "R." Do this for every wire before loosening any screws.
Some wires may be bundled or tucked into the baseplate. Take your time separating them visually before labeling. If you notice a wire is frayed or corroded, make a note – you may need to trim and strip it before reconnecting it to your new thermostat.
When all wires are labeled and documented, use a screwdriver to loosen the terminal screws. Turn each screw counterclockwise until the wire is free, then carefully pull the wire away from its terminal. Keep the wires separated to avoid mixing up the labels.
A small but important tip: immediately wrap the disconnected wires around a pencil or pen to prevent them from slipping back into the wall.
Once all wires are disconnected and secured, remove the baseplate from the wall by unscrewing the mounting screws. Turn these screws counterclockwise, then gently lift the baseplate off and set it aside for reference during the installation of your new thermostat.
Preparing the Wall Surface
After removing the old thermostat, you might notice screw holes, paint discoloration, or minor scratches on the wall. Prepping the wall ensures your new thermostat mounts securely and looks neat.
Inspect the wall first. If there are old screw holes, you can either patch them with spackle and touch up with paint or cover them with the trim plate that often comes with smart thermostats. Trim plates are a quick and easy way to hide imperfections, especially if the old holes are near the new mounting area.
If you decide to patch the holes, apply a small amount of spackle with a putty knife. Let it dry according to the product’s instructions, then sand the area smooth. Touch up the wall with matching paint if needed to create a clean surface.
Some smart thermostats include a trim plate that can be painted to match your wall. If you’re painting the trim plate, do it before installation and ensure the paint doesn’t get on any parts that will touch the wiring, baseplate, or thermostat display. Let the paint dry completely before proceeding.
When you’re ready to install the new baseplate, start by attaching the trim plate (if you’re using one). Pull the labeled wires through the trim plate’s center opening, keeping the pencil in place to prevent the wires from slipping back into the wall.
Before drilling any new holes, check for hidden pipes or electrical wires behind the wall. A stud finder with wire detection can help, or you can simply avoid drilling deeper than an inch. Most drywall is about 1/2 inch thick, so shallow drilling minimizes the risk of hitting anything unexpected.
With the wall prepped and wires secured, you’re all set to mount the new baseplate.
Installing the Baseplate
With your wall prepped and wires ready, it’s time to mount the baseplate for your thermostat. Careful positioning and leveling are key to ensuring accurate temperature readings and a polished look.
Selecting the Best Location
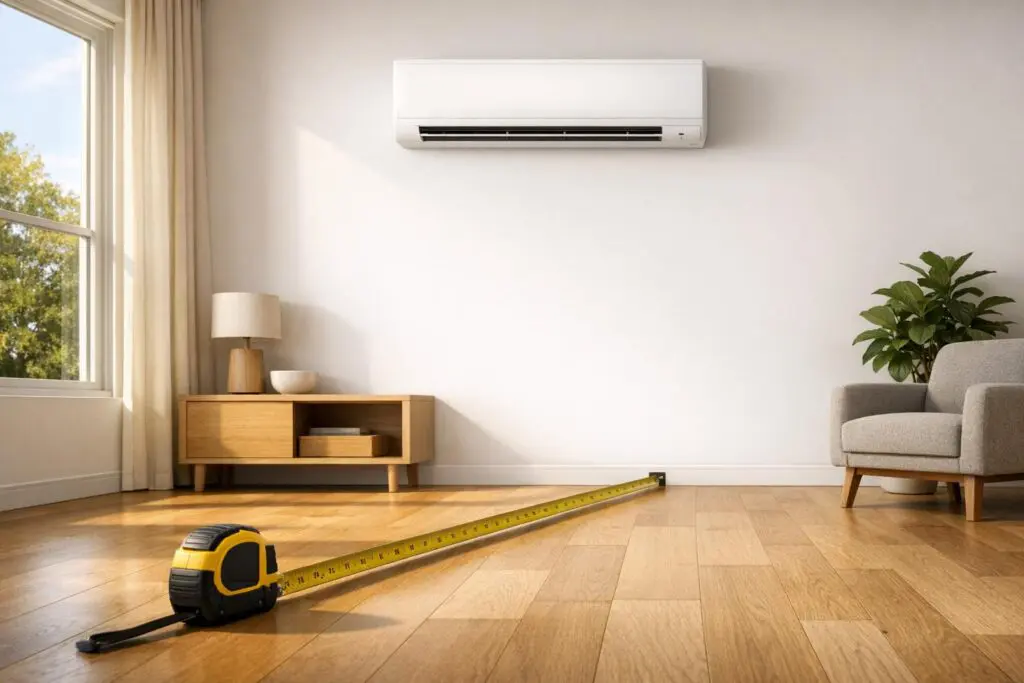
If you’re using the same spot as your old thermostat, you can skip ahead to the mounting steps. But if this is a new installation or you’re relocating the thermostat, take a moment to pick the best location. The thermostat works best on an interior wall, away from anything that might distort temperature readings. Avoid areas like exterior walls, spots exposed to sunlight, or near heat sources like fireplaces, radiators, or space heaters. Similarly, don’t place it near HVAC vents or return grilles, as these could cause the thermostat to sense conditioned air rather than the room’s actual temperature. A location with steady airflow and a strong Wi-Fi signal (if applicable) will help your thermostat perform reliably.
Once you’ve chosen the ideal spot, you’re ready to secure the baseplate.
Mounting the Baseplate
Start by holding the baseplate against the wall where it will be installed. Pull the labeled wires through the center opening. If your thermostat includes a trim plate, thread the wires through it before attaching the baseplate.
Many thermostat models come with a built-in bubble level, which makes alignment easier. If yours doesn’t have one, use a separate level or a smartphone app to ensure the baseplate is perfectly horizontal. A crooked baseplate can throw off internal sensors, leading to inaccurate temperature readings.
After confirming the baseplate is level, hold it firmly in place and mark the screw holes with a pencil. Check your thermostat’s manual for specific mounting instructions.
- If the new screw holes align with existing ones and you’re attaching to a stud, you can screw directly into the wall.
- For drywall or other non-stud surfaces, wall anchors are usually necessary. Most smart thermostats include screws and drywall plugs in the box.
Pre-drill holes to make installation easier. Use a 1/4‑inch bit for drywall or a 3/32‑inch (2.5 mm) bit for wood. For harder materials like brick, stone, or concrete, use a masonry drill bit and a hammer-action drill. Work slowly to avoid damaging the surface.
For drywall installations, gently tap wall anchors into place until they sit flush with the wall. These anchors will expand and grip the drywall once screws are inserted.
When attaching the baseplate, use a manual screwdriver instead of a power drill. Power tools can overtighten screws, potentially cracking the plastic or damaging internal components. Tighten each screw until the baseplate is snug, but stop before overtightening.
Once the baseplate is secure, tuck any extra wire into the wall opening. Leave just enough wire to comfortably reach the terminals – too much excess can make it difficult for the faceplate to sit flush.
Finally, give the baseplate a gentle tug to ensure it’s securely mounted. If it feels loose, check that the wall anchors are properly seated or that the screws are long enough to hold firmly. Once everything is solid, you’re ready to connect the wires and move on to completing your thermostat installation.
sbb-itb-b5c10b1
Connecting the Wires
With the baseplate securely mounted, it’s time to connect the wires. While this step requires careful attention to detail, it’s a straightforward process when you understand how the terminal labels correspond to each wire’s function. Take your time and double-check each connection before turning the power back on.
Attaching Wires to Terminals
Start by referring to the photos you took of your old thermostat’s wiring. These images will be your guide throughout the process. Most smart thermostats use standardized terminal labels, making it easier to match wires to their appropriate terminals.
Here’s a quick rundown of common terminal labels and their corresponding wire functions:
- R or Rh (red wire): Supplies 24-volt power from the heating system.
- Rc (red wire): Supplies 24-volt power from the cooling system.
- W or W1 (white wire): Controls the heating system.
- Y or Y1 (yellow wire): Controls the air conditioning compressor.
- G (green wire): Operates the fan.
- C (blue or black wire): Common wire, providing continuous power to the thermostat.
- O/B (orange or blue wire): Manages the reversing valve in heat pump systems.
Some systems feature a single red wire connected to R, Rh, or Rc, while others use two separate red wires. If you only have one red wire, most smart thermostats include a jumper wire to link the Rh and Rc terminals. Consult your thermostat’s installation manual for specific instructions on jumper placement.
Before connecting, straighten each wire and trim about 1/4 inch off any corroded ends to ensure a solid electrical connection. Insert each wire into the corresponding terminal on the baseplate. For push-in connectors, press the release button, insert the wire fully, and release the button to lock it in place. Gently tug each wire to confirm it’s secure.
For screw terminals, slightly loosen the screw, wrap the wire clockwise around the screw post, and tighten the screw until the wire is firmly held. Avoid overtightening, as this could damage the wire or terminal. Always match each wire to its labeled terminal based on the letter, not just the color. Your photos and wire labels are more reliable than relying on color coding alone.
If you notice extra wires that weren’t connected to your old thermostat, leave them safely tucked inside the wall. Only connect wires when you’re absolutely sure of their function – incorrect connections can damage your HVAC system or thermostat.
If you encounter any challenges with the C-wire, the next section offers detailed solutions.
Handling C-Wire Problems
The C-wire (common wire) is essential for smart thermostats, as it provides continuous power for features like Wi-Fi connectivity, touchscreens, and consistent temperature monitoring. Older thermostats often didn’t require a C-wire, relying on batteries or minimal power instead. However, modern smart thermostats usually need this constant power source to function properly.
If your old thermostat doesn’t have a wire connected to the C terminal, check inside the wall opening. Sometimes, an unused blue or black wire is present but wasn’t previously connected. If you find one, you’ll need to connect it at both the thermostat and the HVAC system’s control board.
First, turn off the power before working on the HVAC system. Locate the furnace or air handler’s control board by removing its access panel. Find the C terminal and attach the loose wire. Then, return to the thermostat and connect the same wire to the C terminal on the baseplate. This completes the circuit and supplies the necessary power.
If no C-wire is available, you have several options. Many smart thermostat manufacturers include a power adapter kit (sometimes called a C-wire adapter or power extender kit) with their products. These adapters connect at the HVAC system’s control board and use existing wires to deliver the required power. Follow the instructions provided in your thermostat’s manual for proper installation.
Some thermostats use "power stealing" to draw minimal power from other wires, but this approach can cause issues like random reboots or blank screens. If your thermostat supports a no-C-wire installation, it’s worth trying, but be prepared to install a dedicated C-wire or adapter if needed.
For homes with HVAC systems located far from the thermostat or complex multi-zone setups, running a new C-wire can be tricky. In such cases, it’s a good idea to consult an HVAC technician who can evaluate your system and recommend the best solution.
Never substitute the G-wire for the C-wire. Using the wrong wire can disrupt your system’s operation and may void your thermostat’s warranty.
Once you’ve resolved any C-wire issues and ensured all wires are securely connected to their correct terminals, you’re ready to attach the thermostat display and restore power to your system.
Powering On and Setting Up
Now that all the wires are securely connected, it’s time to bring your smart thermostat to life. This final step completes the installation process.
Attaching the Display and Restoring Power
Before attaching the thermostat display, make sure all wires are flush with the baseplate. If any wires are sticking out, carefully push them back into place.
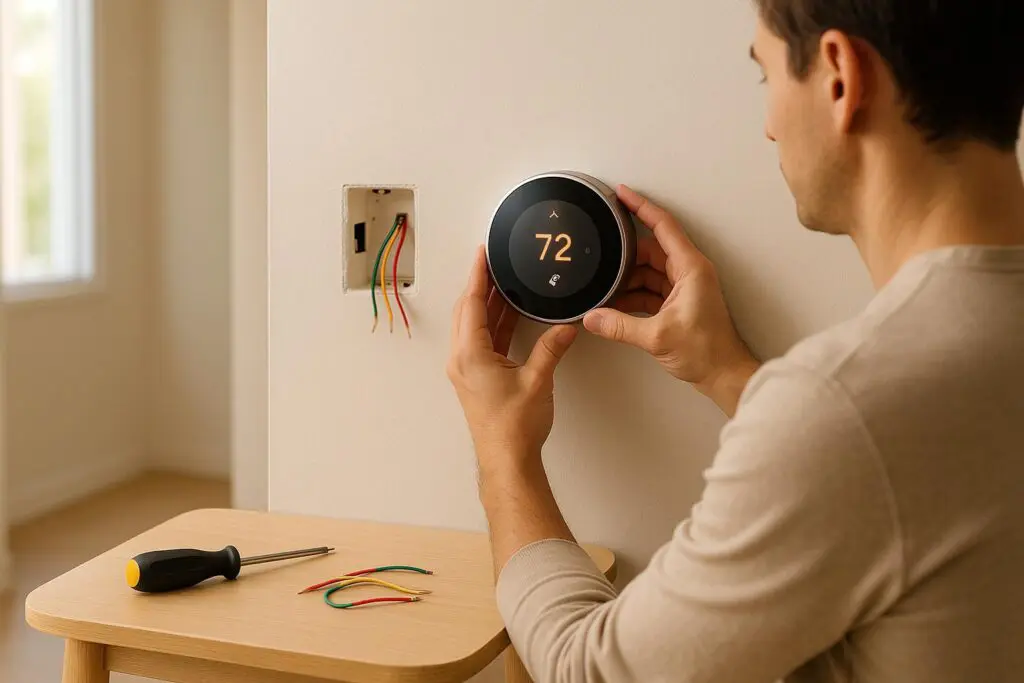
Hold the display in the correct orientation – most models have a screen or buttons that should face a specific direction, typically with buttons on the bottom. Align the display with the baseplate, ensuring the connectors on the back of the display match up with the corresponding connectors on the base. For example, if you’re installing a Google Nest thermostat, you’ll need to align the pin connector on the back of the display with the connector on the baseplate.
Once aligned, press the display firmly onto the baseplate until you hear a click. If it doesn’t click easily, don’t force it. Remove the display, check for any obstructions (like wires sticking out), and try again.
After securing the display, head to your circuit breaker and switch the power back on. Return to the thermostat and wait for the display to light up. Most smart thermostats will power on within a few seconds, showing a welcome screen or a setup prompt. Once powered on, you’re ready to connect to Wi-Fi.
Connecting to Wi-Fi
With the display mounted and power restored, the next step is to connect your thermostat to Wi-Fi.
When the thermostat powers on, it will guide you through an initial setup process. Start by selecting your preferred language and confirming your location settings. Use the touchscreen or control buttons to navigate through these prompts.
Next, the thermostat will ask you to connect to your home’s Wi-Fi network. Choose your network from the list of available options and enter your password carefully, as it is case-sensitive. If your network doesn’t appear, check that your router is working and within range of the thermostat.
Once connected, download the manufacturer’s app. The thermostat may display a QR code or provide instructions for finding the app in the App Store or Google Play Store. Install the app, create an account if needed, and follow the prompts to link your thermostat. This often involves scanning a QR code on the thermostat or entering a unique code from the device or its packaging.
During the setup, the app will ask about your HVAC system. You’ll need to specify whether you have a furnace, heat pump, or other system, and if you have central air conditioning. Be as accurate as possible – these details help the thermostat communicate correctly with your equipment. You’ll also set your initial temperature preferences and may be prompted to share your daily schedule to enable smart features.
Some thermostats offer extra options, like geofencing (which adjusts temperatures based on your location) or integration with smart home systems like Amazon Alexa or Google Assistant. You can set these up now or revisit them later in the app.
Testing Your System
After completing the setup, it’s time to test your system to ensure everything works as expected.
Start by testing the heating system. Increase the target temperature several degrees above the current room temperature. Within a minute or two, your furnace or heating system should activate. Listen for the blower fan and check that warm air is coming from the vents. Let it run for about five minutes to confirm stable operation, then lower the temperature to turn it off.
Next, test the cooling system. Lower the target temperature several degrees below the current room temperature. The air conditioning compressor should activate, and you should feel cool air from the vents. Again, let it run for about five minutes before raising the temperature to shut it off.
Finally, test the fan mode by switching the thermostat to "fan only." The blower should run without activating heating or cooling.
If any system fails to activate, check the thermostat’s display for error messages. Common issues include wires not fully inserted into terminals or incorrect terminal assignments. Turn off the power at the circuit breaker, remove the display, and double-check that all wires match your labels and photos.
For Wi-Fi issues, try moving your router closer to the thermostat temporarily to rule out signal problems. If the thermostat connects when closer to the router, consider installing a Wi-Fi extender or mesh network system to improve coverage in that area.
If the display shows a low battery warning or powers off intermittently, it could indicate a problem with the C-wire. Even if you connected a C-wire, double-check that it’s securely attached to both the thermostat and the HVAC control board.
Lastly, test the app’s remote control features. Adjust the temperature from your phone while standing near the thermostat to confirm it responds. This ensures the Wi-Fi connection and app integration are functioning properly.
Once these tests are complete, your smart thermostat is ready to deliver comfort and efficiency. Take some time to explore the app’s features and fine-tune the settings to fit your preferences and routine.
Conclusion
Your smart thermostat is now up and running – bringing you greater comfort while helping you save on energy costs. By following the steps – gathering tools, shutting off power, connecting wires, and completing the digital setup – you’ve not only installed a vital device but also gained valuable insight into your HVAC system.
Now, you can control your home’s temperature remotely through your smartphone, whether you’re at work, on vacation, or relaxing at home. With features like learning your habits and creating schedules tailored to your routines, your thermostat ensures efficient energy use. Geofencing takes it a step further by adjusting temperatures based on your location, eliminating unnecessary energy waste. Did you know that adjusting your thermostat by 7–10°F for just 8 hours a day can cut energy costs by up to 10%? The U.S. Department of Energy also suggests setting your thermostat to 68°F in winter and 78°F in summer when you’re home to maximize savings. Plus, energy reports can help pinpoint even more ways to reduce consumption.
But the benefits don’t stop there. Beyond savings, you’ll enjoy consistent temperatures, customized climate settings, and seamless integration with voice assistants like Alexa or Google Home. Some models even monitor your HVAC system for potential issues, catching problems early. And if you’re thinking long-term, installing a smart thermostat can even add value to your property.
If you hit any snags during installation or simply prefer expert help, professional support is always available. Eco Temp HVAC offers expert smart thermostat installation services across the Chicagoland area. Our certified technicians are ready 24/7 to ensure your system is installed correctly and running at peak efficiency. We’re committed to customer satisfaction and stand behind our work.
Don’t forget to explore your thermostat’s app to fine-tune settings for ultimate comfort and savings.
FAQs
What can I do if my HVAC system doesn’t have a C-wire for installing a smart thermostat?
If your HVAC system lacks a C-wire, don’t worry – you can still set up a smart thermostat by using a C-wire adapter or an add-a-wire kit. These tools connect to your furnace or air handler and adjust the wiring to provide the required C-wire connection.
Before diving in, check your thermostat’s installation guide to make sure it’s compatible with your HVAC system. If handling electrical wiring feels intimidating or unclear, it’s a good idea to bring in a professional to ensure everything is installed safely and correctly.
How do I check if my smart thermostat will work with my current HVAC system?
To ensure compatibility, begin by snapping a clear photo of the wiring on your current thermostat and HVAC control board. Take note of the number of wires, label them carefully, and check for a C wire – this is often needed for smart thermostats to function properly. Next, determine your system type, whether it’s forced-air, boiler/radiant, heat pump, or fan-coil/PTAC, and verify that it aligns with the thermostat’s requirements. If you’re uncertain about any of this, refer to your thermostat’s installation guide or contact customer support for help with your wiring setup.
What advantages does a smart thermostat offer over a traditional one?
Smart thermostats bring a host of modern features that go beyond what traditional thermostats can do. They’re designed to help you cut down on energy costs by automatically adjusting the temperature based on your daily routines and preferences. Many models even provide detailed energy usage reports, so you can keep track of your savings over time.
Thanks to remote control functionality, you can adjust your home’s temperature from anywhere using a smartphone app. These devices also connect with other smart home systems, like voice assistants, making it easy to automate your home’s climate control. Some smart thermostats take it a step further by learning your habits and fine-tuning settings to keep your home cozy while still being energy-efficient.