Winter puts extra pressure on your HVAC system, and skipping maintenance can lead to higher energy bills, unexpected breakdowns, and safety risks like carbon monoxide leaks. Here’s a quick guide to keep your heating system running efficiently and safely:
- Replace Air Filters Regularly: Check monthly and replace every 30–90 days depending on your household.
- Test Your Thermostat: Ensure it’s in heat mode, replace batteries, and consider programming it for energy savings.
- Schedule a Professional Tune-Up: Book a fall inspection to catch issues early and optimize performance.
- Clear Vents and Registers: Ensure airflow isn’t blocked by furniture or debris.
- Maintain Outdoor Units: Remove snow, ice, and debris to keep the system efficient.
- Monitor System Performance: Watch for unusual noises, smells, or higher energy bills.
Proactive care ensures your system stays reliable, efficient, and safe all winter. Start with these steps to avoid costly surprises during the cold months.
Winter HVAC Maintenance Tips | How To Get Your HVAC System Ready For Winter
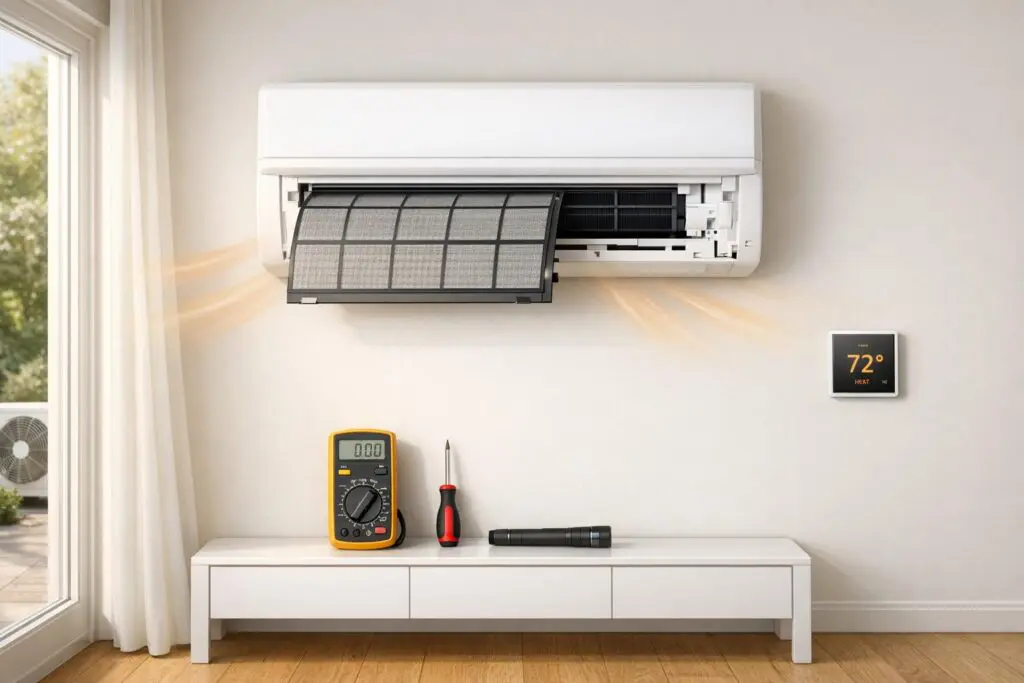
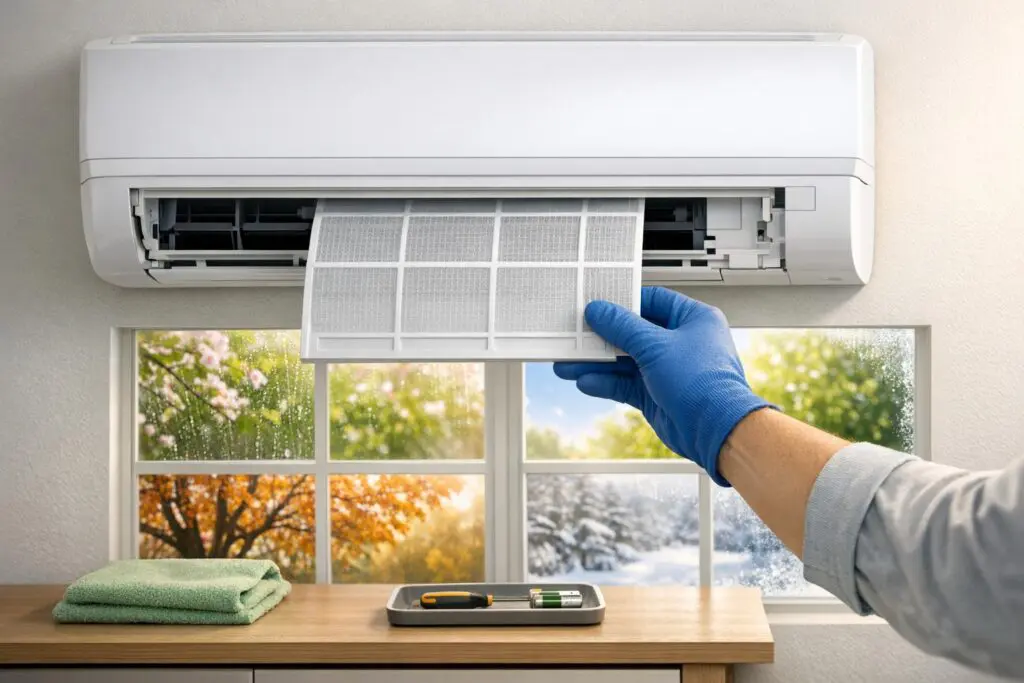
Step 1: Check and Replace Air Filters
Keeping your air filters clean is one of the simplest yet most effective ways to ensure your HVAC system runs smoothly during the winter. Your air filter works overtime during colder months when your heating system is constantly in use. A clean filter helps prevent dust buildup and ensures proper airflow, while a clogged one can make your system work harder, leading to higher energy bills and unnecessary wear. Here’s how to stay on top of filter maintenance for optimal performance.
"Air filters keep dust and particles from getting into your ductwork and HVAC. If they are covered in dust, the air will filter through your furnace much slower, making your system more inefficient." – Glenn Wisemen, Sales Manager, Top Hat Home Comfort Services
How Often to Check and Replace Filters
Regular filter checks are key to keeping your HVAC system efficient and safe. During the winter, when your heating system is working harder, filters tend to collect dust and debris more quickly.
- Monthly checks during the colder months are recommended.
- Replace filters based on your household needs:
- Every 90 days for homes without pets.
- Every 60 days if you have pets.
- Every 30–45 days for allergy-sensitive households.
It’s always a good idea to keep spare filters handy for quick replacements when needed.
Signs of a Dirty or Clogged Filter
Even with regular maintenance, it’s important to watch for signs that your filter may need replacing sooner than expected. Some warning signs include:
- Reduced airflow or uneven room temperatures.
- Longer furnace cycles or increased energy bills.
- Excess dust buildup on furniture and surfaces.
"Dirty or clogged HVAC filters force the system to work harder, leading to wear and tear, overheating, or even a total shutdown." – Glenn Wisemen, Sales Manager, Top Hat Home Comfort Services
A quick visual check can also help. Hold the filter up to a light source – if little to no light passes through, it’s time for a new one.
Choosing the Right Filter
Not all filters are created equal. High-efficiency pleated air filters with a MERV rating of 11–12 strike a good balance between airflow and filtration. These filters are designed to trap even the smallest particles, such as bacteria, viruses, pollen, pet dander, and more.
"High-efficiency pleated air filters (also known as MERV 11 or 12 filters) can capture the smallest particles, filtering out bacteria, viruses, dust, pollen mold, pet dander, and more." – Glenn Wisemen, Sales Manager, Top Hat Home Comfort Services
Selecting a filter with the right MERV rating not only improves your indoor air quality but also helps your HVAC system run efficiently all winter long.
Step 2: Test and Set Up Thermostats
Your thermostat plays a key role in keeping your home warm during the colder months. Testing and configuring it before winter ensures your heating system runs efficiently when you need it most.
Make Sure the Thermostat is in Heat Mode
First, check that your thermostat is set to "Heat" mode. This ensures your furnace or heat pump will kick in when indoor temperatures drop below your desired level. You can usually find the mode setting on your thermostat – switch it to "Heat" and set the temperature to 75°F to test if the system activates immediately.
If you notice delays, uneven heating, or issues like frequent cycling, inconsistent temperatures, or poor airflow, it could point to problems with the thermostat or the heating system itself. Addressing these early can save you from uncomfortable surprises once winter fully sets in.
Replace Batteries and Update Settings
Don’t overlook the thermostat’s batteries – replace them every fall to avoid losing your programmed settings. For energy savings, program your thermostat to maintain a temperature of 68°F while you’re home and drop it to 60–65°F when you’re away or sleeping.
If you have a smart thermostat, you can go a step further. These devices learn your daily habits and adjust settings automatically, potentially cutting heating costs by 10–12%. Take full advantage of these features by setting up a schedule that fits your routine, ensuring your home stays cozy without wasting energy.
Step 3: Schedule a Professional HVAC Tune-Up
Getting a professional tune-up for your heating system is a smart way to ensure it runs safely and efficiently all winter long. The best time to schedule this service is during the fall – ideally in September, October, or early November. Why? HVAC companies are generally less busy during these months, making it easier to secure an appointment. Plus, you’ll avoid the stress and expense of emergency repairs during the peak of winter.
"Fall is the ideal time to schedule maintenance for your furnace or heating system. As temperatures drop, you’ll rely on your heating system more frequently, making it crucial to ensure it’s running efficiently." – ITAK Heating & Cooling Blog
By acting early, you can rest easy knowing your system is ready before the colder months set in.
What Happens During a Tune-Up?
A professional HVAC tune-up includes a detailed inspection and maintenance of your system’s critical components. Here’s what technicians typically handle:
- Inspecting and cleaning mechanical and electrical parts
- Lubricating moving components to prevent wear
- Examining burners and heat exchangers for proper function
- Testing safety controls and airflow
- Checking gas connections for leaks
- Inspecting electrical connections for corrosion or wear
- Assessing carbon monoxide risks and ensuring proper ventilation
- Verifying thermostat calibration
This comprehensive checkup not only keeps your system running smoothly but also helps you avoid inconvenient breakdowns in the middle of winter.
Why Professional Maintenance Matters
Regular tune-ups offer more than just peace of mind – they improve energy efficiency, lower utility bills, and extend the life of your heating system. While the average HVAC inspection costs around $300, it’s a worthwhile investment when compared to the average repair costs of $350 nationwide.
"As the weather cools down, your furnace or heat pump needs attention before winter kicks in. A fall inspection checks for issues like dirty burners, worn-out components, and airflow problems, helping you avoid a mid-winter heating disaster." – Schaibles Plumbing & Heating Inc.
sbb-itb-b5c10b1
Step 4: Check Vents and Registers
After your professional tune-up, the next step is ensuring warm air can circulate throughout your home. Your heating system works best when airflow is unobstructed. Blocked vents force the system to work harder, which can lower its efficiency and create uneven temperatures in different rooms.
Clear and Open Vents and Registers
Take a walkthrough of your home and inspect every vent and register. Look for anything that might be in the way – furniture, curtains, rugs, or other items. Even partial blockages can disrupt airflow and reduce the system’s performance.
- Move any furniture, like chairs or beds, that might be blocking wall vents.
- Check floor registers to ensure they’re not hidden under rugs or furniture legs.
Once the area around each vent is clear, grab a vacuum with a hose attachment and clean off any dust or debris from the registers and vent openings. For a deeper clean, wipe the vent covers with a damp cloth. If they’re especially dirty, remove the covers, wash them with warm, soapy water, let them dry completely, and then reinstall them.
Make sure all vents stay open – even in rooms you rarely use. Closing vents can disrupt the airflow balance and make your heating system work harder than it should.
Step 5: Prepare Outdoor Units for Winter
Winter can be tough on outdoor HVAC units. Snow, ice, and debris often pile up around them, blocking airflow and making your system work harder than it should. A little attention to your outdoor unit can go a long way in keeping your heating system running smoothly all season. Now that you’ve tackled indoor maintenance, it’s time to step outside.
Clear Snow and Debris
Snow and ice buildup isn’t just a nuisance – it can seriously affect your HVAC system’s performance. Blocked airflow forces the unit to work overtime, which can lead to higher energy bills.
"Regularly clear away snow and ice from the unit and ensure there’s at least two feet of clearance around it for optimal operation." – Carolina Comfort Air
After each snowfall, take a moment to check your outdoor unit. Use a soft brush or broom to gently remove snow from the top and sides. Clear away any fallen leaves, dirt, or small branches that could be obstructing airflow. Make sure there’s a two-foot clearance on all sides to keep the system working efficiently.
Inspect for Damage
Once the area around the unit is clear, take a closer look at its condition. Winter weather can be harsh on HVAC equipment, so it’s important to spot any issues early. Pay particular attention to the condenser coils – bent or damaged fins can reduce efficiency, even if the damage seems minor.
"For central AC or heat pumps, clear leaves, dirt, and debris from around the outdoor unit. Maintain at least two feet of clearance around the unit and gently rinse the condenser coils with a garden hose to remove buildup." – Carrier
If the temperature allows, rinse the condenser coils with a garden hose to wash away dirt and debris. Should you notice any significant damage during your inspection, it’s best to call in a professional technician to make sure everything is in good shape. A little prevention now can save you from bigger headaches later.
Step 6: Monitor System Performance and Fix Issues
Keeping an eye on your system during winter is crucial for catching small problems before they turn into expensive repairs. Regular monitoring helps maintain the efficiency and reliability of your system, building on the earlier maintenance steps and ensuring everything runs smoothly.
Watch for Strange Noises or Smells
Odd sounds or unusual odors can be early warning signs of trouble. For example:
- Loud banging, clanking, or grinding noises might mean parts are loose or worn out and need immediate attention.
- A high-pitched squeal often points to issues with belts, while rattling could indicate loose screws or debris in the system.
When it comes to smells, some are more concerning than others. A faint dusty odor is normal after the system has been idle for months, but persistent burning, gas, or electrical smells are red flags. If you notice:
- Burning or electrical fire smells: Shut off the system immediately and call a technician.
- Strong gas odors: Turn off the system and seek professional help right away.
- Musty or moldy odors: This could mean moisture buildup in your ductwork or near the unit. Not only does this affect air quality and health, but it can also lead to higher energy bills.
Track Energy Usage
Beyond noises and smells, your energy bills can provide valuable insights into your system’s performance. Sudden increases in costs, especially spikes of 15-20% or more compared to the same month last year, might signal inefficiencies.
To stay on top of this, keep a simple log of your monthly heating expenses from December through March. For instance, if your January bill jumps from $180 last year to $230 this year without any clear reason, it could indicate issues like dirty filters, duct leaks, or mechanical problems.
Using a smart thermostat can make this process easier. These devices track usage patterns and often alert you to changes in runtime that might indicate trouble. For example, if your system starts cycling on and off in short bursts instead of running consistently for 15–20 minutes, it could point to problems like airflow restrictions, thermostat malfunctions, or even sizing issues. Addressing these early can save you money and keep your home comfortable all winter long.
Conclusion: Stay Warm and Safe This Winter
Following this winter HVAC checklist can help ensure your home stays warm, your heating system operates efficiently, and your household remains safe throughout the colder months. From replacing air filters and testing thermostats to keeping an eye on overall system performance, these steps work together to keep your heating system in top shape when you need it the most.
Taking care of regular maintenance not only protects your heating system investment but also boosts energy efficiency and reduces the risk of hazards like carbon monoxide leaks. Tackling these straightforward tasks, along with seeking professional help when necessary, creates a solid defense against winter’s chill.
While many of these steps are simple enough for homeowners to handle, some require the expertise of a certified technician. Scheduling an annual tune-up before the season begins allows professionals to catch issues you might overlook and ensures your system runs safely and reliably all winter long.
Interestingly, less than half of homeowners take advantage of professional tune-ups – a missed opportunity to avoid costly repairs and improve efficiency. Certified technicians can also spot ways to lower your heating bills, providing both peace of mind and potential savings.
FAQs
How often should I get my HVAC system professionally serviced, and why does it matter?
Keeping your HVAC system in good shape is as simple as scheduling a professional tune-up once a year. This annual check-up helps your system run smoothly and reduces the risk of unexpected breakdowns. Plus, it ensures your heating and cooling equipment is ready to handle whatever the seasons throw at it – especially during winter, when dependable performance is a must.
By catching small problems early, a yearly inspection can prevent expensive repairs down the line. It also boosts energy efficiency and adds years to your system’s life. This straightforward step keeps your home cozy and safe, even during the chilliest months.
What are the advantages of using a high-efficiency pleated air filter with a MERV rating of 11–12 for your HVAC system?
Using a high-efficiency pleated air filter with a MERV rating of 11–12 can make a noticeable difference in both your indoor air quality and the performance of your HVAC system. These filters are specifically designed to capture smaller particles such as dust, pollen, pet dander, and even some bacteria. This means cleaner air to breathe and fewer allergens circulating in your home.
On top of that, these filters help safeguard your HVAC system by reducing debris buildup. This added protection can lead to better energy efficiency and even extend the life of your equipment. While they might need more frequent checks to maintain proper airflow, the benefits of cleaner air and a healthier HVAC system make them a smart choice for most households.
What should I do if my HVAC system makes unusual noises or emits strange smells during winter?
If your HVAC system starts making unusual noises or emitting strange odors during the winter, it’s a clear sign something might be wrong. These issues can stem from a variety of causes – loose parts, debris caught in the system, or even electrical or mechanical malfunctions. For example, a burning smell might point to overheating components or clogged filters, while musty odors could suggest mold growth inside the system.
To avoid further damage or potential safety hazards, it’s crucial to turn off the system right away and reach out to a professional HVAC technician for a thorough inspection. Staying on top of regular maintenance and addressing problems quickly can help keep your system running smoothly and safely throughout the winter season.