Want to upgrade to a smart thermostat? First, make sure it’s compatible with your HVAC system. Many smart thermostats work with standard low-voltage (24V) systems like forced-air furnaces and central air conditioners. However, high-voltage systems (120V/240V) like electric baseboards, or millivolt systems, are often incompatible. Compatibility depends on three main factors:
- Voltage: Most smart thermostats support 24V systems but not high-voltage or millivolt systems.
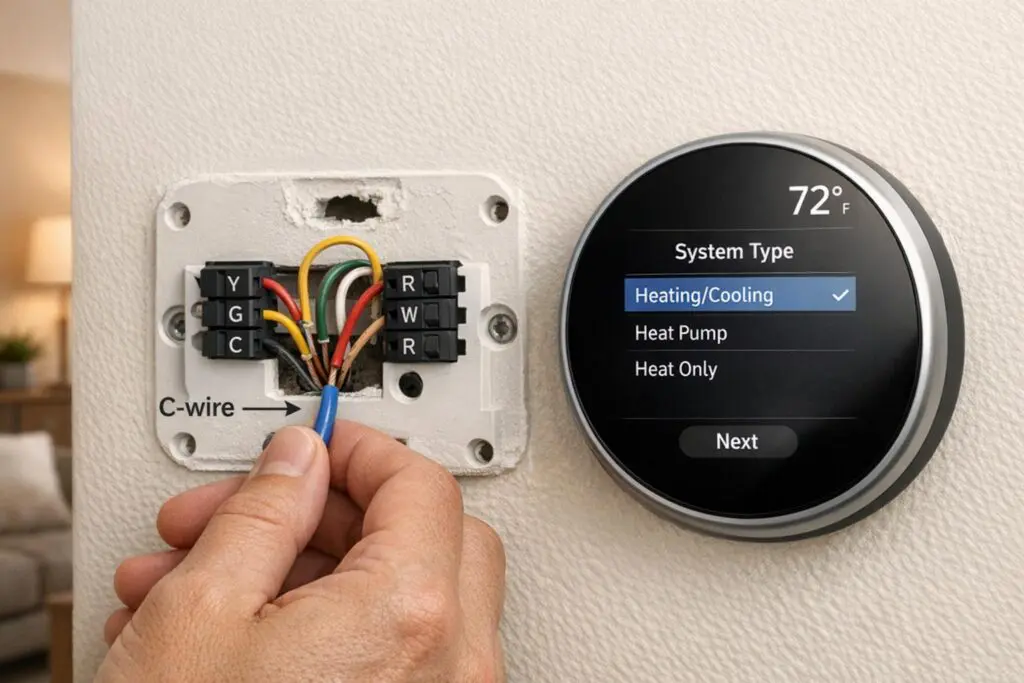
- Wiring: A C-wire is typically required for continuous power. If missing, adapters like a Power Extender Kit can help.
- System Type: Features like multi-stage heating/cooling, heat pumps, or dual-fuel setups may require specific models or professional installation.
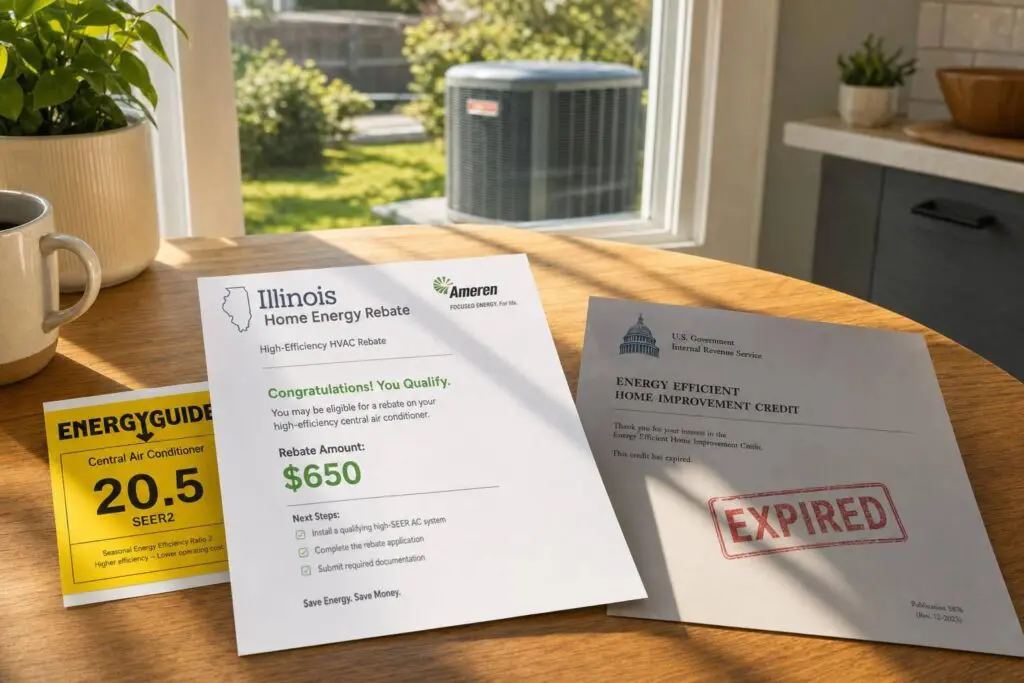
Before buying, inspect your system’s wiring and check for labels like R, W, Y, G, and C. For complex systems like heat pumps, dual-fuel setups, or ductless mini-splits, professional help is often recommended. Proper compatibility ensures your thermostat works efficiently, avoids equipment damage, and maximizes energy savings – up to $100 annually for U.S. households. Always verify with the manufacturer’s compatibility tools before purchase.
How Do I Check HVAC System Compatibility For A Smart Thermostat?
HVAC System Types and Compatibility

HVAC System Types and Smart Thermostat Compatibility Guide
Common HVAC Systems
When it comes to residential and small commercial buildings, most HVAC systems use 24V forced-air setups that combine furnaces with central air conditioning. These systems are generally well-suited for smart thermostats. Heat pumps also operate on 24V but need an O/B terminal to manage the reversing valve.
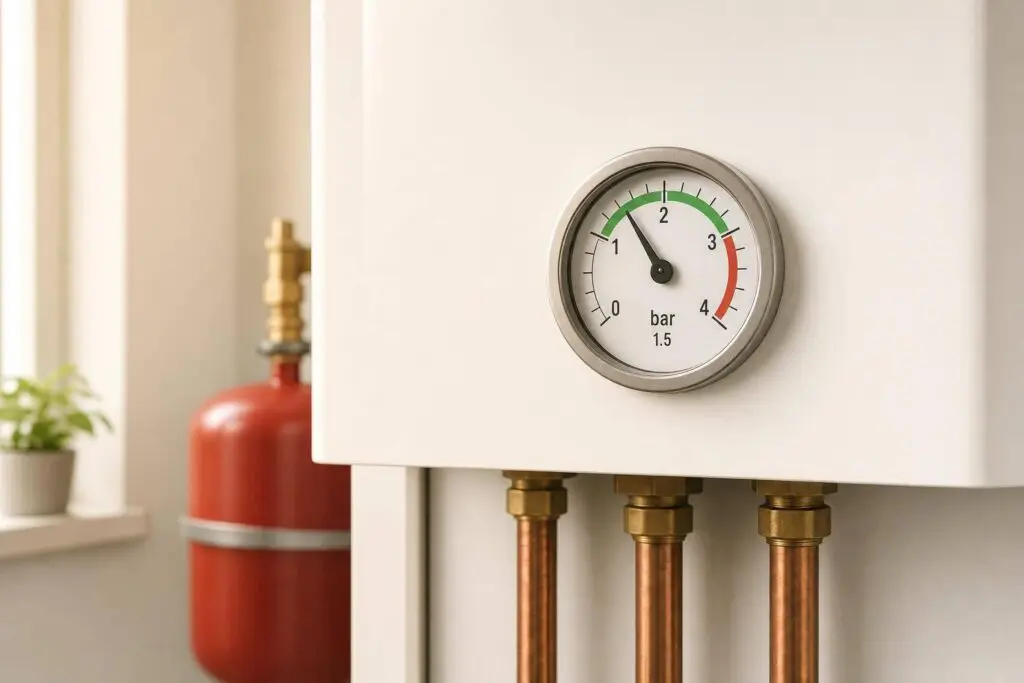
Boilers and radiant heating systems work differently, relying on hot water pipes or radiators instead of air ducts. While many smart thermostats can handle these systems, wiring can be tricky since boilers often only have two wires (R and W) at the thermostat. In these cases, you might need a C-wire adapter or professional help to rewire. Ductless mini-split systems are another story – they typically use proprietary controls with unique wire labels like A, B, C, D or 1, 2, 3, 4. For these, you’ll likely need a thermostat from the original manufacturer.
Standard systems usually have wire labels like R, G, W, Y, and C. However, if you see thicker wires secured with wire nuts or labels like L1/L2, you’re dealing with a line-voltage system (120V or 240V). These systems, often found in electric baseboard heaters or some in-wall heaters, require specialized high-voltage thermostats or a professionally installed step-down transformer.
Understanding these wiring setups is crucial because they tie directly into how voltage specifications impact thermostat compatibility.
Voltage and Control Systems
The voltage of your HVAC system plays a big role in determining whether a smart thermostat will work safely and effectively. Most low-voltage systems (24V) operate between 20–30 VAC and use thin wires, making them ideal for smart thermostats.
Line-voltage systems, on the other hand, run on 120V or 240V and are typically used for electric baseboard heaters or certain radiant floor systems. These systems are easy to spot – they have thick wires, wire nuts, and terminal labels like L1 and L2. Standard smart thermostats can’t handle this voltage without risking damage. Similarly, millivolt systems, which are common in some wall or floor heaters, don’t generate enough power to support Wi-Fi or touchscreen features.
Some HVAC setups use proprietary or "communicating" control systems that rely on digital communication between the thermostat and HVAC equipment. These systems often have non-standard wire labels and may require professional rewiring to work with a standard smart thermostat. However, doing so could mean losing advanced features unique to the proprietary system. Always check the wire labels rather than relying on wire colors, as colors are not standardized.
Beyond voltage and wiring, your system’s heating/cooling stages and fan speeds also influence thermostat compatibility.
System Stages and Fan Speeds
Matching your smart thermostat to your system’s stage capabilities and fan speeds is essential. Single-stage systems operate at full capacity, while multi-stage systems need thermostats that can manage multiple heating or cooling stages and fan speeds. Terminals like W1/W2 or G1/G2 indicate these capabilities.
For example, single-stage furnaces run at one fixed capacity, but two-stage furnaces can operate at reduced power during milder weather. Smart thermostats for these systems must have enough terminals to control each stage, such as W1 and W2 for heating or Y1 and Y2 for cooling.
Heat pumps add another layer of complexity. They often require support for both primary heat pump stages and auxiliary or emergency heat stages. To handle these, your smart thermostat must support the necessary number of stages and fan speeds, indicated by terminals like W1/W2 for heating and Y1/Y2 or G1/G2 for fans. Before buying a smart thermostat, it’s a good idea to remove your current thermostat cover and look for labels like W2, W3, Y2, G2, or G3. These labels suggest your system is multi-stage or has multiple fan speeds, which means you’ll need a compatible thermostat.
| System Type | Voltage | Smart Thermostat Compatibility | Identification Marks |
|---|---|---|---|
| Standard Residential | 24V (Low Voltage) | High (works with most models like Nest, ecobee) | Thin wires; labels like R, G, W, Y, C |
| Electric Baseboard | 120V/240V (Line Voltage) | Incompatible (requires adapter) | Thick wires; wire nuts; L1/L2 labels |
| Wall/Floor Heaters | Millivolt | Incompatible | Very low power; often no C-wire |
| Communicating Systems | Proprietary | Limited (may need professional rewiring) | Labels like 1, 2, 3, 4 or A, B, C, D |
Wiring and Power Requirements
Thermostat Wire Functions
Knowing what each wire in your thermostat setup does is key to understanding whether your system can support a smart thermostat. The R (Red) wire delivers 24V AC power from your HVAC transformer. In some systems, this is split into Rc (cooling) and Rh (heating) wires. The C (Common) wire, usually blue or black, completes the circuit, ensuring continuous power for features like Wi-Fi, displays, and sensors.
For temperature control, the W (White) wire activates the heating system, while the Y (Yellow) wire starts the cooling compressor. If your system has labels like W2 or Y2, it means you have a multi-stage setup. The G (Green) wire controls the blower fan independently. In heat pump systems, the O/B (Orange/Blue) wire manages the reversing valve, switching between heating and cooling.
| Terminal Label | Common Color | Function |
|---|---|---|
| R / Rh | Red | 24V Power (Heating) |
| Rc | Red | 24V Power (Cooling) |
| C | Blue / Black | Common (Continuous Power) |
| W / W1 | White | Stage 1 Heating |
| W2 / AUX | Brown / White | Stage 2 Heating / Auxiliary Heat |
| Y / Y1 | Yellow | Stage 1 Cooling |
| Y2 | Yellow / Blue | Stage 2 Cooling |
| G | Green | Fan / Blower |
| O / B | Orange / Blue | Heat Pump Reversing Valve |
| E | Various | Emergency Heat |
When working with wiring, always label wires by their terminal designation. This ensures clarity when addressing the continuous power needs described below.
The C-Wire Requirement
Smart thermostats need a steady power supply to run features like Wi-Fi, touchscreens, and sensors. While the R wire provides power, it doesn’t complete the circuit. That’s where the C-wire comes in – it ensures a continuous flow of energy to the thermostat.
If your system lacks a C-wire, some thermostats might pull small amounts of power from the heating or cooling wires. This workaround can trigger problems like rapid furnace cycling, clicking or thumping noises, Wi-Fi disconnections, or drained batteries. Interestingly, less than 20% of U.S. homes currently have a C-wire installed.
To check for a C-wire, look behind your thermostat’s backplate – installers often leave unused wires tucked into the wall. If no C-wire is present, you can use a manufacturer-approved adapter, such as the Nest Power Connector or ecobee Power Extender Kit. These adapters work by modifying the wiring at your furnace control board. Avoid third-party adapters, as they can potentially damage your system.
How to Check Your Wiring
Before upgrading to a smart thermostat, it’s important to confirm your system’s wiring compatibility. Start by turning off the power at the circuit breaker. Adjust the thermostat’s temperature and wait 5–10 minutes to ensure the system stays off. The thermostat display should go blank.
Next, carefully remove the thermostat faceplate – either by gently pulling it off or unscrewing it – and take a photo of the wires for reference. If you don’t see a C wire, inspect the wall cavity for any unused wires. Then, check your HVAC control board, where you’ll find labeled terminals like R, C, W, G, and Y. If a wire is connected to the "C" terminal at the control board but not at your thermostat, you can extend it to complete the circuit.
If you notice thick wires or labels like L1/L2, your system might use line-voltage wiring, which isn’t compatible with most smart thermostats. If you’re unsure about your wiring or need help adding a C-wire, it’s a good idea to call a professional to ensure everything is installed safely and correctly.
sbb-itb-b5c10b1
Compatibility by System Type
Furnaces and Central Air Conditioners
Most smart thermostats are designed to work well with forced-air furnaces and central air conditioners installed after 1975. These systems usually rely on 24V low-voltage wiring, making them a good match for modern thermostats, regardless of whether the furnace uses natural gas, oil, or electricity as its energy source.
A key consideration is the number of system stages. Single-stage systems use one wire for heating (W) and one for cooling (Y). In contrast, multi-stage systems include additional terminals, such as W2 and Y2, for extra heating or cooling capacity. For instance, the Nest Learning Thermostat (4th gen) can handle up to three stages of heating and two stages of cooling for conventional systems.
Some older furnace and AC setups may have separate transformers for heating and cooling, which is indicated by Rc and Rh wires at the thermostat. While many smart thermostats can manage this configuration, entry-level models like the ecobee3 lite or Smart Thermostat Enhanced might face limitations. To avoid issues, it’s always a good idea to check your wiring using the manufacturer’s online compatibility tools before making a purchase.
Next, let’s look at how these requirements change when dealing with heat pumps and dual-fuel systems.
Heat Pumps and Dual-Fuel Systems
Heat pumps require precise control over the reversing valve and auxiliary heat stages. These systems rely on an O/B wire for the reversing valve and AUX or W2 terminals for backup heating during colder weather. However, not all smart thermostats can handle every heat pump setup. For example, the ecobee Smart Thermostat Enhanced isn’t compatible with heat pumps that have two auxiliary heat stages.
Dual-fuel systems, which combine an electric heat pump with a gas or oil furnace, add another layer of complexity. The thermostat must decide when to switch between the heat pump and the furnace. If this switch-over is configured incorrectly, it could damage the equipment. Professional installation is highly recommended for these systems. High-end models like the Nest Learning Thermostat (4th gen) can support up to four heating stages – two for the heat pump and two for the alternate heating source.
Now, let’s explore the unique requirements of ductless mini-splits and proprietary systems.
Ductless Mini-Splits and Proprietary Systems
Ductless mini-splits and proprietary systems often have unique wiring setups that don’t follow standard configurations. If your system uses only two wires but provides both heating and cooling, it’s likely proprietary and won’t work with standard smart thermostats.
In some cases, proprietary systems can be made compatible with adapters provided by the manufacturer or by having a professional rewire the system. Additionally, interface modules like the Honeywell HZ311 or Carrier HK42FZ011 may require a C-wire connection. If you notice thick wires or labels indicating 110V, 120V, or 240V, your system operates on high voltage and isn’t compatible with standard smart thermostats. In such cases, a professional can install a step-down transformer to make the system compatible.
When to Call a Professional
Situations That Need Professional Help
Some HVAC systems are complex enough to require professional installation to avoid damaging equipment or creating safety risks. For instance, dual-fuel systems – those combining a heat pump with a furnace – demand expert handling. As Google Nest Support explains:
Professional installation is recommended for some systems since their wiring and setup can be complicated. These include: Dual fuel systems (heat pump with furnace), Dual transformer systems… Whole-home humidifiers and dehumidifiers.
Improper setup can lead to serious equipment damage and operational issues.
If you come across thick wires, wire nuts, or labels like 110V, 120V, or 240V during installation, stop immediately. These high-voltage systems, often found in electric baseboard or radiant heat setups, pose risks of electric shock or fire and must be handled by a licensed professional. Similarly, systems with proprietary wiring – terminals labeled A, B, C or 1, 2, 3 instead of the standard R, W, Y, G – require specialized knowledge for proper adapter installation or rewiring. Zoned systems, which independently control different areas of a home, often need advanced C-wire integration and panel configuration, tasks that typically go beyond DIY capabilities.
In these situations, calling a professional is the safest and most effective choice. While some adapter kits are DIY-friendly, running new wires through walls, floors, or ceilings is a job best left to an experienced HVAC technician. As Cielo warns:
Attempting to install the C-Wire yourself may result in injuries due to electric shock or damage to the HVAC system.
When facing these challenges, professional help ensures the job is done safely and correctly.
How Eco Temp HVAC Can Help
Eco Temp HVAC provides certified technicians who specialize in assessing compatibility and installing smart thermostats for various HVAC systems across Chicagoland. Whether you’re working with a multi-stage furnace, a dual-fuel system, or a ductless mini-split, their team identifies the best thermostat options for your setup and ensures they’re configured for peak performance. They handle intricate wiring scenarios – like dual transformer systems, missing C-wires, or integrated accessories such as whole-home humidifiers and dehumidifiers – so your new thermostat operates safely and efficiently.
Serving areas like Chicago, St. Charles, Bartlett, Lemont, Downers Grove, and Palatine, Eco Temp HVAC offers quick response times and 24/7 support. Their technicians can also spot potential issues in your existing HVAC system during installation, helping you avoid expensive repairs in the future.
Conclusion
When choosing a smart thermostat, the first step is to confirm that your HVAC system can support it. Take a close look at your wiring, system type, and whether you have a C-wire. To avoid buying an incompatible thermostat, use compatibility tools provided by manufacturers like ecobee or Google Nest. This extra step not only simplifies installation but also ensures you get the most out of your energy savings.
Heating and cooling costs average more than $900 per year for American households. For homes with high HVAC bills, switching to an ENERGY STAR-certified smart thermostat can save up to $100 annually. On a larger scale, if every household made the switch, the nation could save 56 trillion BTUs of energy and $740 million each year. However, these savings only come when the thermostat is properly matched to your system.
Installing a smart thermostat on a standard forced-air system is usually a DIY-friendly task and takes about 45 minutes. But if your setup includes thick wires, dual-fuel configurations, or zoned systems, professional assistance is often necessary. As ENERGY STAR expert Daniel Cronin points out:
Due to the variety of models and systems, you may benefit from consulting an expert before you buy.
For more complex systems, certified technicians, like those at Eco Temp HVAC in Chicagoland, can evaluate your setup, recommend a compatible thermostat, and handle tricky installations. Their expertise ensures your thermostat runs safely, avoids equipment issues, and delivers the energy savings you expect.
Taking the time to verify compatibility upfront can save you from headaches down the road. It’s a simple step toward lowering energy costs, enhancing your home’s efficiency, and enjoying the benefits of a smarter, more sustainable household.
FAQs
How do I know if my HVAC system works with a smart thermostat?
To determine if your HVAC system works with a smart thermostat, begin by identifying your system type. This could be a furnace, heat pump, air conditioner, boiler, or ductless mini-split. Next, take a look at the wiring behind your current thermostat. Most smart thermostats are designed for standard 24V systems and require at least an R (power) and W (heat) wire. Many also need a C (common) wire to provide continuous power, especially for setups with multiple heating or cooling stages.
Check for additional wires like G (fan control), O/B (heat pump), or HUM/VENT (humidifier/ventilation) to confirm compatibility. If you’re unsure about the wiring or the voltage of your system, a professional evaluation can clarify things. Some older or proprietary systems might require specific thermostat models to work properly.
Eco Temp HVAC offers professional compatibility checks and can handle the installation of smart thermostats like ecobee or Nest. Their certified technicians ensure your system operates efficiently while letting you enjoy smart features like energy-saving schedules and remote control.
What can I do if my HVAC system doesn’t have a C-wire for a smart thermostat?
If your HVAC system doesn’t include a C-wire, don’t worry – there are a few ways to make sure your smart thermostat gets the steady power it needs:
- Use a power adapter: Several smart thermostat brands, such as Nest, Honeywell, and Ecobee, offer power adapters. These devices work with your existing wiring and provide a consistent power supply without requiring major changes.
- Add a C-wire: For a long-term fix, you can install a new C-wire that connects your furnace to the thermostat. This option ensures a reliable power source for years to come.
- Call in a professional: Not into DIY? A licensed HVAC technician can handle the job for you, whether it’s installing a C-wire or setting up a power adapter. For example, Eco Temp HVAC provides expert installation services throughout the Chicagoland area.
Taking care of the missing C-wire will help you avoid problems like drained batteries or unreliable Wi-Fi, keeping your smart thermostat running smoothly.
Do I need a professional to install a smart thermostat with my HVAC system?
Not every HVAC system demands professional installation when upgrading to a smart thermostat, but for some setups, it’s absolutely necessary. If you have a single-stage furnace, a standard air conditioner, or a heat pump with an existing C-wire, a confident DIY enthusiast can usually handle the installation by following the manufacturer’s guidelines. On the other hand, systems like dual-fuel setups (heat pump + furnace), those with whole-home humidifiers or dehumidifiers, or setups lacking a proper C-wire often require professional assistance due to more intricate wiring and potential safety concerns.
Eco Temp HVAC strongly advises professional installation for multi-stage systems, dual-fuel setups, or systems with moisture control, as well as for homes without a C-wire. Their certified technicians can confirm compatibility, manage any necessary wiring adjustments, and ensure your thermostat integrates smoothly – safeguarding both your equipment and its warranty. For simpler systems equipped with a C-wire, DIY installation might be an option, but if you’re unsure, reaching out to a professional is always the safest route.