Changing your HVAC filter is simple, quick, and essential for maintaining clean air and energy efficiency. Here’s a step-by-step guide:
- Why it matters: A clean filter improves air quality, reduces energy costs, and extends your HVAC system’s lifespan.
- What you need: Replacement filter, screwdriver (if needed), vacuum or cloth, gloves, and flashlight.
- Key steps:
- Turn off the HVAC system.
- Locate the filter (furnace, return vent, or air handler).
- Remove the old filter, noting the airflow direction.
- Install the new filter with arrows pointing correctly.
- Turn the system back on and ensure proper airflow.
Pro Tip: Check your filter every 1-3 months, especially if you have pets, allergies, or live in a dusty area. Stick to the filter size and MERV rating recommended for your system.
For stubborn issues or tricky setups, consult a professional technician. Regular maintenance keeps your system running efficiently and saves money in the long run.
How To Change An Air Filter In 5 Easy Steps
What You’ll Need
Before swapping out your HVAC filter, make sure you have everything you need for a smooth and quick process.
Basic Tools and Supplies
First, grab the replacement filter that matches your system. Double-check the size and type to avoid any surprises mid-task.
If your filter compartment is held in place with screws, you’ll need a screwdriver – typically a Phillips-head. While many modern systems have panels that slide or clip open, older units often require removing screws to access the filter.
Keep a vacuum cleaner or cleaning cloth handy to tackle any dust or debris that might fall out when you remove the old filter. Use these tools to clean the filter slot before installing the new one.
If you’re sensitive to dust or allergens, disposable gloves can be a lifesaver. They’ll keep your hands clean and protect you from allergens that may have built up on the old filter.
A flashlight can be a big help if your HVAC system is tucked away in a dimly lit basement or utility closet. It’ll make it easier to spot the airflow arrows on the new filter and ensure proper installation.
Finally, double-check the filter dimensions to confirm you have the right fit before you start.
How to Find the Right Filter Size
Getting the correct filter size is critical. A filter that’s too small won’t seal properly, and one that’s too large simply won’t fit. The easiest way to confirm the size is by looking at your current filter. The dimensions are usually printed on the filter’s frame (e.g., 16x25x1), showing length, width, and thickness in inches.
If the numbers on your old filter are unreadable, use a tape measure to measure the filter slot itself. Measure the length, width, and depth of the opening where the filter sits. Round your measurements to the nearest whole inch – filters are standardized, so you won’t find odd sizes like 15.5 inches.
You can also check your system’s manual for the recommended filter size. Locate the model number on your furnace or air handler, then refer to the manual or the manufacturer’s website for specifications. Sometimes, manufacturers include a size sticker near the filter compartment for quick reference.
Don’t forget about the MERV rating (Minimum Efficiency Reporting Value), which measures a filter’s ability to trap particles. Residential filters typically range from MERV 1 to 16. Most homes use filters rated between MERV 8 and 13. While higher MERV ratings offer better filtration, they can also restrict airflow. Stick to the rating recommended in your system manual or match the MERV rating of your current filter.
When buying filters, consider purchasing a multi-pack. Bulk options often save money and ensure you have replacements on hand for future changes. Standard pleated filters generally cost between $15 and $40, depending on their size and MERV rating.
How to Change Your HVAC Filter in 5 Steps
Replacing your HVAC filter is a straightforward process that takes just 5 to 10 minutes and doesn’t require any special skills. Follow these steps to safely and effectively swap out your filter.
Step 1: Turn Off Your HVAC System
Before you touch anything, make sure your HVAC system is off. This is a crucial safety step to prevent the system from running while the filter compartment is open, which could damage the equipment or spread dust into your home.
You can turn off the system at the thermostat by switching it to "Off." For extra precaution, flip the circuit breaker labeled HVAC, Furnace, or Air Handler to the off position in your electrical panel. Wait about 30 seconds before moving on.
Step 2: Locate the Filter
The filter’s location depends on your system and home setup. Here are the most common spots to check:
- Furnace or air handler compartment: Look for a rectangular slot or panel near the bottom or side of the unit. Many systems have a marked filter access panel that slides out or opens with a latch.
- Return air ducts: These large vents, often on walls or ceilings, pull air back to the HVAC system. If the filter is here, you’ll see a grille secured by clips or screws.
- Ceiling-mounted return vents: Common in single-story homes, these require a sturdy step ladder to access.
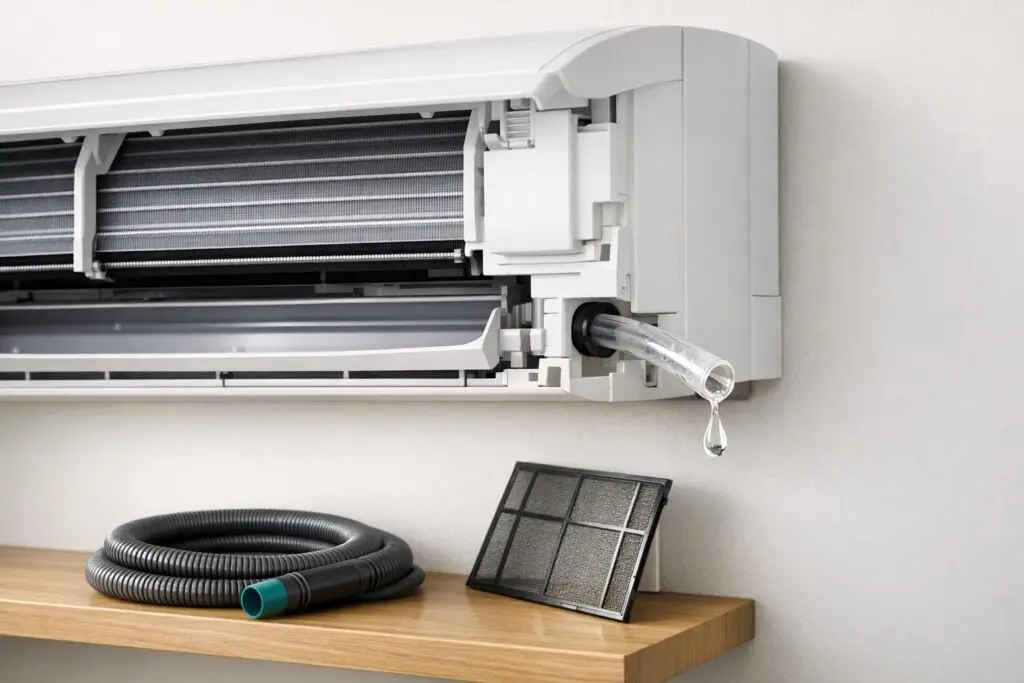
- Ductless mini-split systems: Check inside the wall-mounted unit by opening the front panel.
If you’re still unsure, trace the main return air duct back to the unit. The filter is usually located where the duct connects to the system. Use a flashlight if needed to get a clear view, especially in dimly lit areas.
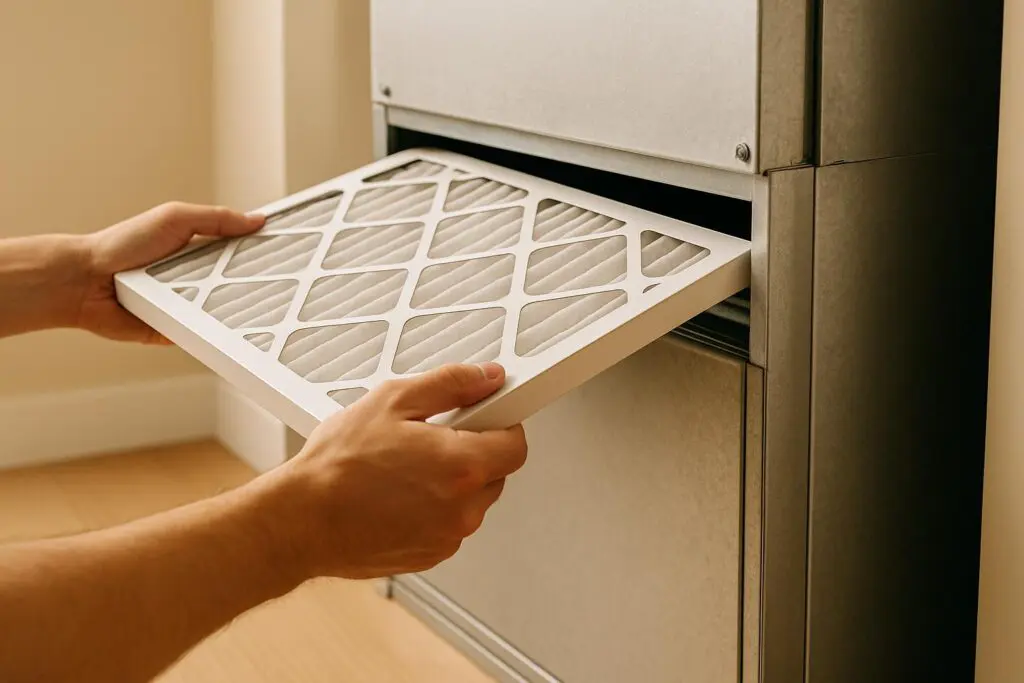
Step 3: Remove the Old Filter
Before removing the old filter, pay attention to its orientation. Most filters have arrows on the frame indicating the airflow direction – this is key for installing the new one correctly.
Pull out the old filter carefully, keeping it level to avoid spilling dust and debris. If it’s heavily soiled, expect some particles to fall, so have a vacuum or cleaning cloth handy. Dispose of the old filter immediately.
Clean the filter compartment by vacuuming or wiping it down, especially the corners and edges where dust tends to accumulate. If the tracks or guides are dusty, wipe them with a damp cloth and ensure they’re dry before proceeding. While cleaning, check for any cracks or gaps in the compartment that might allow unfiltered air through. Make a note of any damage for future repairs.
Step 4: Install the New Filter
Unpack the new filter and locate the airflow direction arrows on the frame. These arrows should point toward the HVAC equipment and away from the return vent, matching the orientation of the old filter.
Slide the new filter into place, ensuring it fits snugly without bending or forcing it. Double-check that you have the correct size and that the filter aligns properly with the tracks. The filter should sit flush against the compartment walls, with no gaps around the edges.
If your system has a filter access panel or cover, close it securely to prevent unfiltered air from entering. Make sure the filter is completely flat and not warped, as this could restrict airflow and reduce efficiency.
Step 5: Turn the System Back On
Once the new filter is installed, replace any panels and restore power by flipping the circuit breaker back on. Set your thermostat to your desired temperature and switch it from "Off" to "Heat", "Cool", or "Auto", depending on your needs.
As the system starts up, listen for normal operating sounds like the hum of the blower motor. Within a few minutes, you should feel air flowing through your vents. If airflow seems weak, double-check the filter installation or ensure the filter’s MERV rating is appropriate for your system.
To stay on top of maintenance, write the installation date on the filter frame with a permanent marker or set a calendar reminder for the next replacement. Regular filter changes keep your system running efficiently and improve indoor air quality.
Choosing the Right Filter
Once your new filter is installed, selecting the right replacement becomes a crucial task. The choice of HVAC filter impacts more than just size – it directly affects air quality, energy efficiency, and your system’s overall performance. Picking the wrong one can restrict airflow and hinder your system’s operation.
Filter Types and Their Uses
Disposable fiberglass filters are the most basic option, priced at $1–$3. These filters are designed to catch larger particles like dust and lint but do little to improve air quality. They’re best for older HVAC systems that can’t handle more efficient filters.
Pleated disposable filters offer better filtration thanks to their accordion-like surface, which increases the area available to trap particles. Made from materials like polyester or cotton paper, they cost between $5–$15 and can effectively capture dust mites, pollen, and pet dander. They’re a popular choice for modern residential systems, providing solid air quality improvements without requiring system upgrades.
Electrostatic filters attract particles using static electricity and come in both disposable and washable versions. Disposable options range from $8–$20, while washable ones cost $25–$50. Washable filters require monthly cleaning with water and mild detergent, followed by thorough drying before reuse.
High-efficiency filters, including HEPA-style options, are designed to capture particles as small as 0.3 microns. These filters, priced at $15–$40, are ideal for homes with severe allergies or respiratory issues. However, they create significant airflow resistance and are not suitable for all systems.
For most homeowners, pleated disposable filters strike the best balance between cost, filtration efficiency, and compatibility with modern HVAC systems. On the other hand, commercial buildings often require washable or high-efficiency filters to meet higher air volume needs and stricter air quality requirements.
While understanding filter types is helpful, the MERV rating ultimately determines how effective a filter is at capturing particles.
MERV Ratings Explained
The Minimum Efficiency Reporting Value (MERV) rating measures a filter’s effectiveness at trapping particles between 0.3 and 10 microns. The scale ranges from 1 to 20, with higher numbers indicating better filtration.
- MERV 1–4: These filters capture particles larger than 10 microns, such as dust and carpet fibers. They’re primarily used to protect HVAC equipment and don’t improve air quality significantly.
- MERV 5–8: These trap particles between 3 and 10 microns, including mold spores, dust mites, and pollen. They work well for most residential systems and provide a noticeable boost in air quality.
- MERV 9–12: Filters in this range can capture particles as small as 1 micron, such as fine dust, auto emissions, and most allergens. They improve indoor air quality but may require a system check to ensure proper airflow.
- MERV 13–16: These remove particles down to 0.3 microns, including bacteria, smoke, and virus carriers. They’re commonly used in hospitals and commercial settings but may strain residential systems.
For most homes, MERV 8 to 11 filters are ideal. They offer excellent filtration without overburdening your system. If you have pets or household members with allergies, MERV 11 filters are a great choice. For basic dust control, MERV 8 filters are sufficient. Many modern HVAC systems can handle MERV 11 filters without issue. However, if you’re considering upgrading to MERV 12 or higher, check your system’s specifications or manual first. Using a filter with a rating beyond your system’s capacity could void warranties or even damage the equipment.
Matching the right filter type and MERV rating to your system ensures better air quality while keeping your HVAC system running efficiently. Always verify compatibility to avoid any performance hiccups.
sbb-itb-b5c10b1
Maintenance Tips and Best Practices
Taking care of your HVAC system doesn’t just keep it running smoothly – it can also save you money on energy bills and extend the life of your equipment. One of the simplest ways to ensure your system stays in top shape is through regular filter changes, along with a few additional care measures.
How Often to Change Filters
Changing your HVAC filter regularly is crucial, but how often depends on your specific situation. For most households, the general rule is every 1 to 3 months. However, certain factors can shorten that timeline:
- Homes with pets or smokers may need monthly changes.
- Allergy sufferers or homes in dusty environments might also require more frequent replacements.
- Filter type matters too:
- Fiberglass filters: Replace every 30 days.
- Pleated filters: Last about 60–90 days.
- High-efficiency filters: Typically need changing every 30–60 days.
A quick visual check can tell you if it’s time to swap out your filter. If it’s discolored or you can’t see light passing through, it’s ready for a replacement.
Simple Maintenance Tips
Beyond filter changes, there are a few easy steps you can take to keep your system running efficiently:
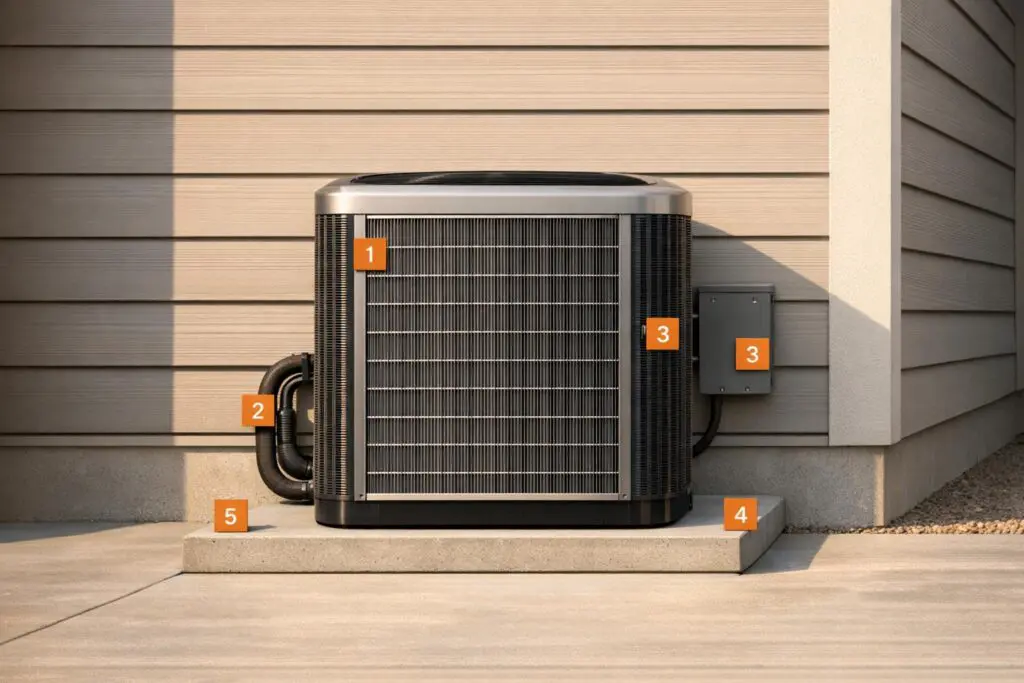
- Clear the outdoor condenser unit: Remove debris, leaves, or overgrown plants to allow proper airflow.
- Check the condensate drain: Regularly clean it to prevent clogs that could lead to water damage.
- Set your thermostat to "auto": This ensures the system cycles on and off efficiently, rather than running continuously.
- Schedule annual tune-ups: A professional inspection and servicing once a year can catch potential issues early and keep your system in peak condition.
These simple tasks not only improve performance but also reduce strain on your system, which can translate into noticeable savings on your energy bills.
Benefits of Regular Filter Changes
Swapping out your HVAC filter on time might seem like a small task, but it has a big impact. A clean filter allows air to flow freely, which reduces the workload on your system. This means lower energy consumption, fewer repairs, and lower utility bills. On the flip side, a clogged filter forces your system to work harder, driving up energy use and wear and tear. Regularly changing filters is one of the easiest ways to keep your HVAC system running efficiently while saving money in the long run.
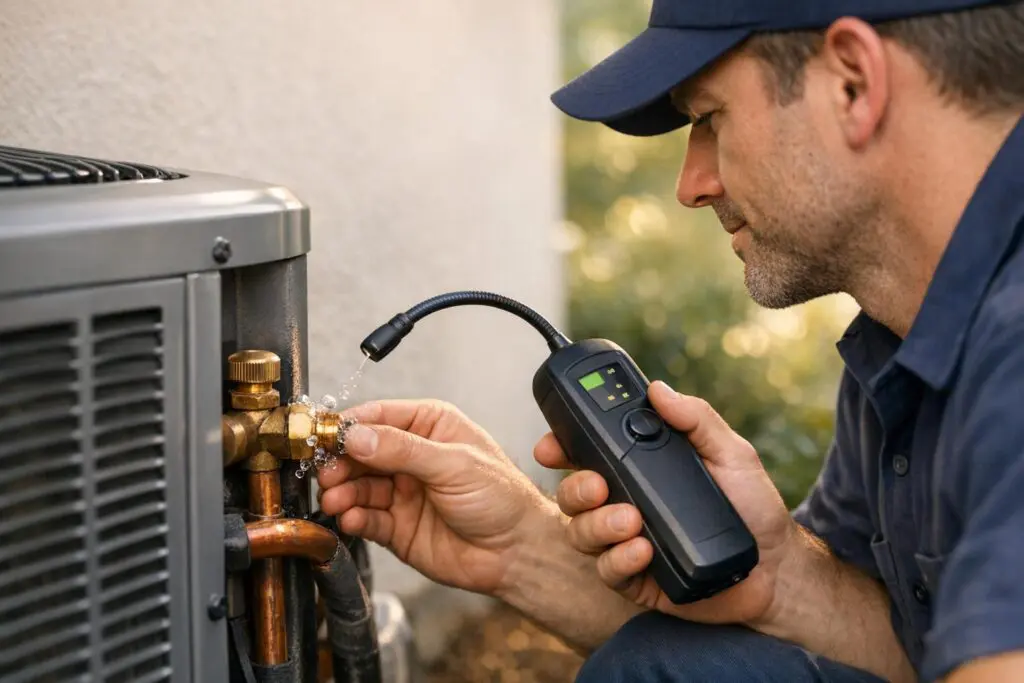
When to Call a Professional
Swapping out an HVAC filter is usually a straightforward task, but there are times when it’s best to bring in an expert. If you’re unsure about the exact filter specifications your system needs, it’s wise to consult a certified HVAC technician. They can identify the correct filter for your system, ensuring it runs efficiently without risking any damage.
You should also consider professional help if your filter is located in a spot that’s tough to access or poses safety concerns. Technicians have the right tools and know-how to handle these situations safely. This is where routine DIY maintenance transitions into tasks that require a trained hand.
Beyond filter changes, certain warning signs point to deeper issues that need professional attention. Persistent poor airflow, unusual noises, or a system that won’t turn on could indicate problems with ductwork, wiring, or mechanical parts. Other red flags include a slow or noisy fan, bent fins, overly dusty or clogged coils, or unexplained moisture buildup. These issues go beyond basic maintenance and should be addressed by an expert.
Eco Temp HVAC Professional Services
When DIY efforts aren’t enough, Eco Temp HVAC is here to help. Their certified technicians are available around the clock to assist with everything from filter replacements to thorough HVAC system maintenance across the Chicagoland area. Whether you need help choosing the right filter, accessing a tricky location, or resolving performance problems, their team has you covered.
Eco Temp HVAC also offers professional maintenance agreements that include seasonal system inspections. During these checks, technicians assess air filters along with other essential components to catch potential issues early. This proactive care ensures your HVAC system runs safely and efficiently. From basic filter advice to full system repairs, inspections, and installations, Eco Temp HVAC’s team is equipped to keep your heating and cooling systems in top shape all year long. Combining regular DIY upkeep with professional expertise is the key to getting the most out of your HVAC system.
Conclusion
Changing your HVAC filter is a quick yet impactful way to enhance your home’s air quality, improve energy efficiency, and extend the life of your system. This guide outlined straightforward steps to help you handle this key maintenance task with ease and confidence.
Replacing filters regularly not only keeps your system running efficiently but also lowers energy bills and prevents unnecessary wear on mechanical components. Clean filters trap dust, pollen, and other airborne particles, creating a healthier indoor environment while reducing strain on your HVAC system. By staying on top of this simple upkeep, you can avoid expensive repairs and premature system breakdowns.
However, some situations call for professional expertise. Scheduling an annual inspection with a qualified technician ensures all parts of your HVAC system are in good working order and can help identify potential problems early on. If you encounter a damp or moldy filter, it’s crucial to contact Eco Temp HVAC. Moisture issues require professional assessment to prevent health risks and further damage to your system.
For those looking for complete HVAC care, Eco Temp HVAC offers customized maintenance plans designed to address all your system’s needs. Their certified technicians are available 24/7 across the Chicagoland area, ready to assist with anything from filter advice to full system installations and repairs.
FAQs
How often should I replace my HVAC filter if I have multiple pets at home?
If you share your home with multiple pets, swapping out your HVAC filter every 30 days is a smart move to keep your indoor air fresh and your system running efficiently. Got furry friends that shed a lot, or dealing with peak shedding seasons? In those cases, aim to change the filter every 2–3 weeks. Staying on top of this routine helps cut down on pet hair and dander, ensuring your HVAC system stays in good shape and your air stays cleaner.
What happens if I install my HVAC filter backward, and how can I fix it?
Installing your HVAC filter the wrong way can disrupt airflow, forcing your system to work harder and lowering its efficiency. This not only impacts performance but can also lead to poor indoor air quality and unnecessary wear on your equipment.
To correct this, start by turning off your HVAC system. Carefully remove the filter, then reinstall it, ensuring the arrow on the filter frame points in the direction of the airflow – typically toward the blower or fan. Always check the markings on the filter to confirm it’s installed correctly.
What MERV rating should I choose for my HVAC filter?
Choosing the right MERV rating for your HVAC filter depends on two key factors: your system’s capabilities and your air quality requirements. MERV ratings range from 1 to 16, with higher ratings providing more effective filtration. However, higher-rated filters can also restrict airflow if your system isn’t built to handle them.
For most households, a MERV rating between 8 and 13 offers a solid middle ground. This range effectively captures common allergens, dust, and other particles while allowing for proper airflow. If you have pets, allergies, or live in an area with poor air quality, you might consider a filter on the higher end of this range. Just make sure to check your HVAC system’s manual or consult a professional to confirm that your chosen filter won’t overburden your system or reduce its efficiency.